


I read a lot of books. Usually between 40 and 50 every year.
Almost all of them are non-fiction and fall into the self-help or personal development genre. Many are for the Bookworm podcast I do with my friend Cory Hixson, where we discuss a different productivity book every two weeks, but some I read just because I enjoy learning new things and wrestling with big ideas.
I understand that may sound boring to some people, but I enjoy it. What can I say, I’m a nerd 🤓
In this post, I’m going to walk through my entire reading workflow, including my approach to reading, how I take my mind map notes, how I format them in Obsidian, and how I use the new Bases core plugin to create a database of my personal book notes in Obsidian.
My Approach to Reading Books
How to Read a Book by Mortimer Adler ended up being one of the most important books I’ve ever read. I actually didn’t like it when we originally read it for Bookworm, but it has forever changed the way I approach reading and helped me get more out of the books that I read.
One of the big ideas from the book is that our job as the reader is to receive the message the author is sending. Once we understand it, the next step is to decide for ourselves what we think about it.
To help us do that, Mortimer Adler shares four levels of reading we can use to help us make sense of things:
- *Level 1: Elementary Reading* - this is where you ask “what does this sentence say?”
- Level 2: Inspectional Reading - this is where you figure out “what is this book about?”
- Level 3: Analytical Reading - this is where you ask a bunch of clarifying questions about what the author is saying.
- Level 4: Syntopical Reading - this is where you compare the book in relation to other books that you’ve read.
As you’re working your way through a book, you’re trying to figure out:
- What is this book about as a whole?
- What is being said in detail and how?
- Is this book true, in whole or in part?
- What of it? (or “What does this mean to ME?”)
The key? Figure out what’s useful, and discard the rest.
Analog vs. Digital Books
I always read physical books. I have something like 1,500 of them all around my house.
The reason I always read physical books is that I tend to retain more from them. That’s how I got started reading in the first place — I started carrying a physical book with me everywhere I went. And I found that often I would pick up my book and read a page or two instead of scrolling whenever I had a few minutes.
So while you can read books on a digital device, I actually recommend you read a physical book if you can. There’s something different about reading the same words from a digital book. Researcher Maryanne Wolf agrees, and in her book Reader, Come Home, she shares how information hits differently when it comes from a screen.
The bottom line? If you want to read more (and get more out of what you read), you can’t beat a physical book.
If you need to read digital books, that’s fine. Just recognize there are tradeoffs. And if you have a choice, I highly recommend you give physical books a try.
How I Take Notes on Books That I Read
When it comes to taking notes, I use MindNode on my iPhone. It’s the best tool I’ve found for modernizing the process of working a book that Mortimer Adler described when we wrote his back in the 1940s.
Now, you might be wondering why I use my iPhone to take notes when I just talked about how physical books are great because they minimize distraction.
That’s fair 😂
I’ve actually done quite a bit to force myself down specific paths whenever I pick up my iPhone. I use an app called Blank Spaces to eliminate the icons and the badges, and I only have apps on my Home Screen that I consider to be positive uses of my technology.
Here’s what it looks like when I unlock my iPhone:
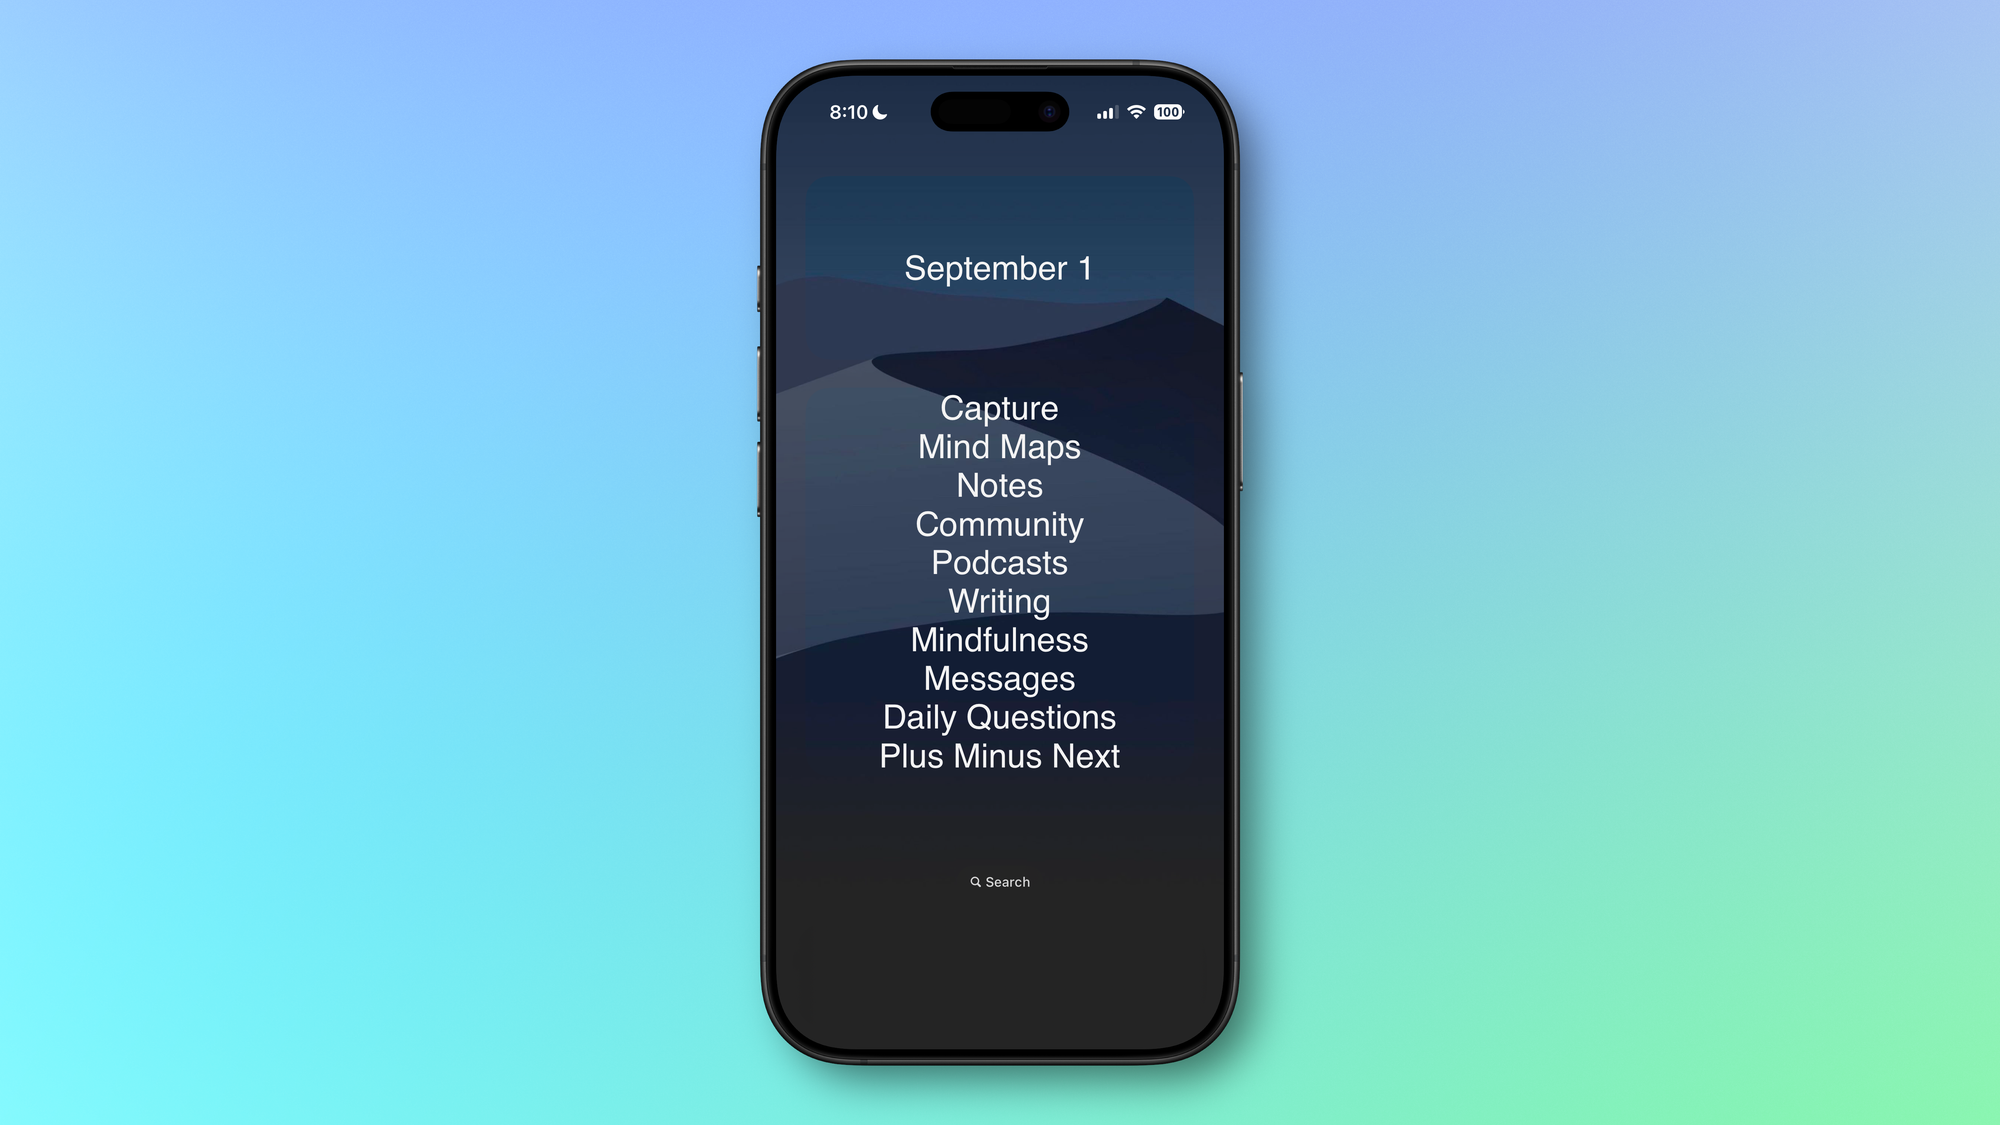
With the way I’ve set up my iPhone, I find that once I get some momentum by picking up the physical book and starting to read, the phone really isn’t a distraction.
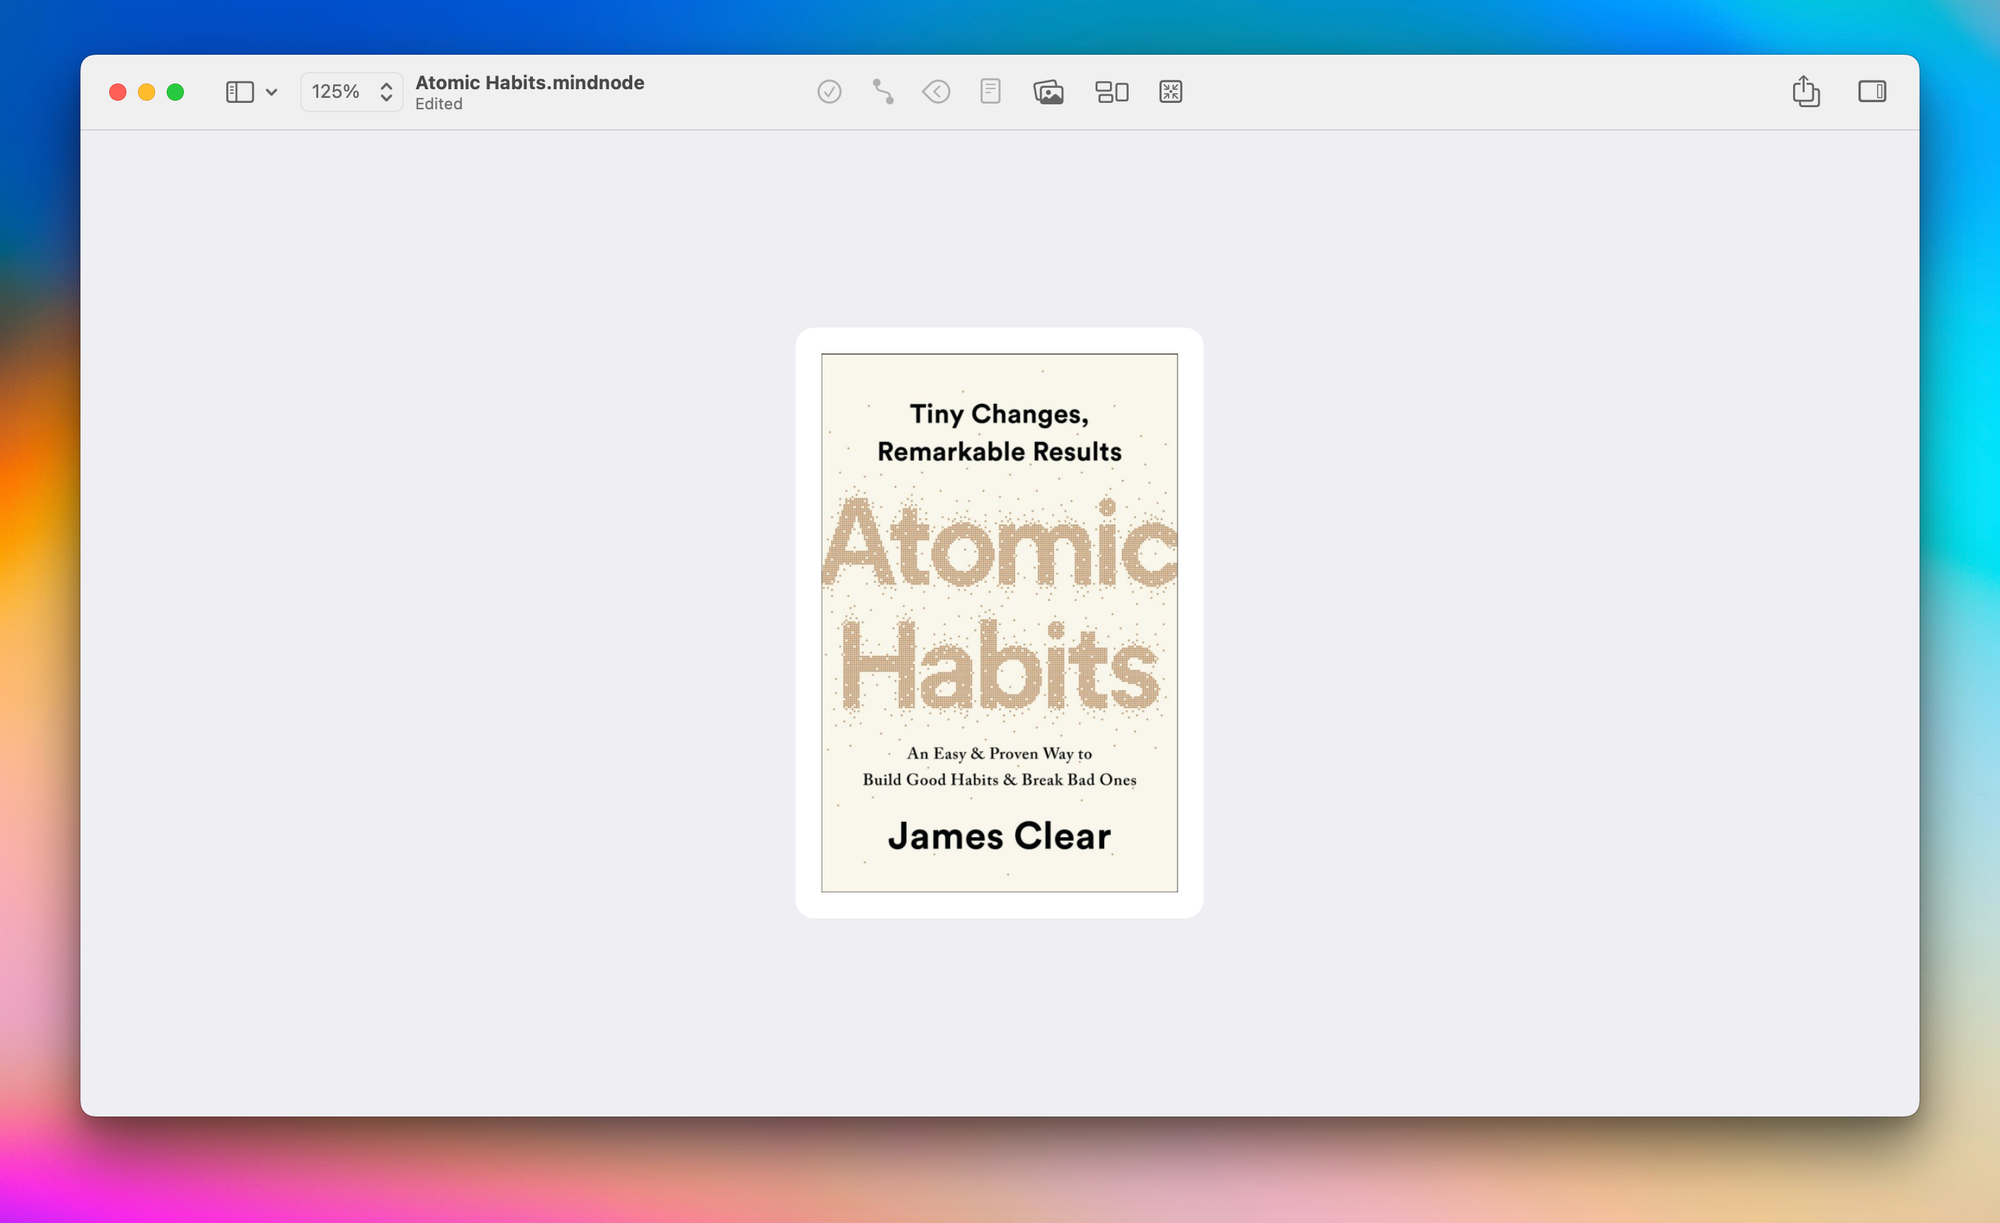
Before I start reading, I open up a new mind map and place a cover image from a quick Google search in the middle of the mind map.
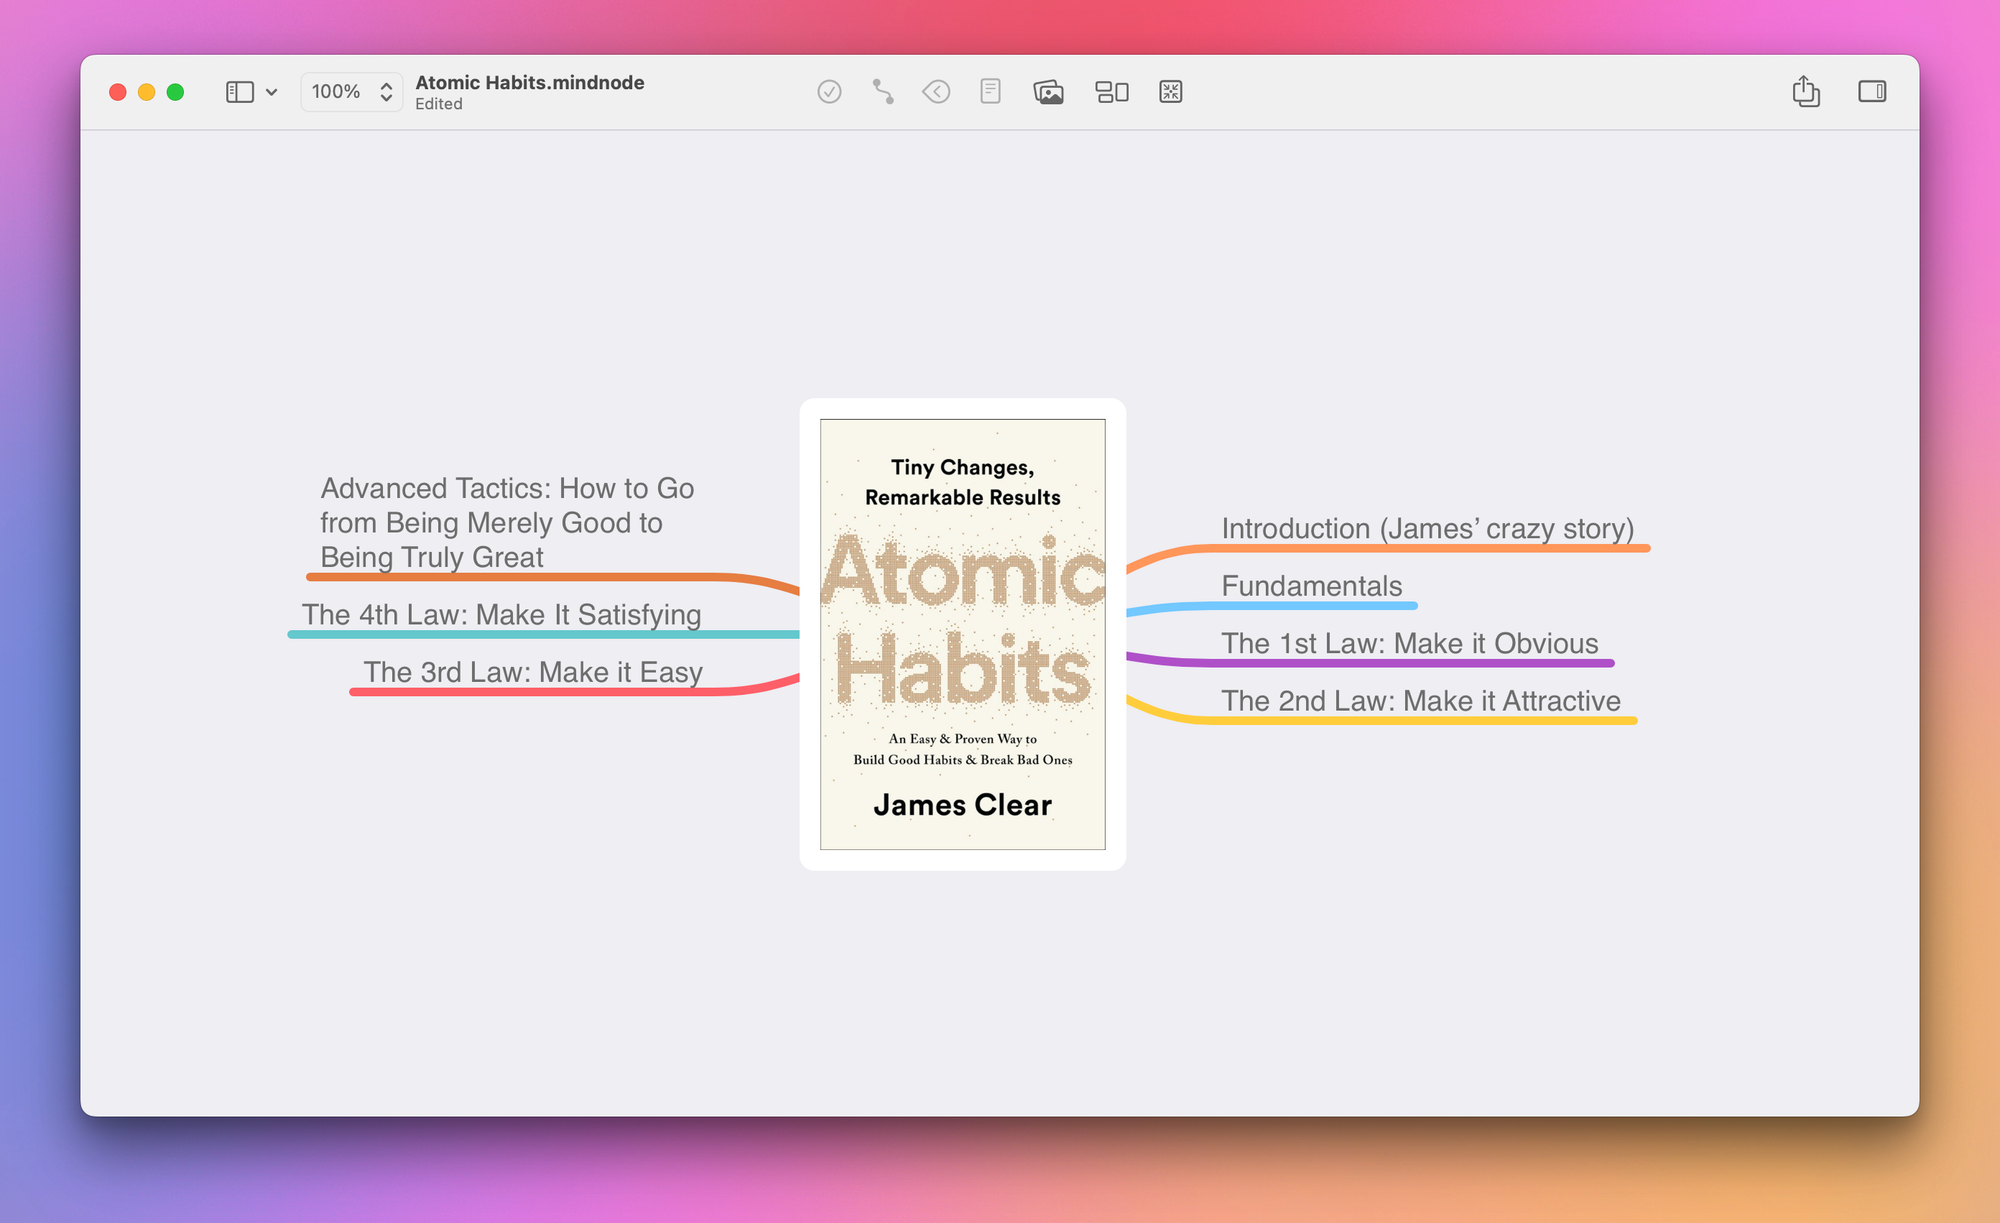
Next, I look at the table of contents for the book and recreate that in my mind map structure. If the book has parts, I’ll create those as the main nodes and the chapters as child nodes underneath.
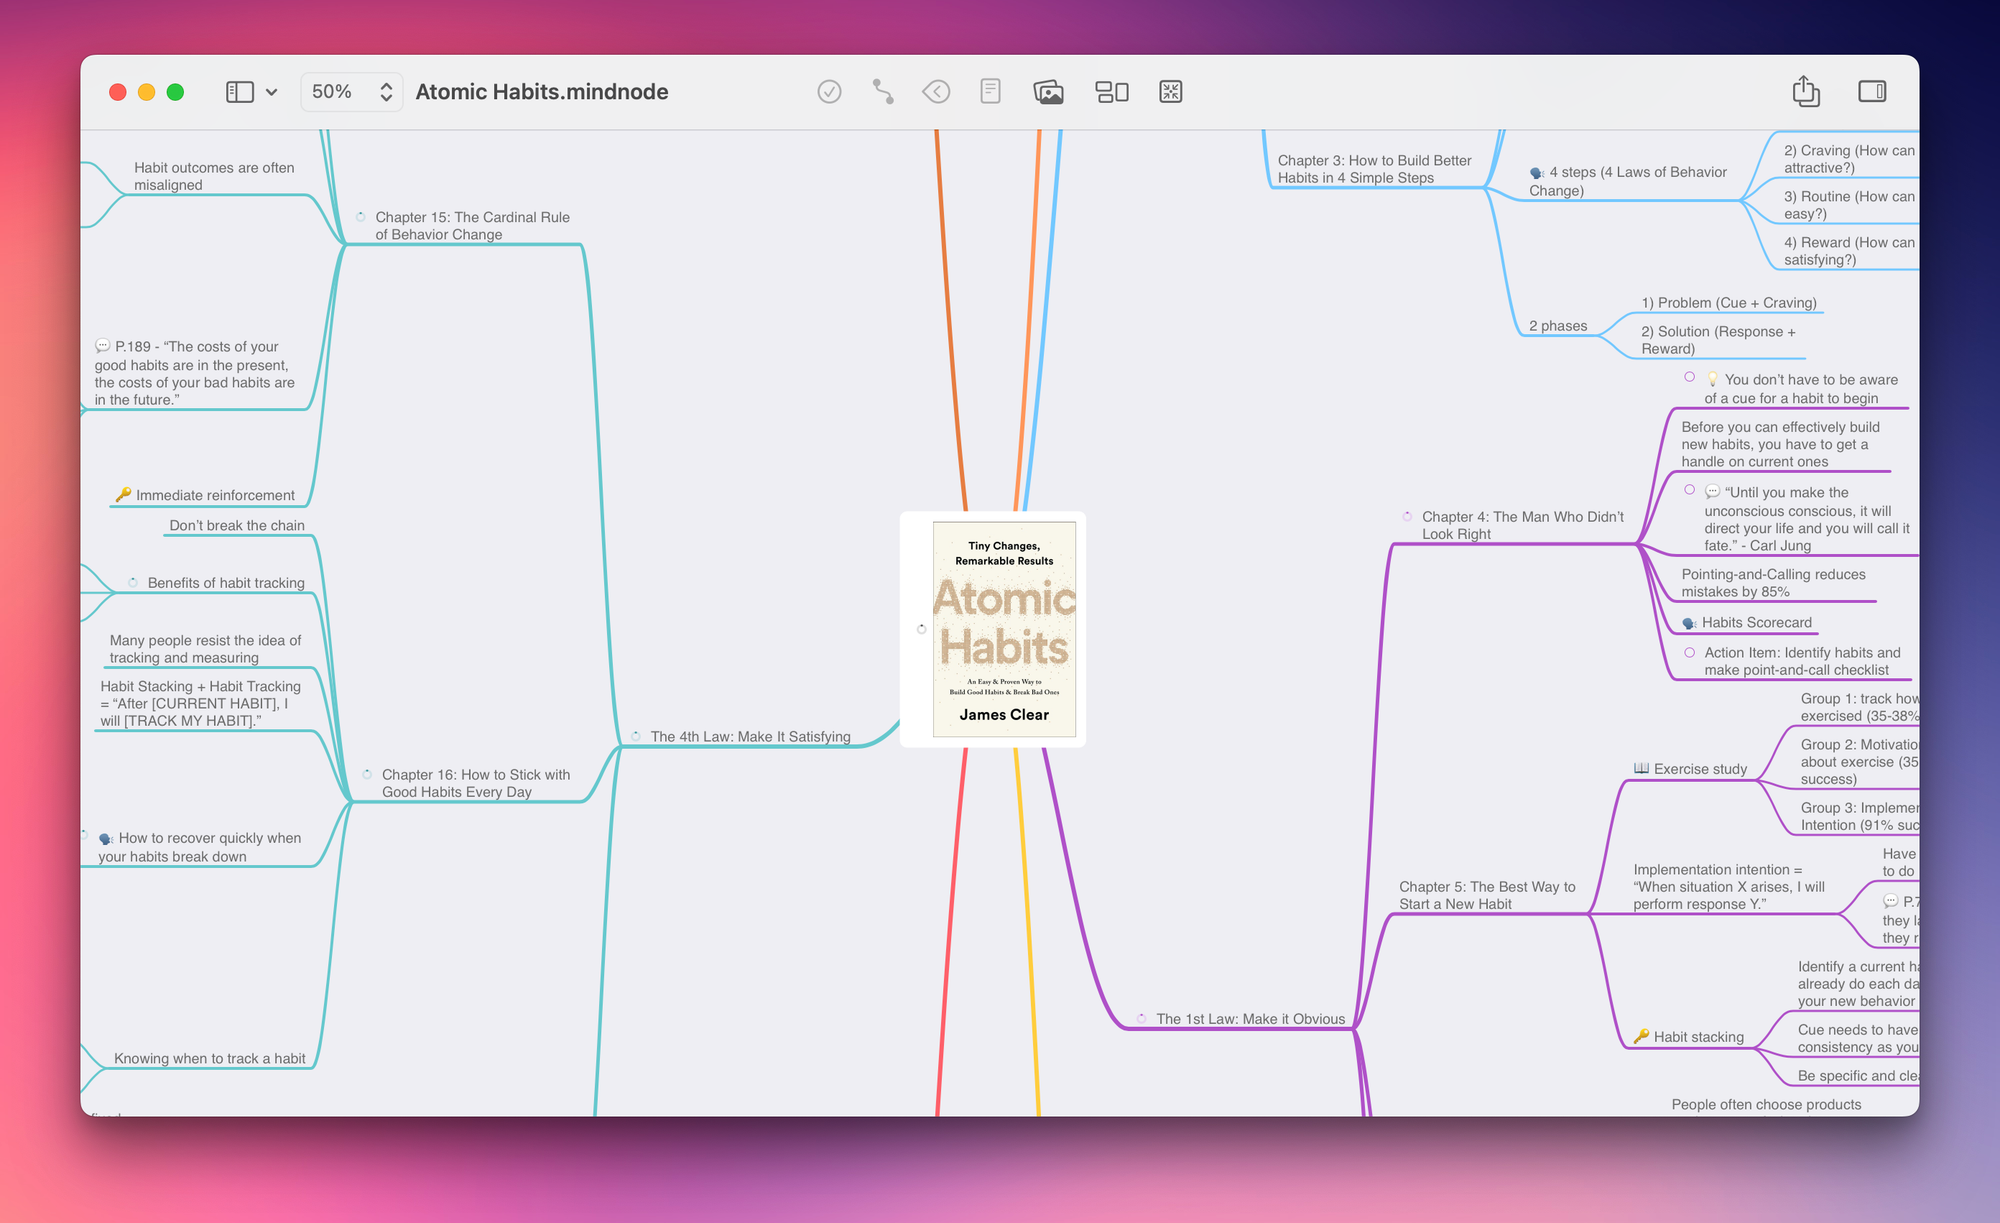
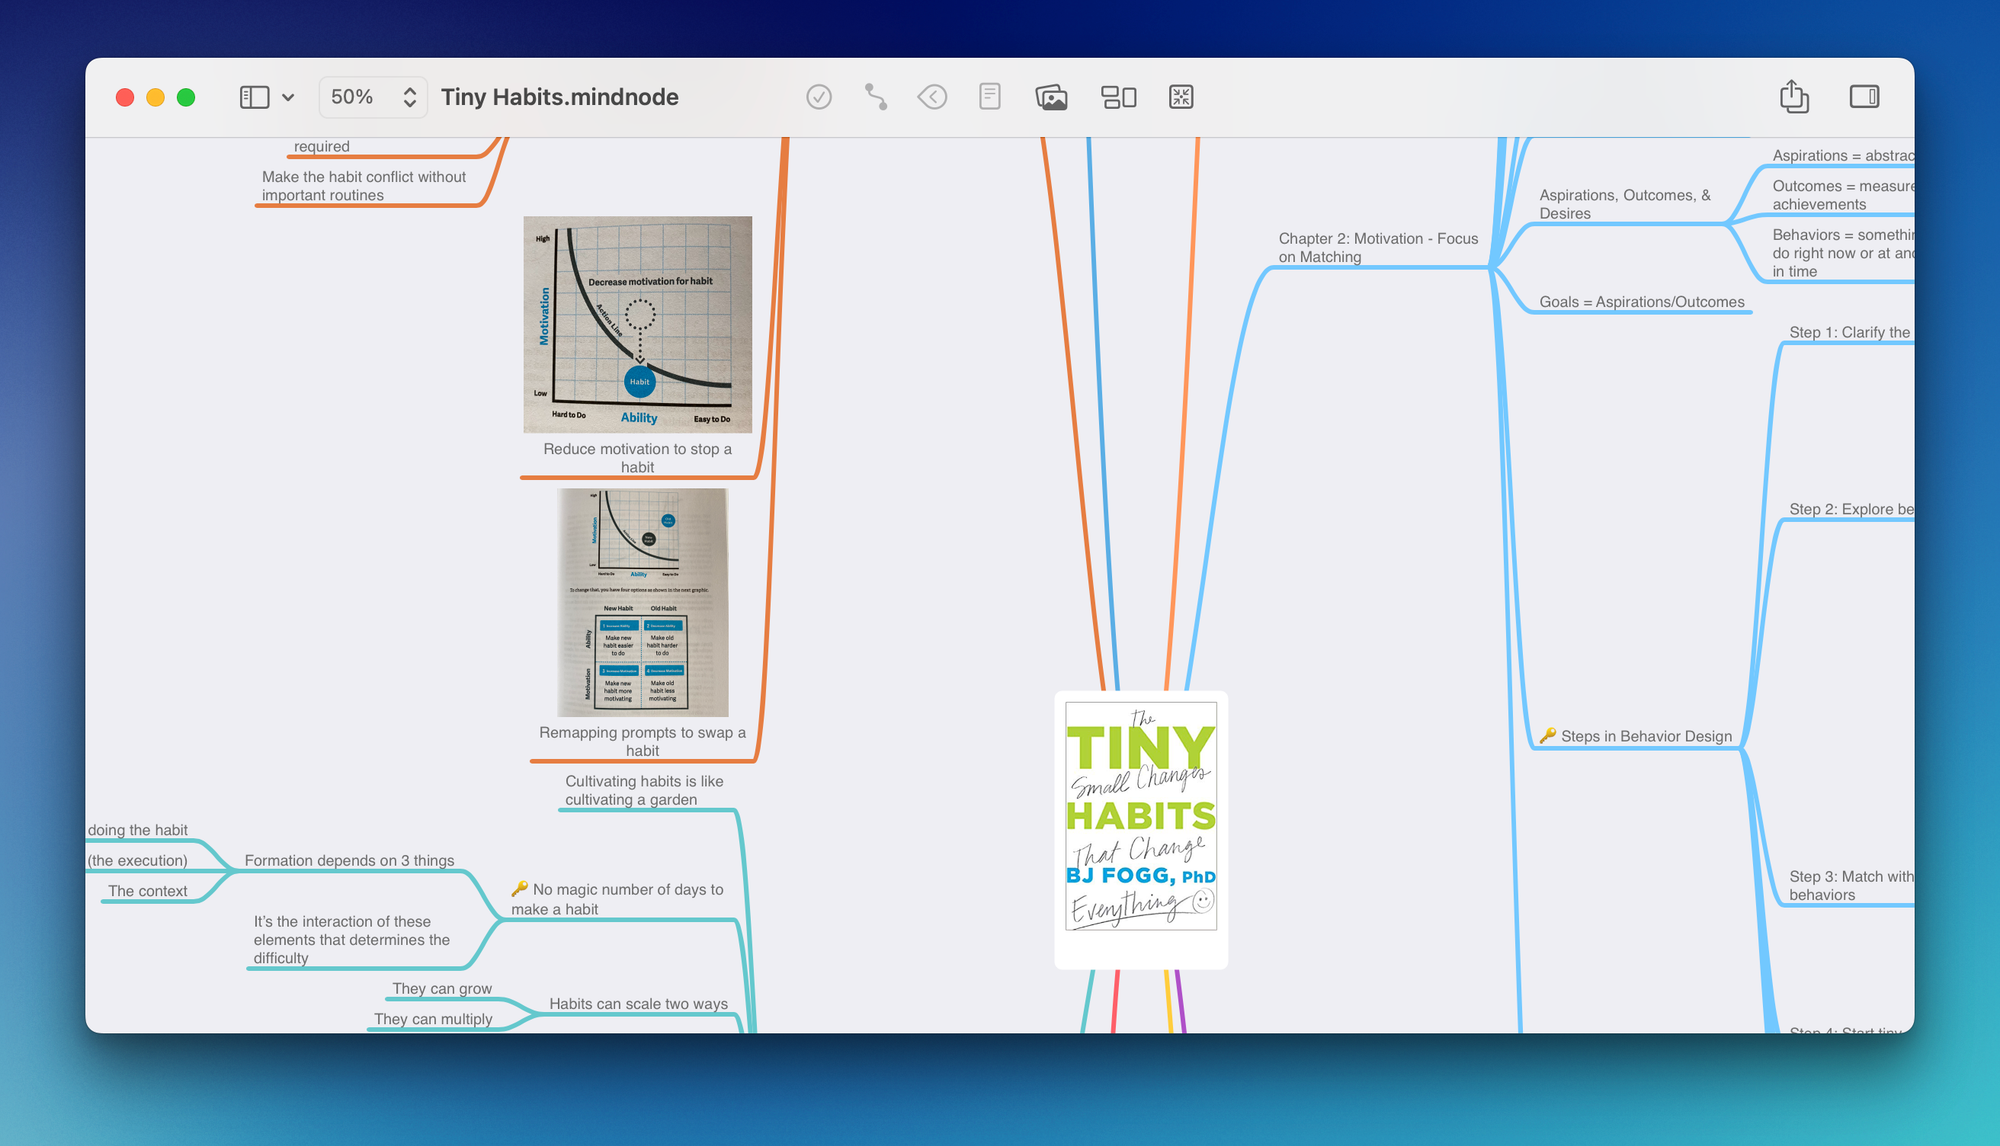
As I read, I capture notes for the things that resonate. I intentionally try to keep my notes simple by focusing on what piques my interest instead of what the author says is important. That way, I end up with notes of things that are useful for me instead of trying to copy over everything from the book. When I'm done, it looks something like this:
I’ll also take photos of important diagrams or visuals in the book with my camera and embed them in the mind map, like so:
I also have this emoji coding system I use when taking notes. I’ve been using this for years, and it helps me easily locate the good stuff whenever I review my notes.
Here’s the emoji coding system that I use:
- 💡 Inspiration - This is basically the equivalent of an “aha!” moment, or something that is kind of surprising.
- 🔑 Key Arguments - This is a key argument the author is making, which I use to grok the basic message later when I review the mind map.
- 💬 Quote - This is for the one-liners that stand out to me when I’m reading, and I make sure to capture the page number so I can roll these up into my Quotebook note.
- 🗣 Talking point - This is something that I want to discuss when covering the book for Bookworm, which makes it really easy to create the outlines for those episodes.
- 🤯 Mind Blown - Every once in a while, I’ll come across a section or statistic that just completely blows my mind.
I could probably do this using tags, but they didn’t exist in MindNode when I started using this system, and I just really like the visual nature of this, so I’ve continued to use this system. They also make it easier to find once I move things over to Obsidian in the next step.
Moving Things Into Obsidian
Once I’m done reading, I export my notes from MindNode in two specific formats:
- PDF, which gets embedded in the note
- Markdown, which gives me a plain-text version that I can break into atomic notes and link together inside my vault
(Unfortunately, the images don’t get exported in the Markdown format, but they exist in the PDF mind map, so I can still see them when I review my notes.)
I have a template I use when adding book notes that has a couple of distinct sections:
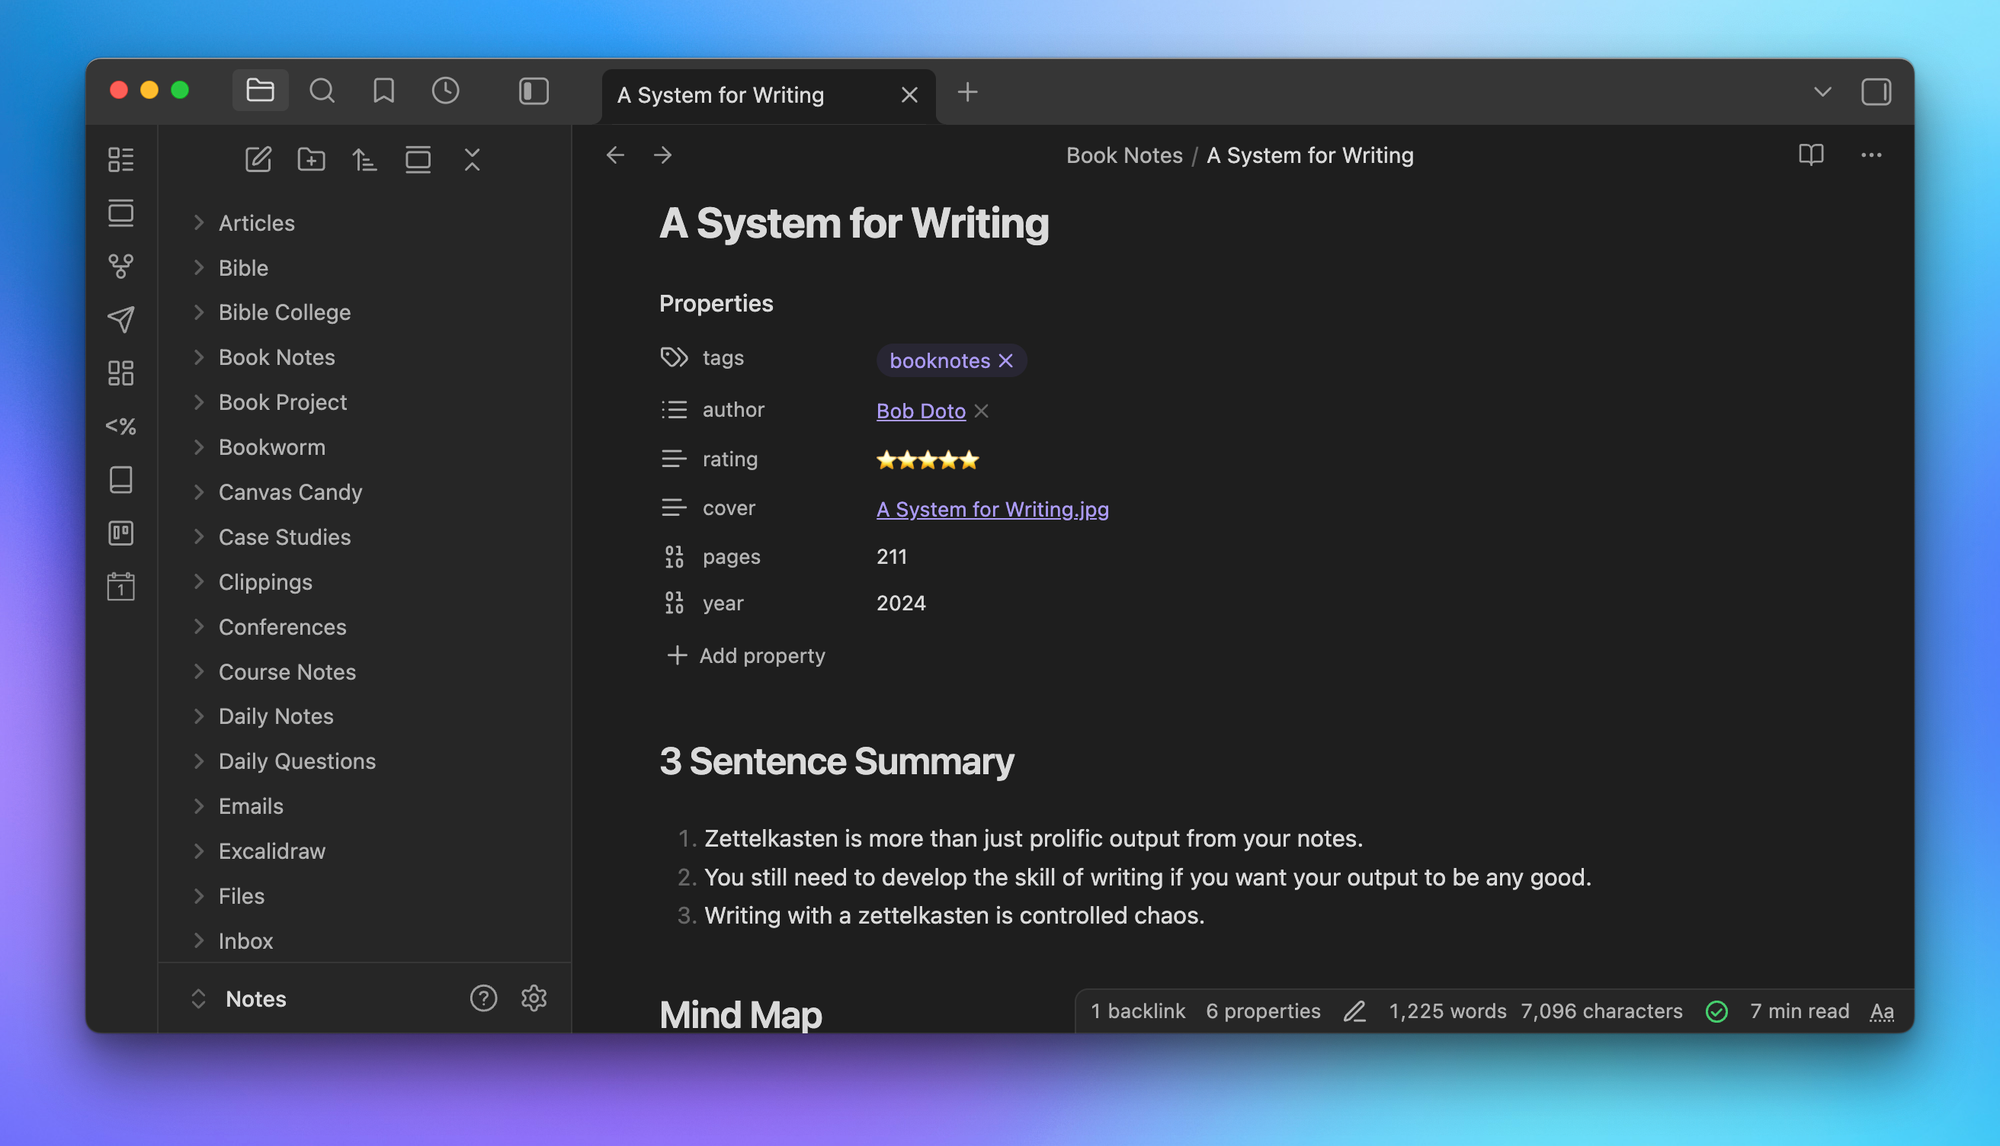
- 3 Sentence Summary - This is where I condense the whole message of the book into three sentences at the top of the note.
- Mind Map - This is where I drag in the PDF mind map file, which gets embedded in the note.
- Notes - This is where I paste the Markdown outline after copying it from Nova (my text editor of choice).
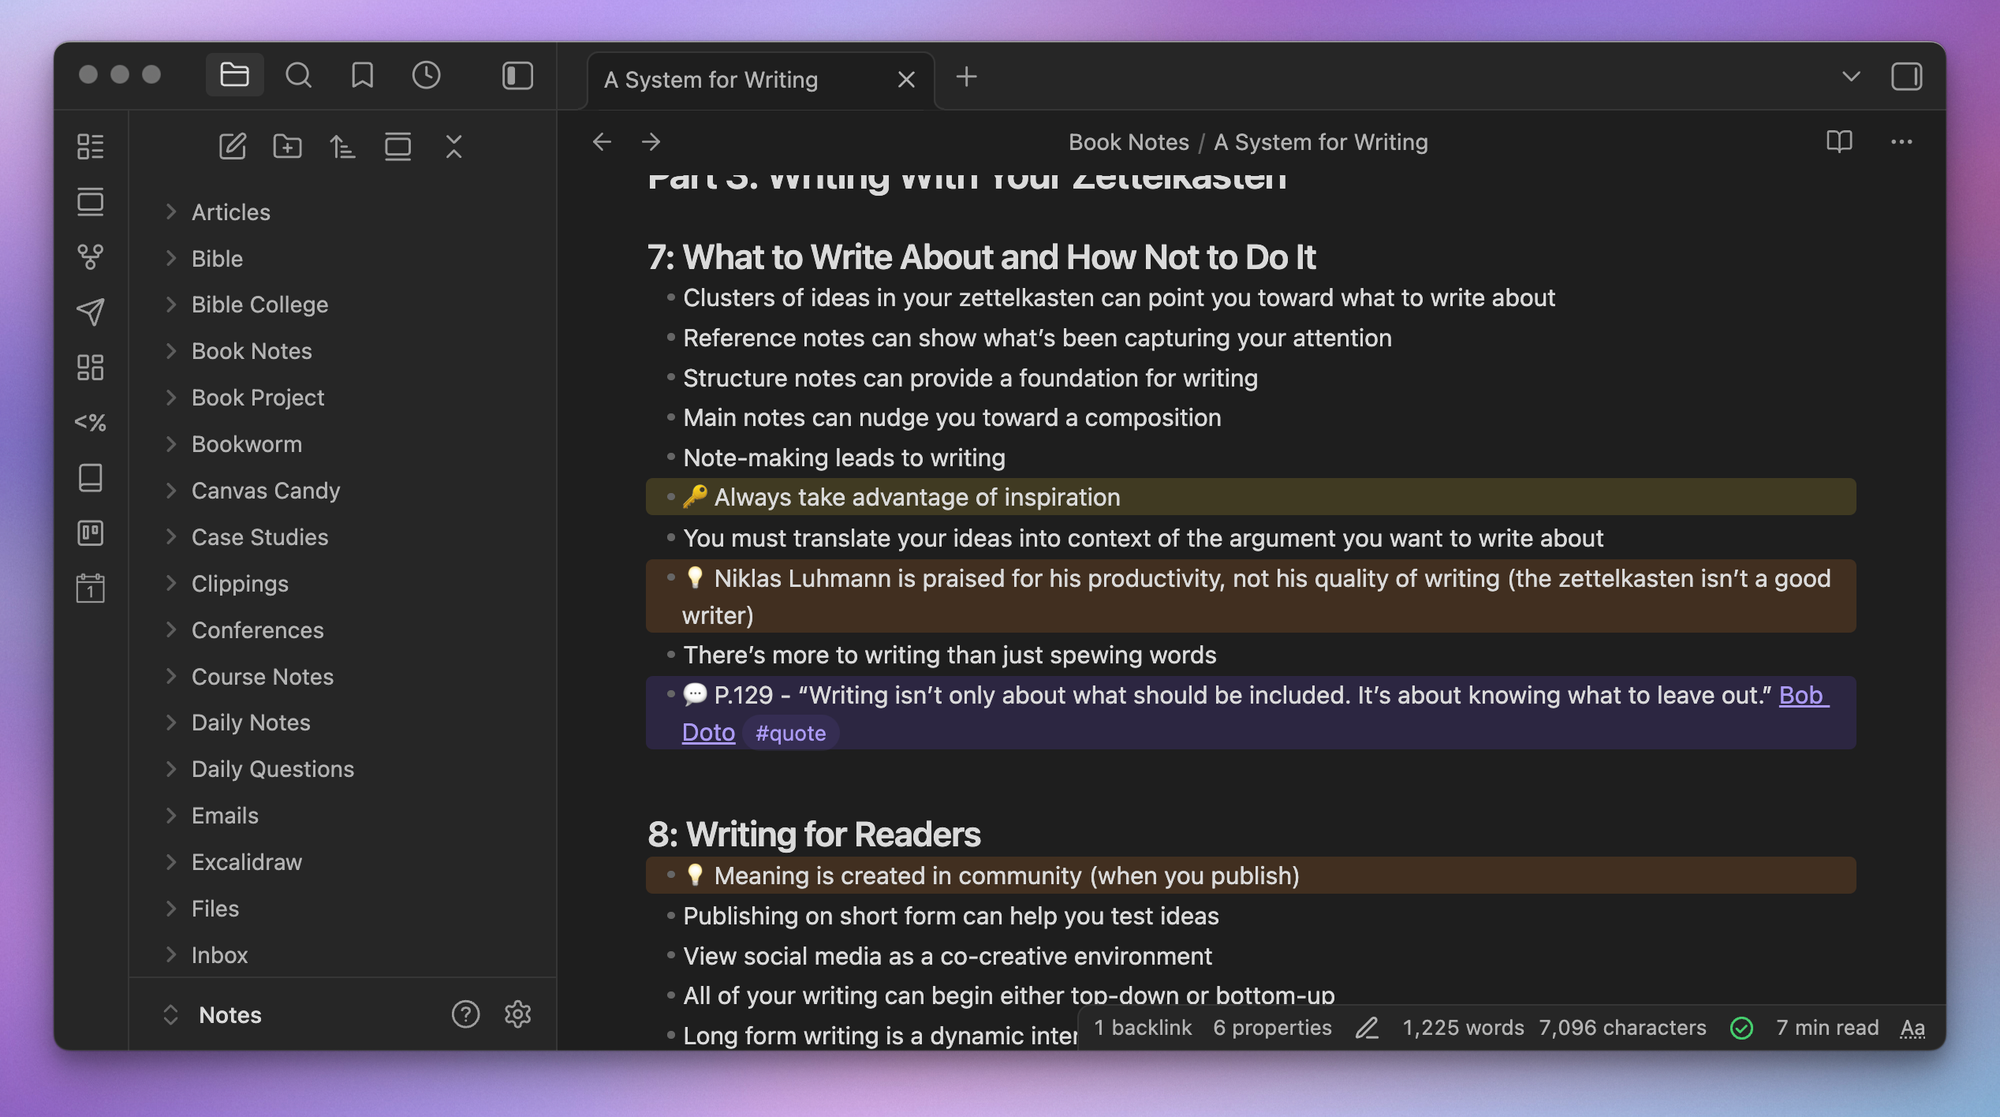
I also use the List Callouts plugin to add a colored background to every line that has one of the emojis I added when taking notes. You can configure this in the plugin settings, but here’s what it looks like in my notes:
I also have a bunch of metadata properties I add to the top of the note:
- Author - A link to a note matching the name of the person who wrote the book
- Rating - My personal rating of the book from one to five stars
- Year - The year the book was published
- Pages - How many pages the book has
- Cover Image - A link to a local image file of the book cover
I automate adding most of this metadata using the excellent Book Search plugin. When you run the command, you can search for the book using the title or ISBN number, and the plugin can automatically pull in the associated metadata that you choose.
I don’t use Book Search to find the Author simply because I want a link to the author’s note, and it gets tricky when there are multiple authors. And obviously, the star rating is something I have to add by hand. But the rest of the note gets created automatically, the cover image gets downloaded and stored in the appropriate folder, and the template gets applied simply by running the command from the Command Palette.
This metadata is important as this is the information that Bases will use when creating the cards for all the books in my library.
Creating the Base
Ok, now it’s time for the fun part 🙂
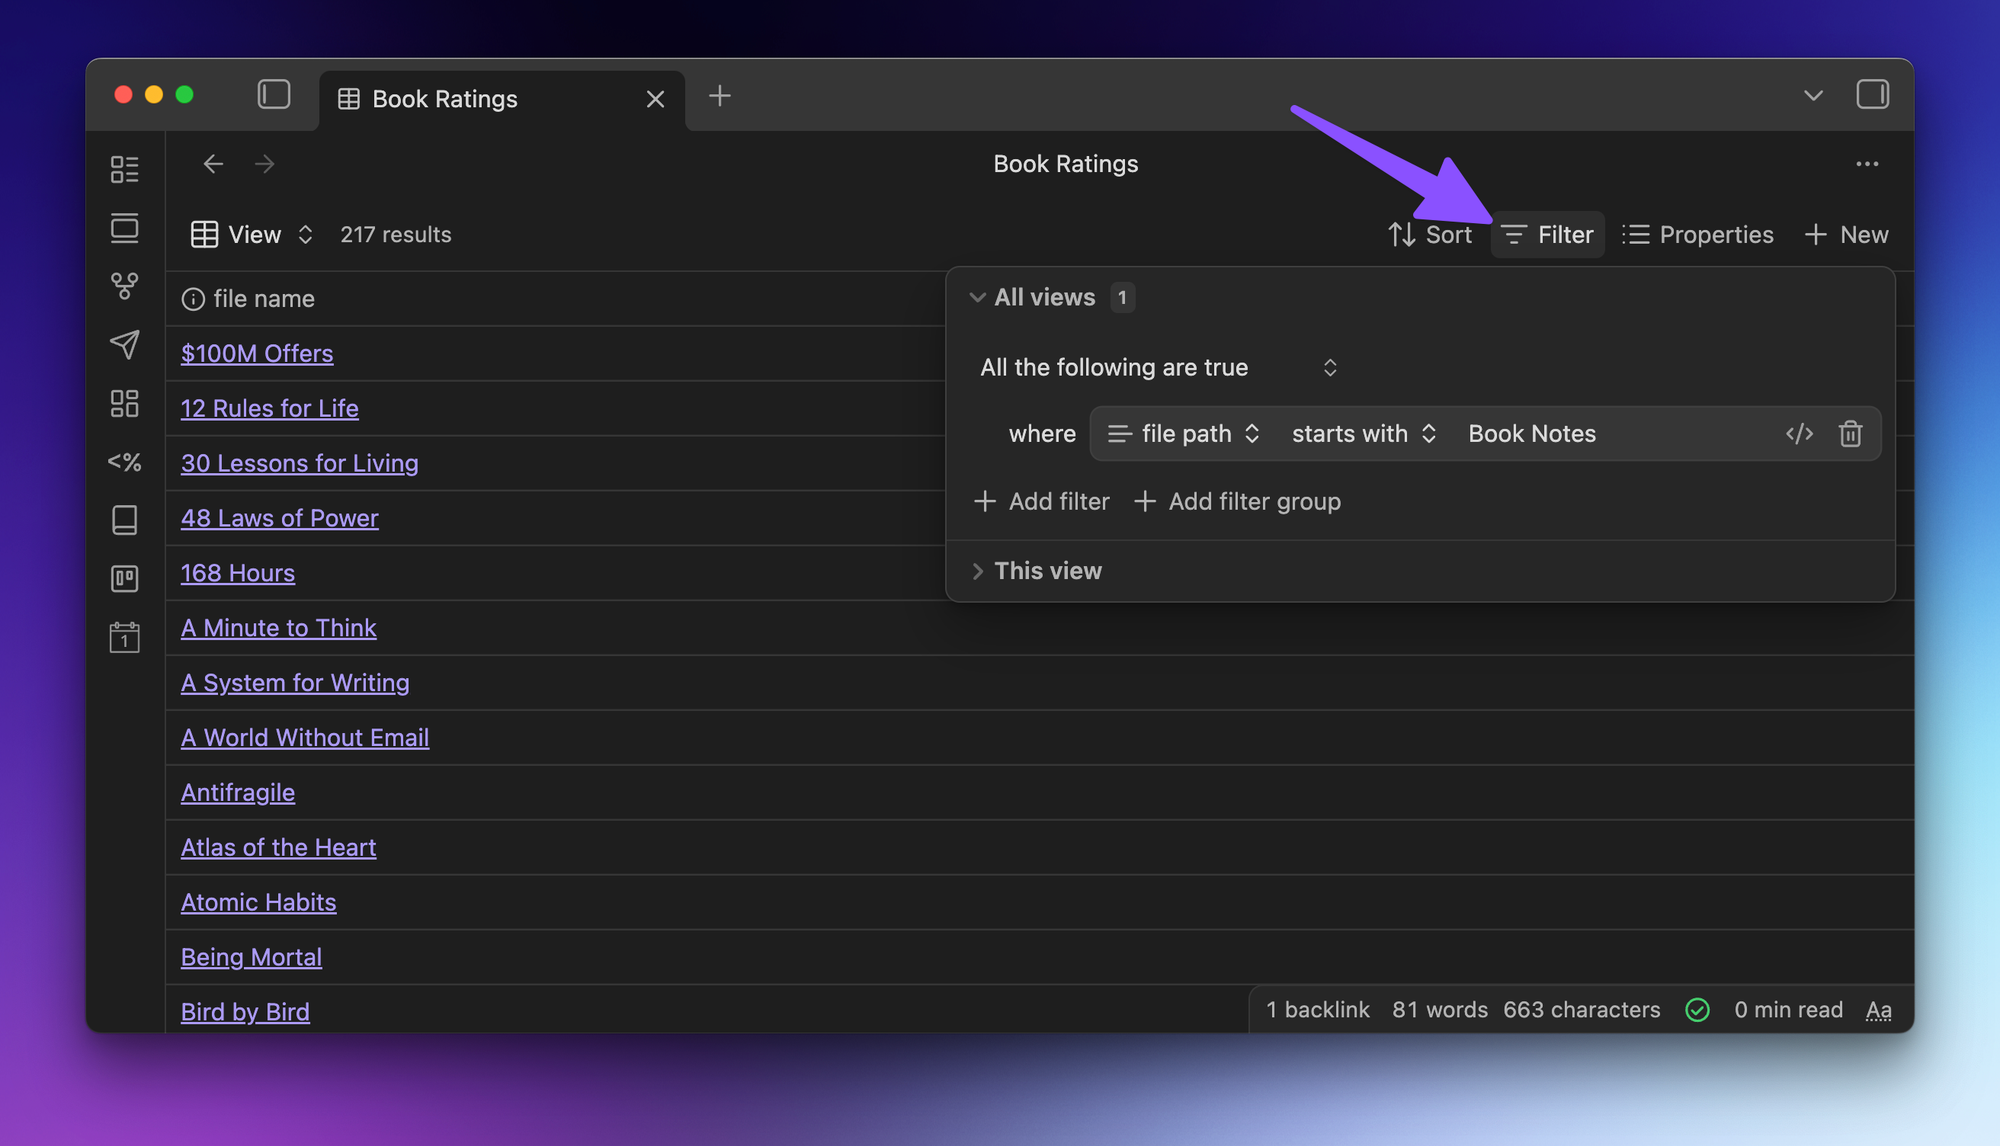
I keep all of my book ratings in a Base file named Book Ratings.base. Since I keep all of my book notes in a folder called Book Notes, the filter for the Base is actually very simple: it only shows files where the file path begins with Book Notes.
This creates a Table view that looks something like this:
From here, you can click on the view button in the upper-left of the Base view and select Add new view to create a new view and configure the settings. The important settings here are the Cards layout and choosing the correct property for the Image property setting.
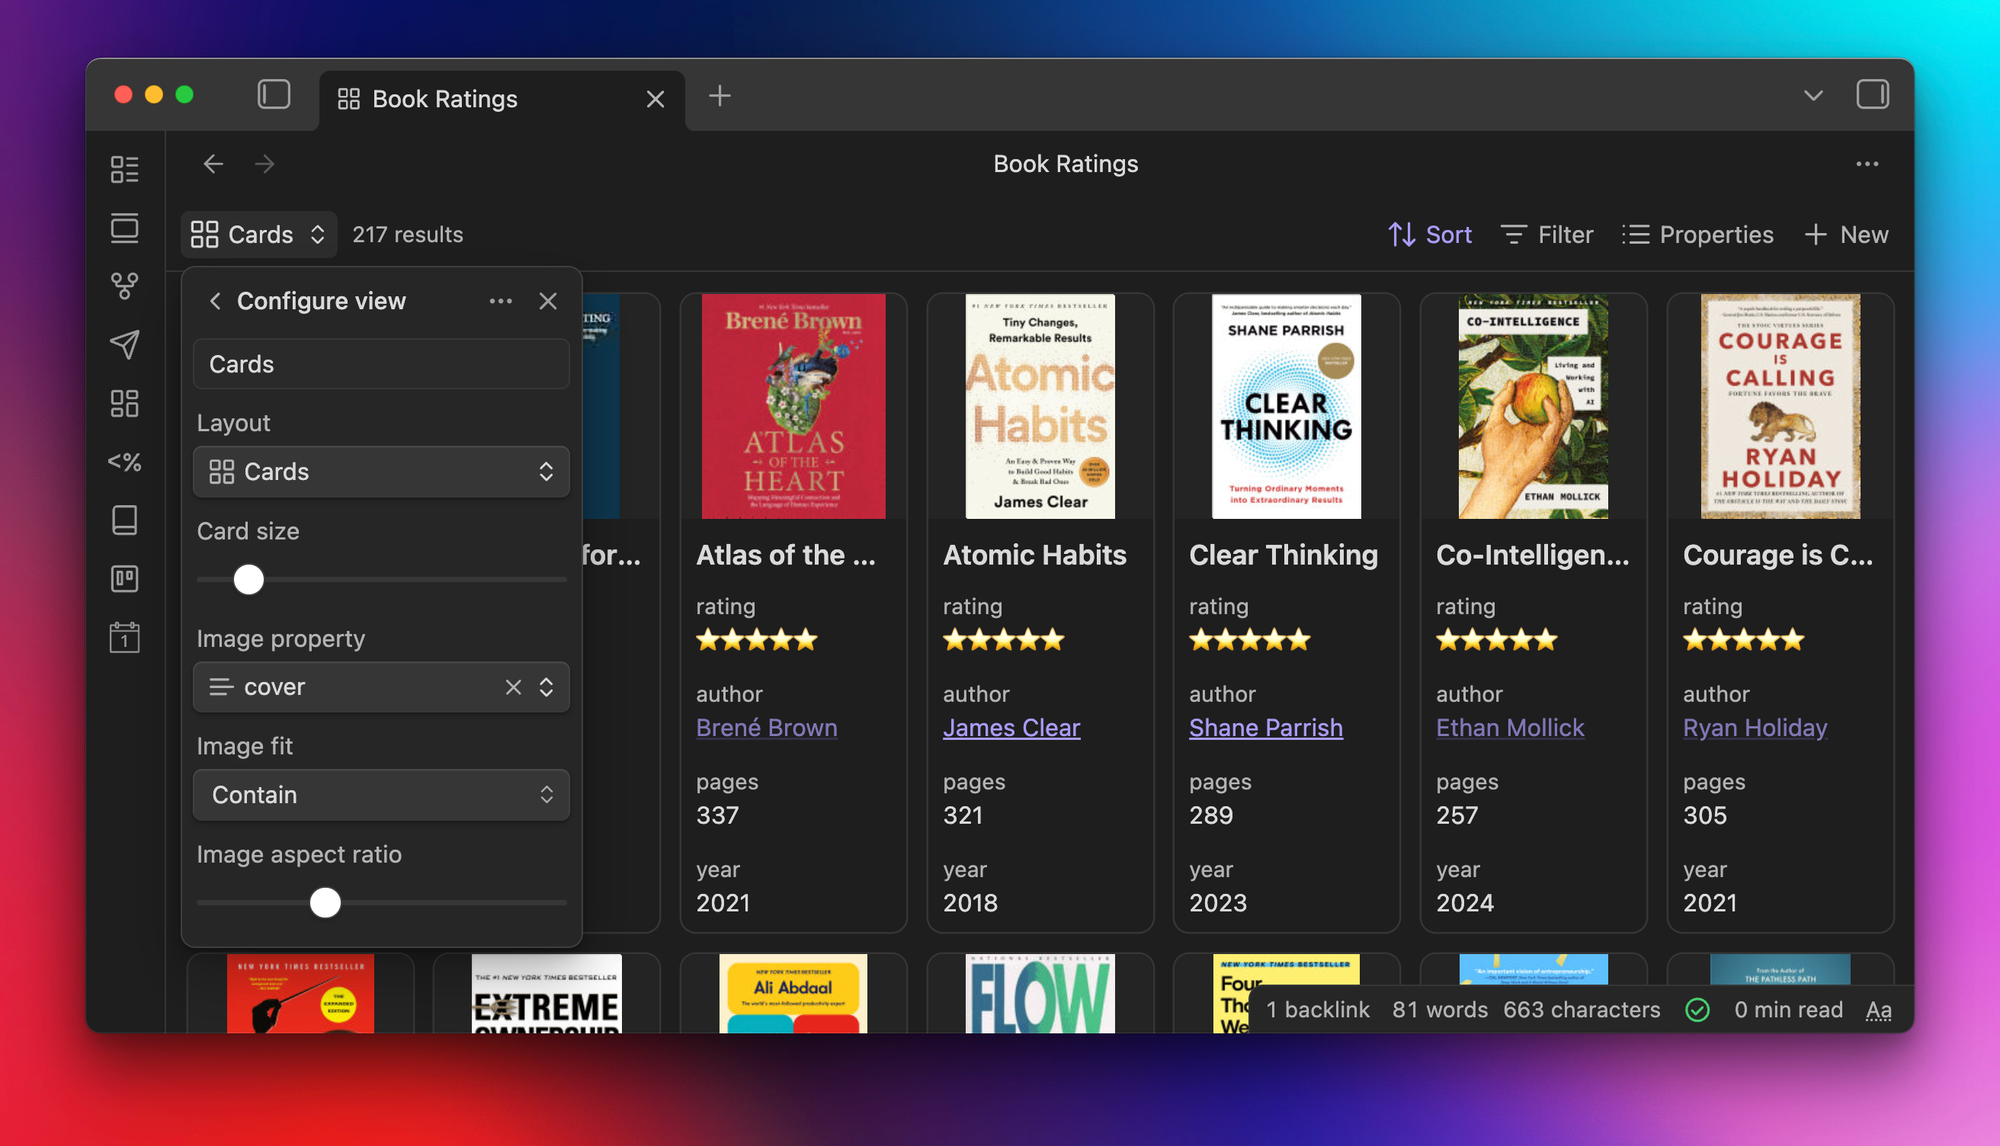
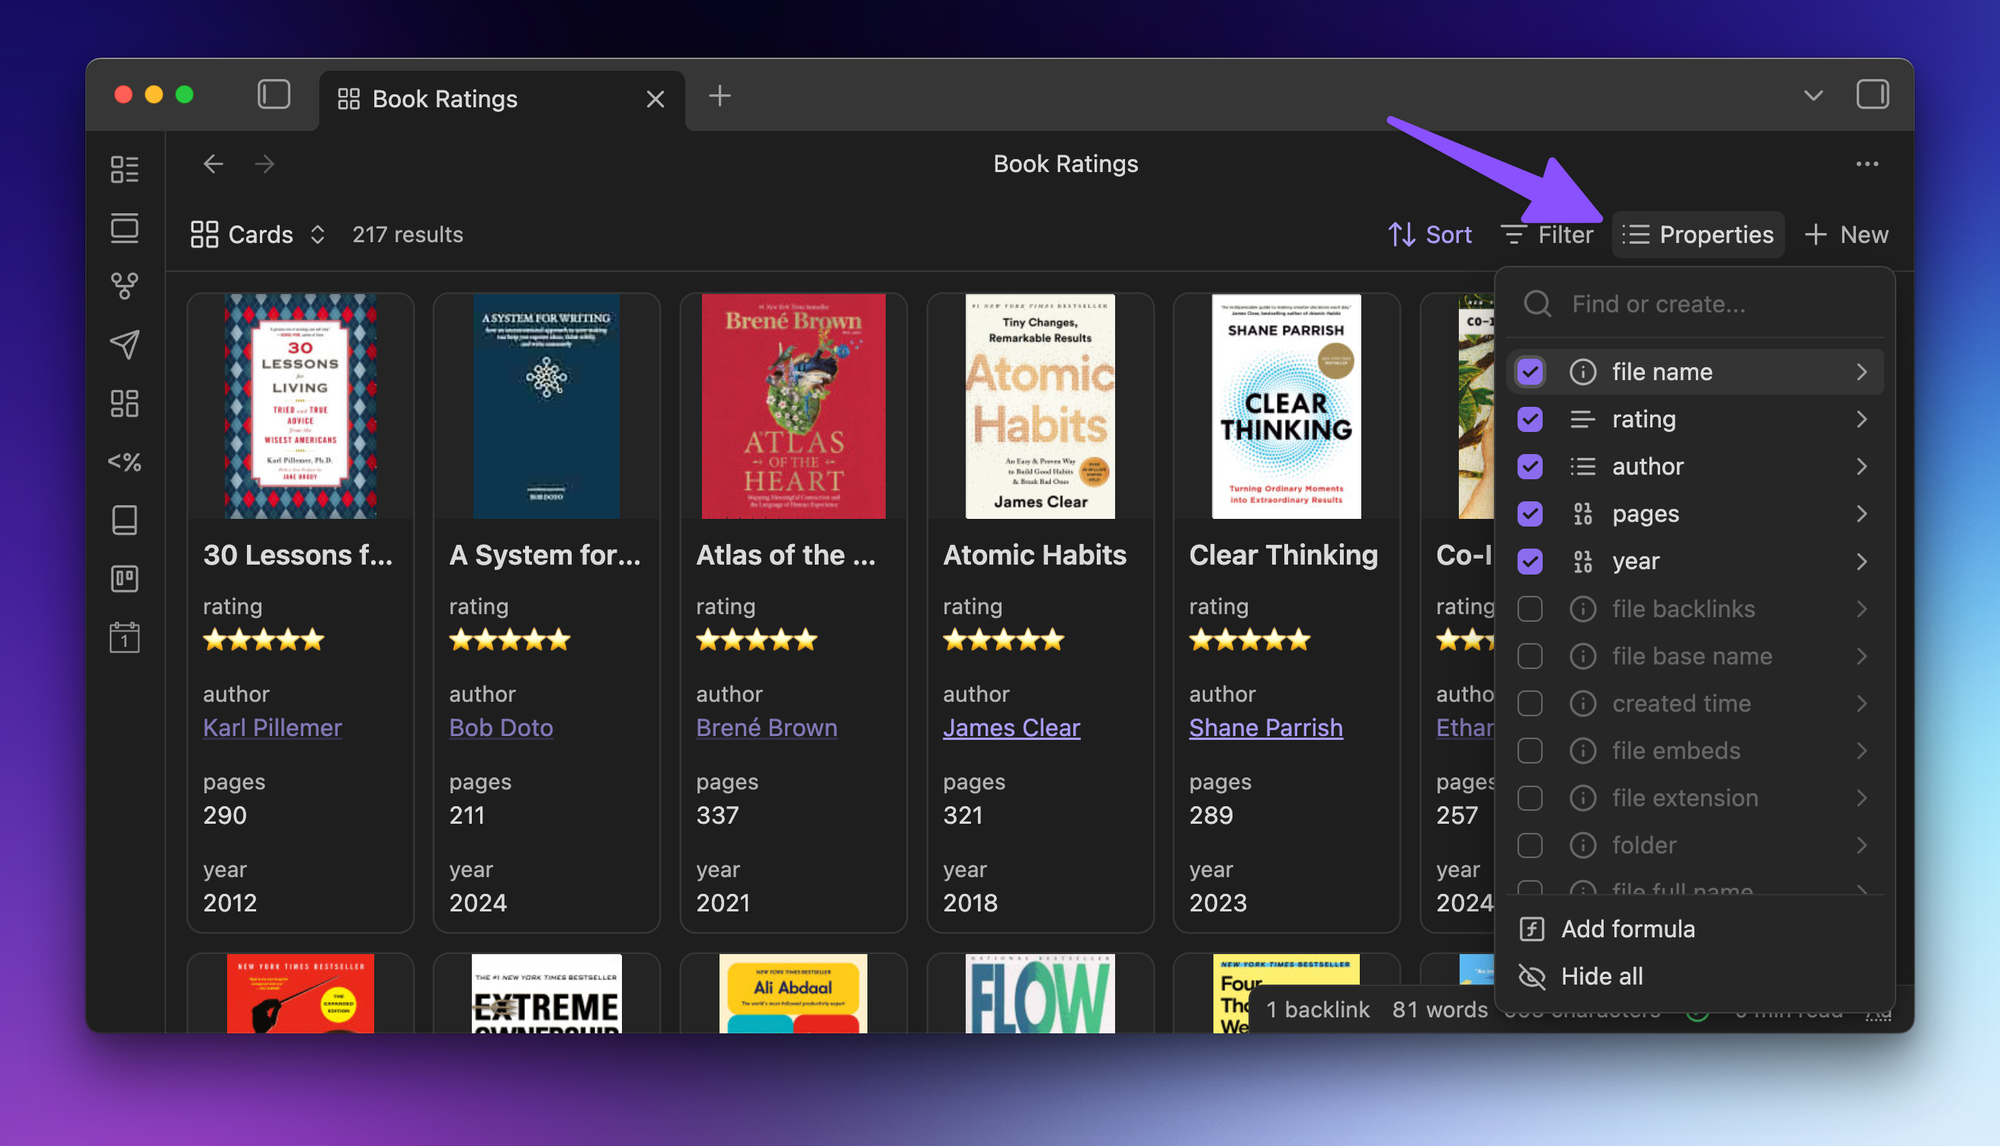
To control what appears on the cards, you’ll need to check the boxes from the dropdown list for the properties you want to include:
You can also choose how you want to sort the view if you’d like (I have mine sorted in ascending alphabetical order).
The end result? A beautiful-looking Card view that shows all 217 of my book notes with author, rating, and page number.
(BTW, I’ve recently added all 217 of these to LifeHQ, my epic done-for-you Obsidian vault.)
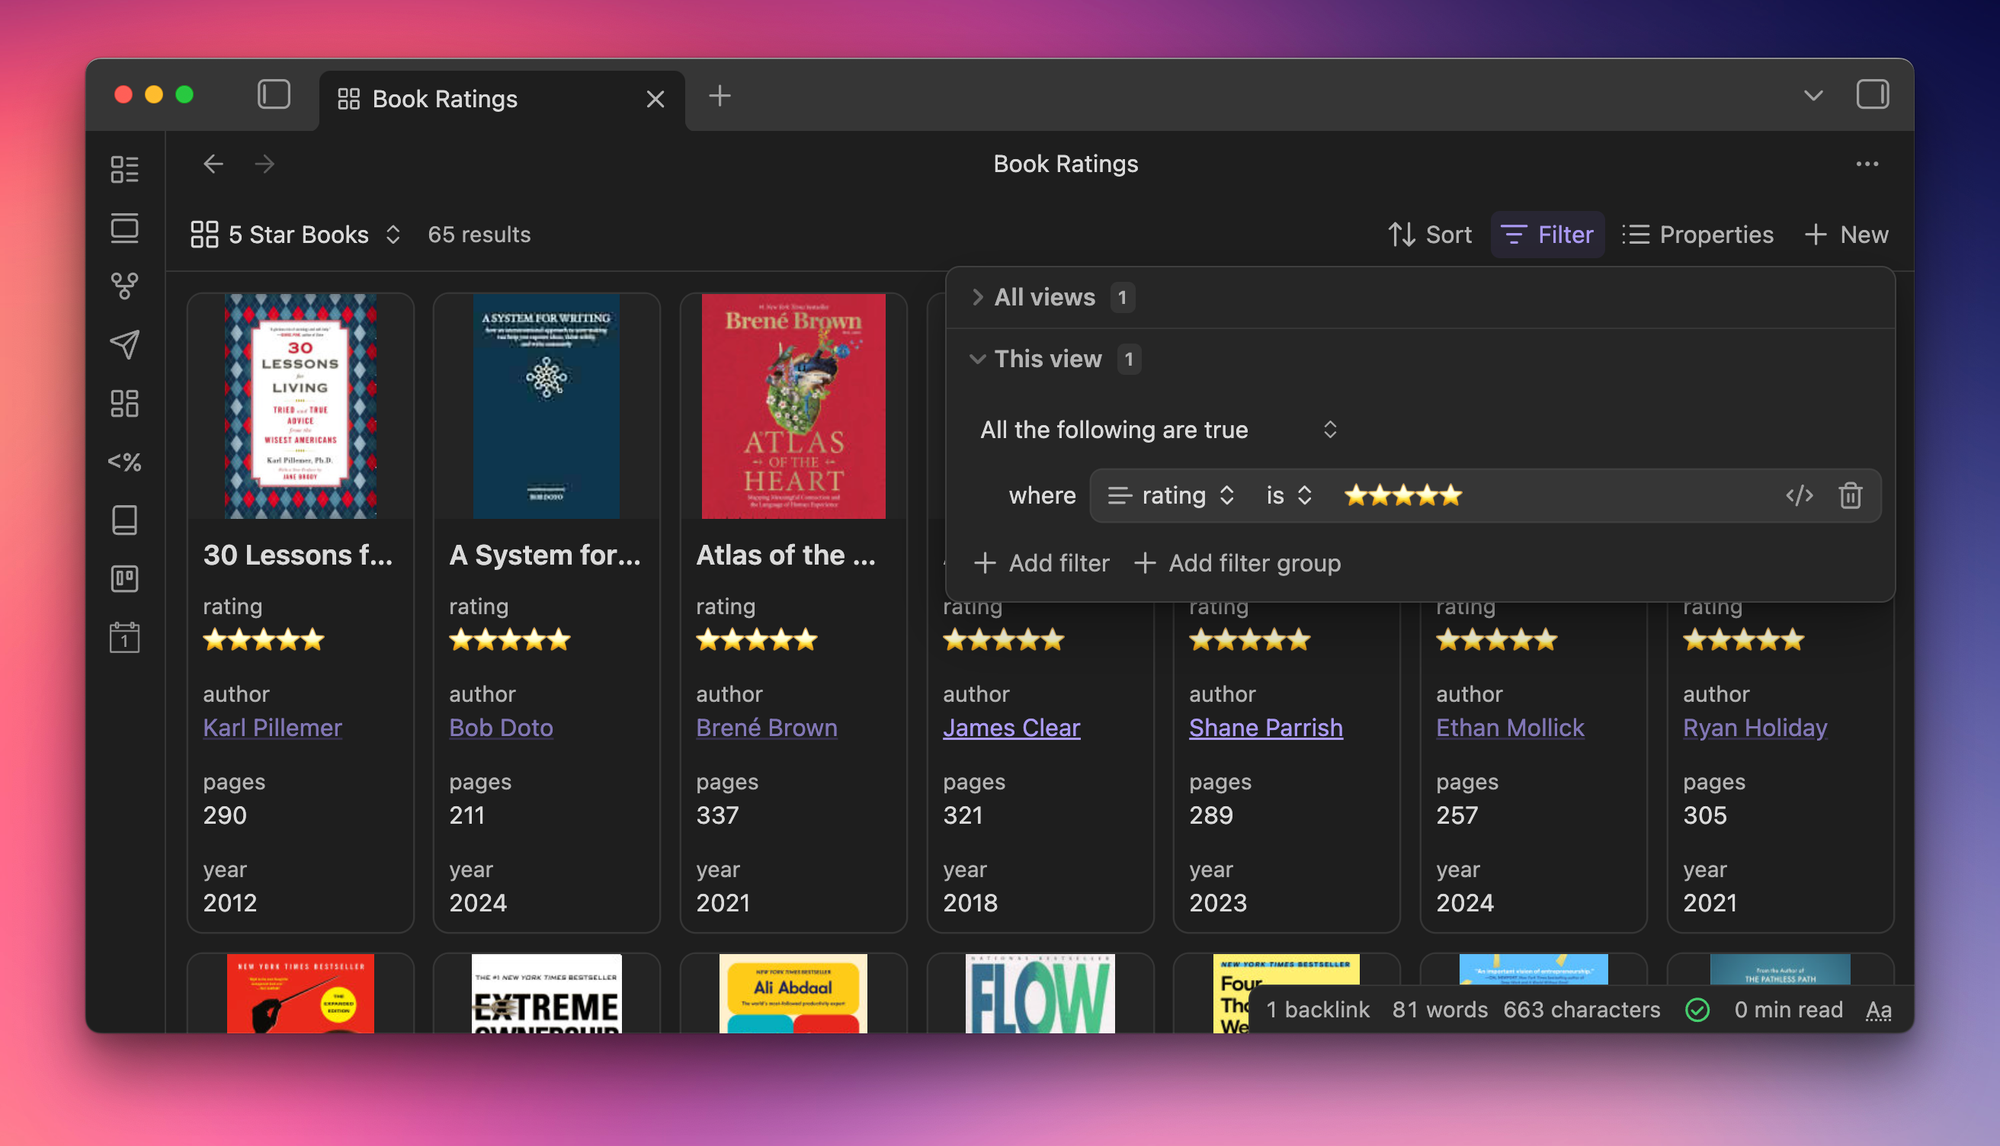
But you can take this even further by creating additional views from the same .base file. For example, I have a 5 Star Books view that adds an additional filter where the rating property is ⭐⭐⭐⭐⭐
And from any of these views, you can click on the card to open the note.


