


Do you use tags, aliases, or CSS classes in Obsidian?
If so, version 1.9 probably borked them.
Here’s how to fix it without having to edit every single file in your vault.
What Changed?
Obsidian version 1.9 (available now to Catalyst supporters) includes a couple of breaking changes:
- The
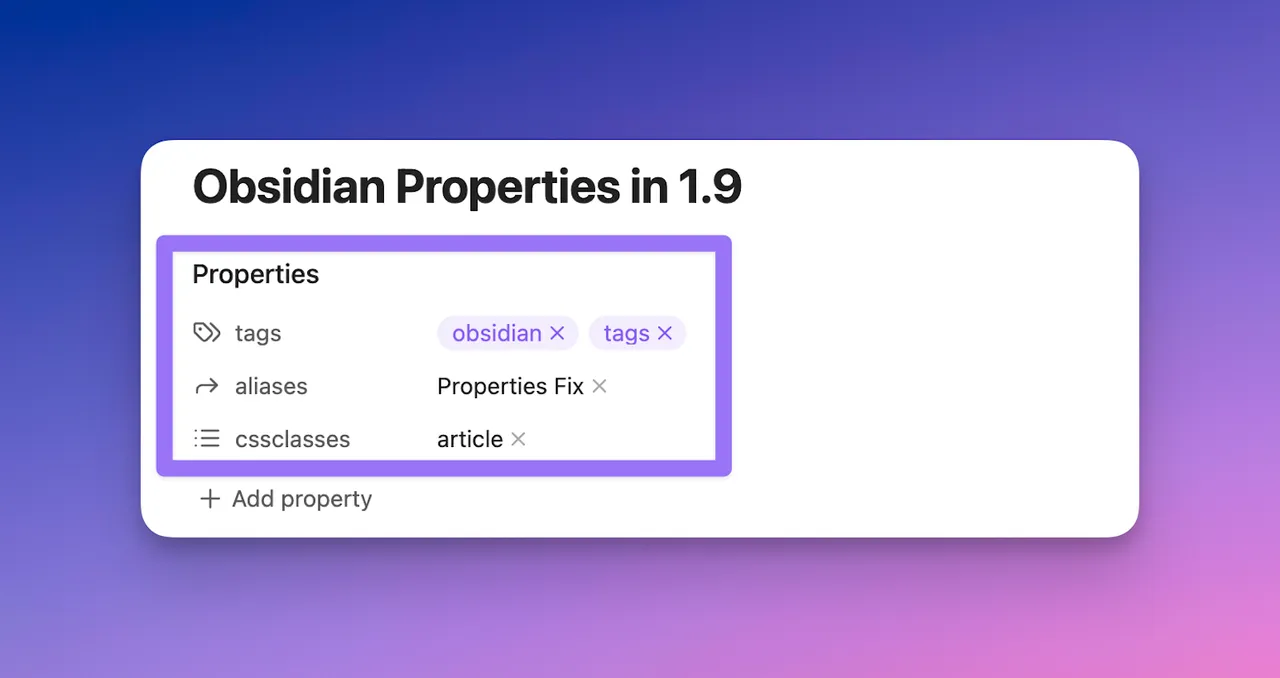
tag,alias, andcssclassproperties can no longer be singular - they must be plural (tags,aliases, andcssclasses, respectively). Not a huge deal, as I’ve been using the plural versions of these properties for a while now. - The values for these properties MUST be in a list. That means that all text-based properties are no longer recognized. So if you have text-based Properties and you switch into Live Preview or Reading View (without changing how these are formatted), you'll see they just don't show up at all in the Properties field (or in the case of tags in the Tags pane in the sidebar).
The bottom line: all tags, aliases, and cssclasses properties must be converted from this:
tags: tag 1, tag 2to this:
tags:
 - tag 1
 - tag 2
All you need to do is go to the property in Source View, hit enter, hit space, add a dash, and voilà! Now your tags, aliases, or cssclasses property is a list.
But if you've got multiple tags in thousands of notes like I do, that will take forever.

Fortunately, you can automate all of this with the Linter community plugin. , is a plugin that formats and styles your text notes with a focus on configurability and extensibility. Rules can be toggled and configured in the plugin settings, and fortunately, this allows you to update all of the notes in your Obsidian vault at the same time.
The very first thing you need to do is go into the Settings, go to Community plugins, and install and enable the Linter plugin. After that, you need to go into the plugin settings and look at a few specific things.
First, go to the General section and make sure that the YAML tags section style is set to multi-line. This will change all of your existing tags from text formatting to list formatting.
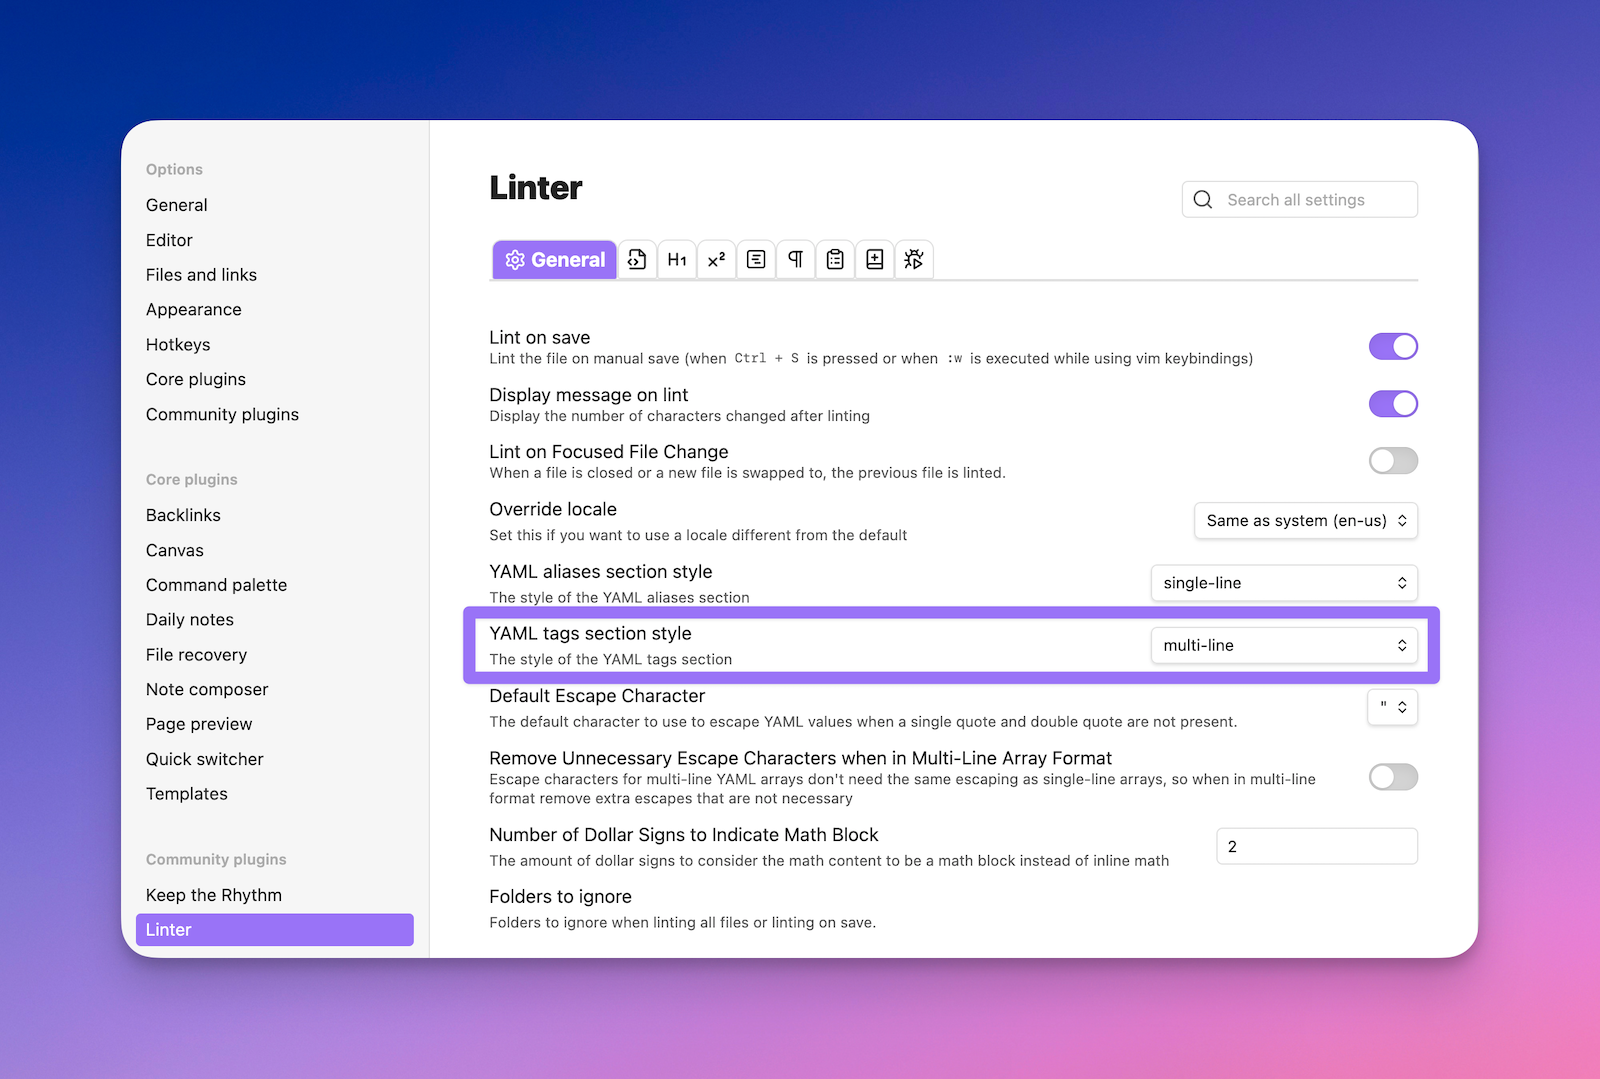
multi-line.Next, go to the YAML section and make sure to toggle on the Format YAML Array option.
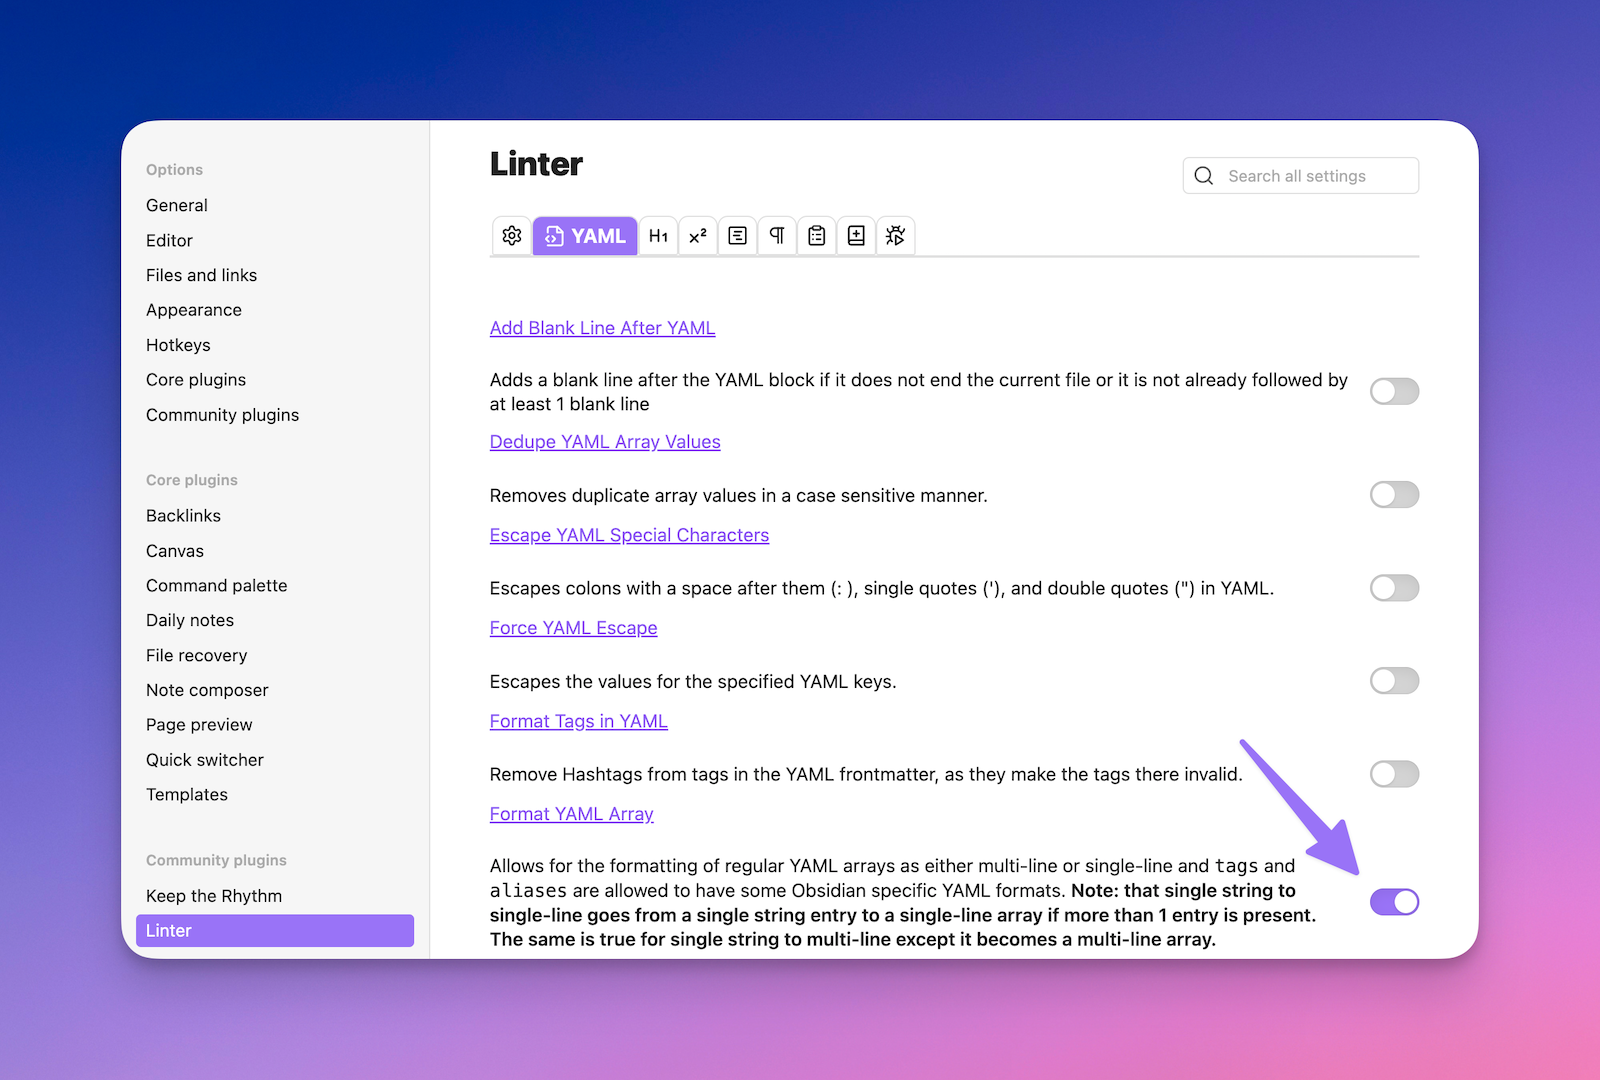
This will open up some new settings, including the Format YAML aliases section and Format YAML tags section, which will both be toggled on already.
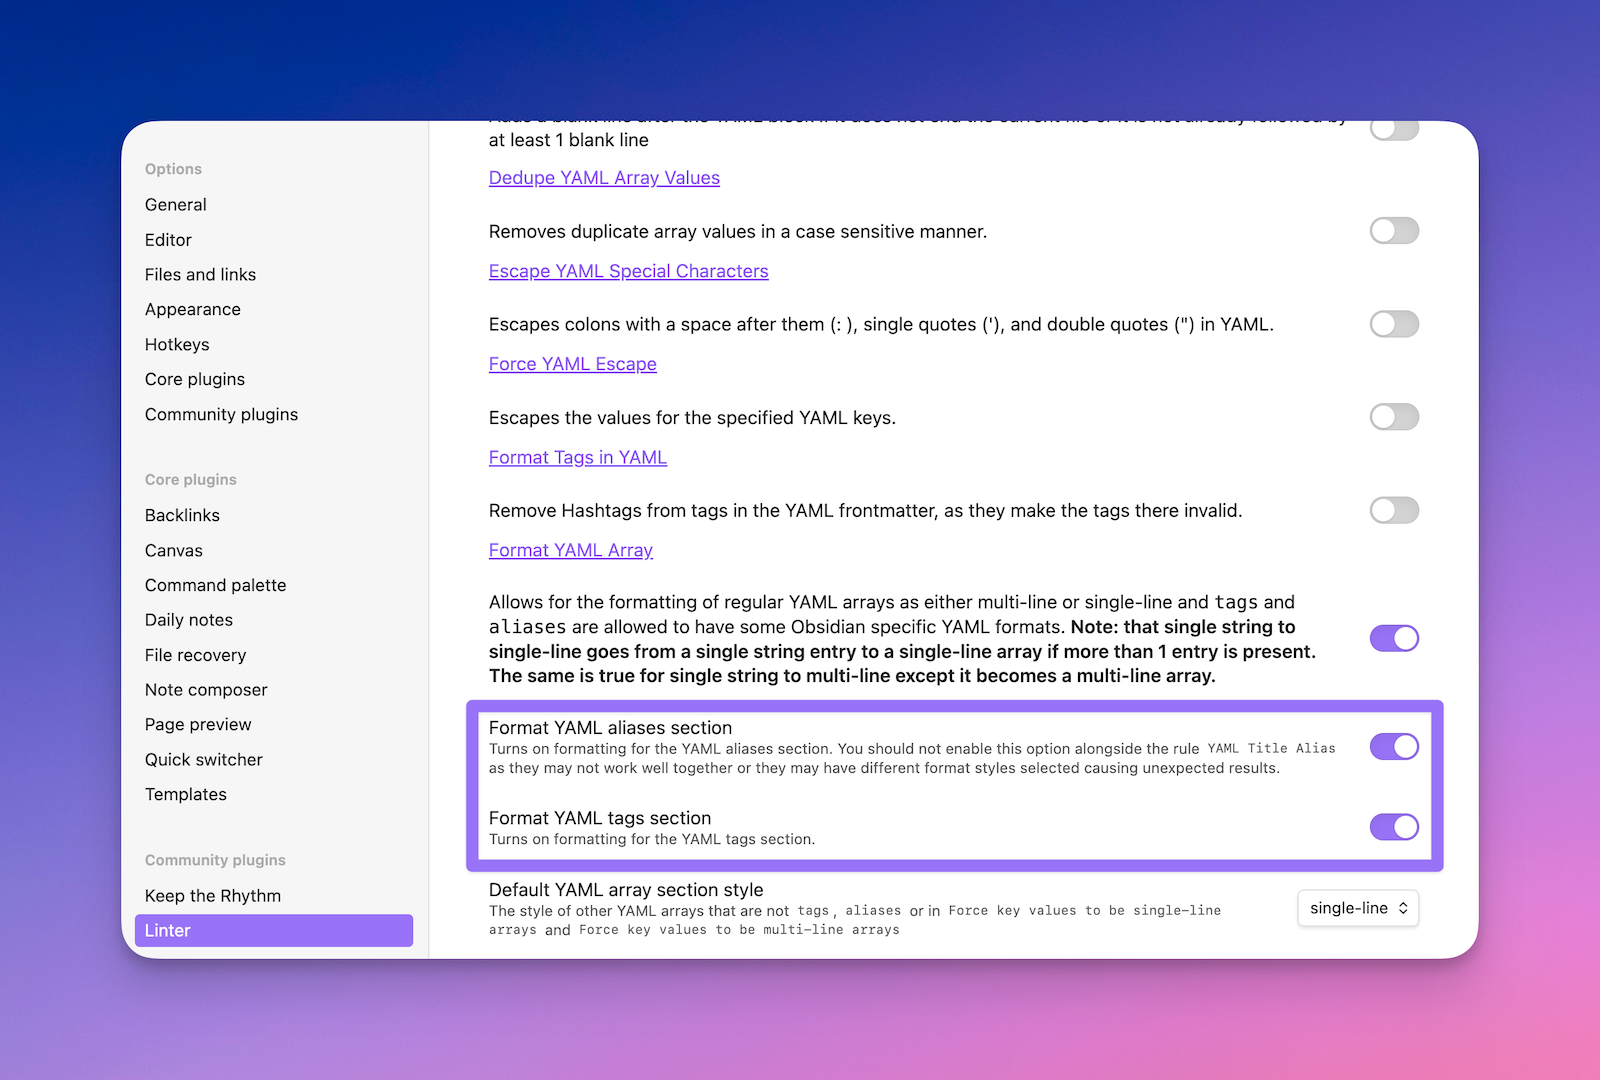
That takes care of two of the properties, but we still need something for the cssclasses. So next, make sure that in the Force key values to be multi-line arrays box, you add the cssclasses property.
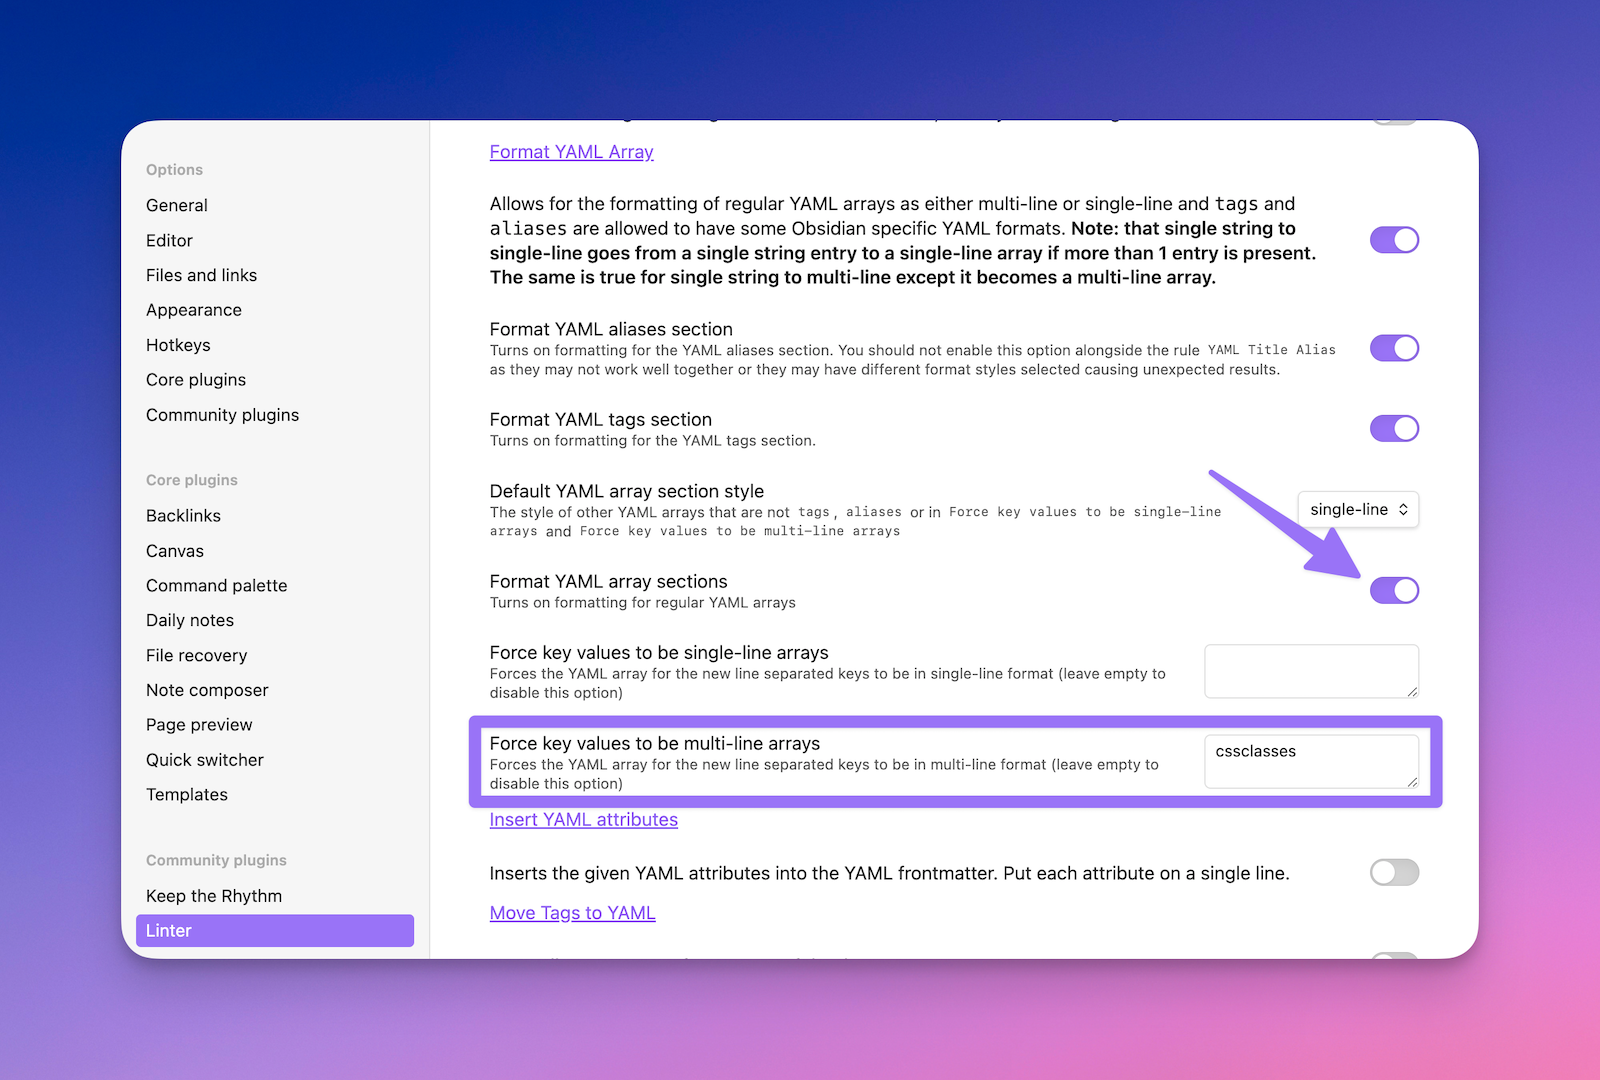
cssclasses to the Force key values to be multi-line arrays box. This will tell Linter to apply the same formatting to all cssclasses properties that appear in your notes.
Next, go back to Obsidian and open the Command Palette by hitting ⌘-P (or ⌃-P on Windows), and then run the Linter: Lint all files in the vault command.
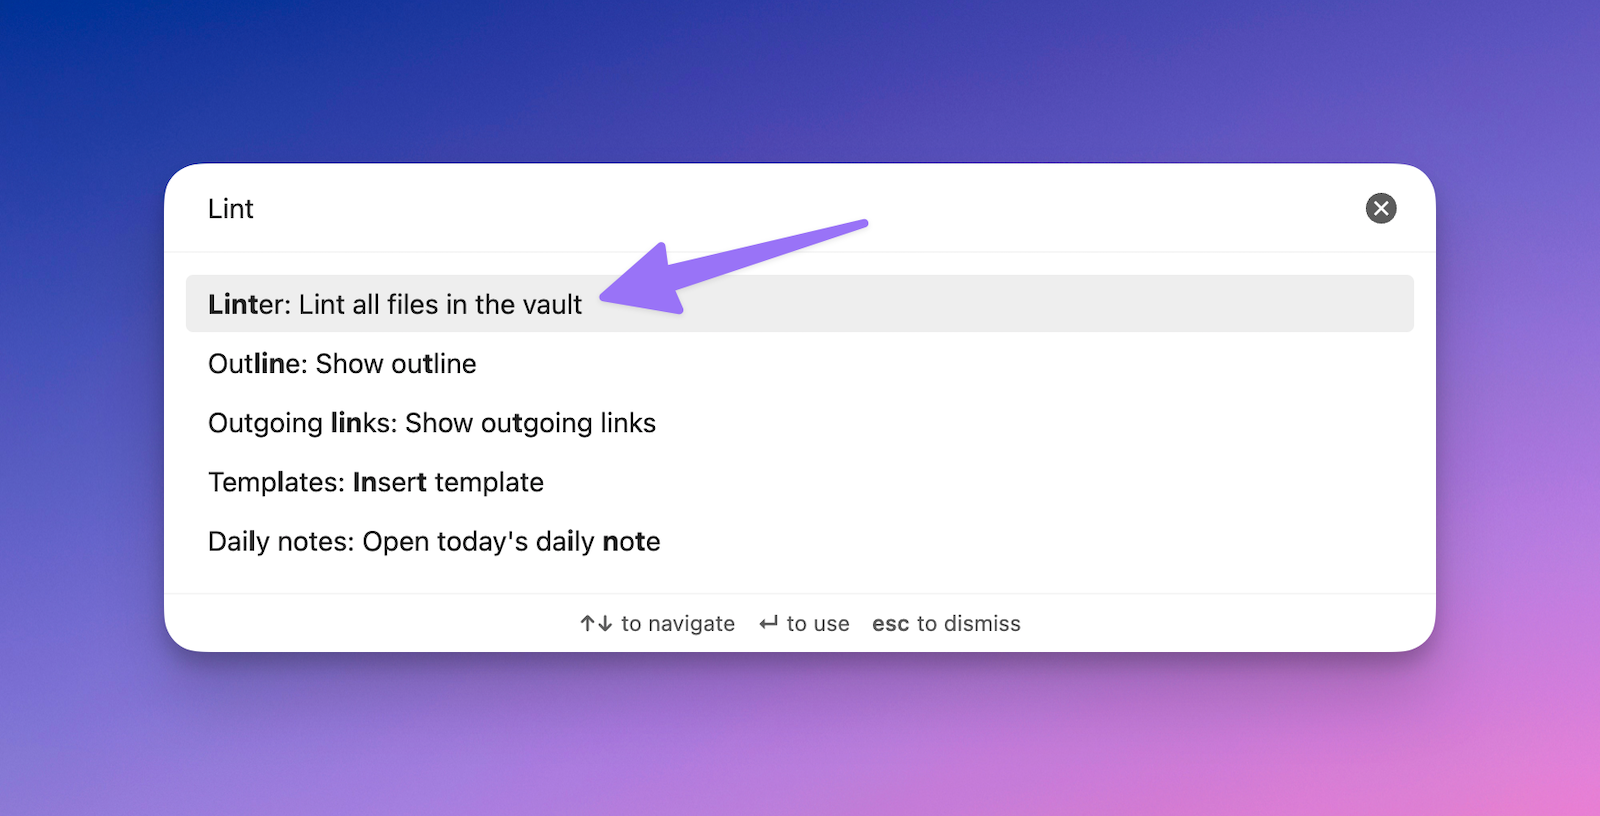
If you've set everything up correctly, it should quickly fix the formatting for all of your tags, aliases, and cssclasses properties into lists that can now be read by Obsidian 1.9


