


Properties in Obsidian are insanely powerful. But most Obsidian users don't really know what to do with that note metadata at the top of their notes.
So in this post, I'm going to walk you through every single property type available in Obsidian. I'll explain exactly how each one works, and show you where to use each type to get the most out of your notes and ideas.
By the time we're done, you'll have a clear roadmap for implementing the property types that will have the biggest impact on your own personal knowledge management (PKM) system.
Want more Obsidian tips, templates, and resources? Grab my free Obsidian Starter Vault and start getting more out of your notes and ideas today.
What are Properties?
Simply put, properties are structured metadata attached to your notes. This metadata is usually stored as plain text in the Markdown file itself and is visible at the top of your note in Obsidian.
These properties are very flexible and can help you organize, sort, filter, and query your information in some pretty powerful ways.
If you've used Notion before, you're probably already familiar with properties, as that's how you sort information in your Notion database. Using properties, you can do things like show everything that is assigned to a specific person, is due on a specific day, or meets some other filtering criteria.
In Obsidian, properties work exactly the same way. The only difference is that the whole thing sits on top of plain text files, so if you ever want to move your notes to a different system or app in the future, you can.
Before using properties in Obsidian, you'll want to go to Settings → Core plugins and make sure that the Properties View option is toggled on.
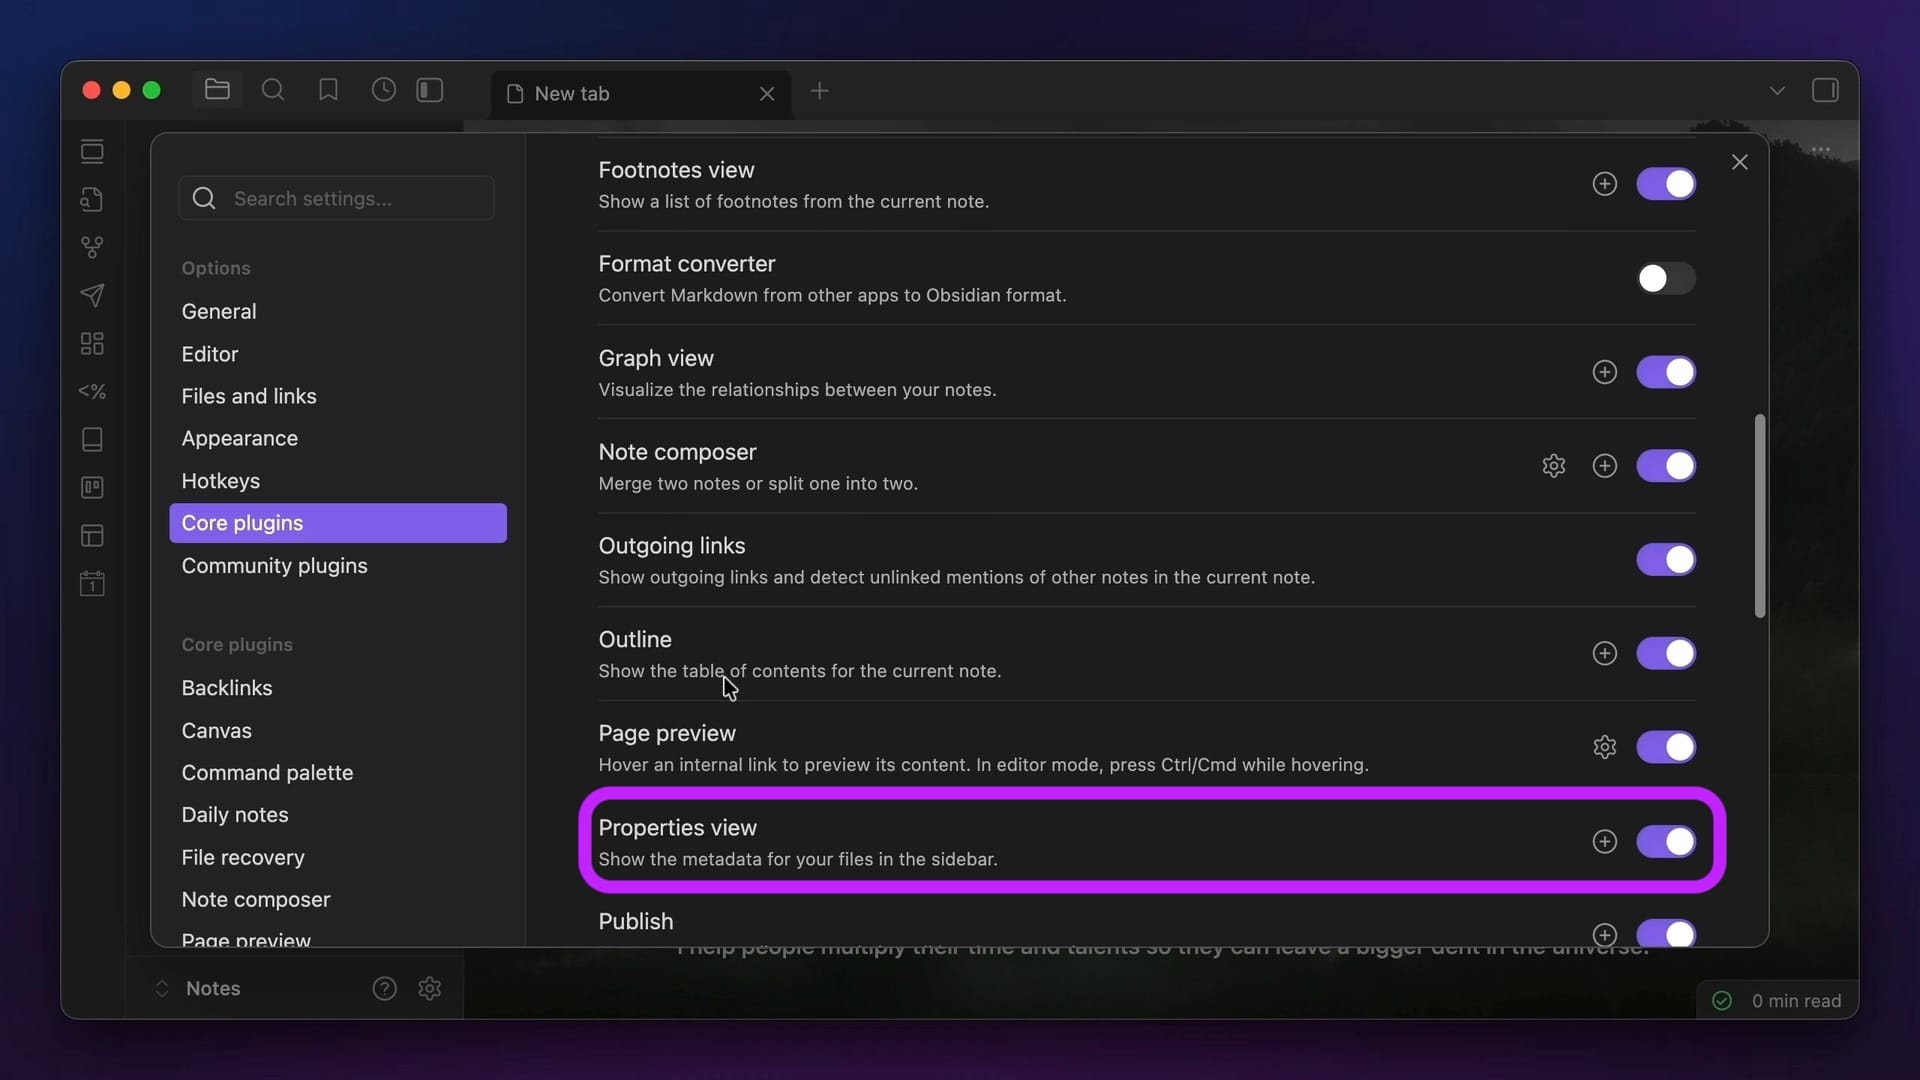
You technically don't need this on in order to start using properties themselves, but this will allow you to see the properties for the file in your right sidebar if you want, as well as view the list of all properties in your vault.
Once you do this, you're ready to start adding properties to your Obsidian notes.
Adding Properties
To add Properties to your notes in Obsidian, simply type —-- at the top of your Obsidian note. This will create a Properties section at the top of the note, and you can create a property by simply typing the name of the property you want to create.
If this doesn't work for you, make sure your settings are configured correctly. Go to Settings → General → Editor, scroll to the Display section, and make sure that Properties in document is set to Visible.

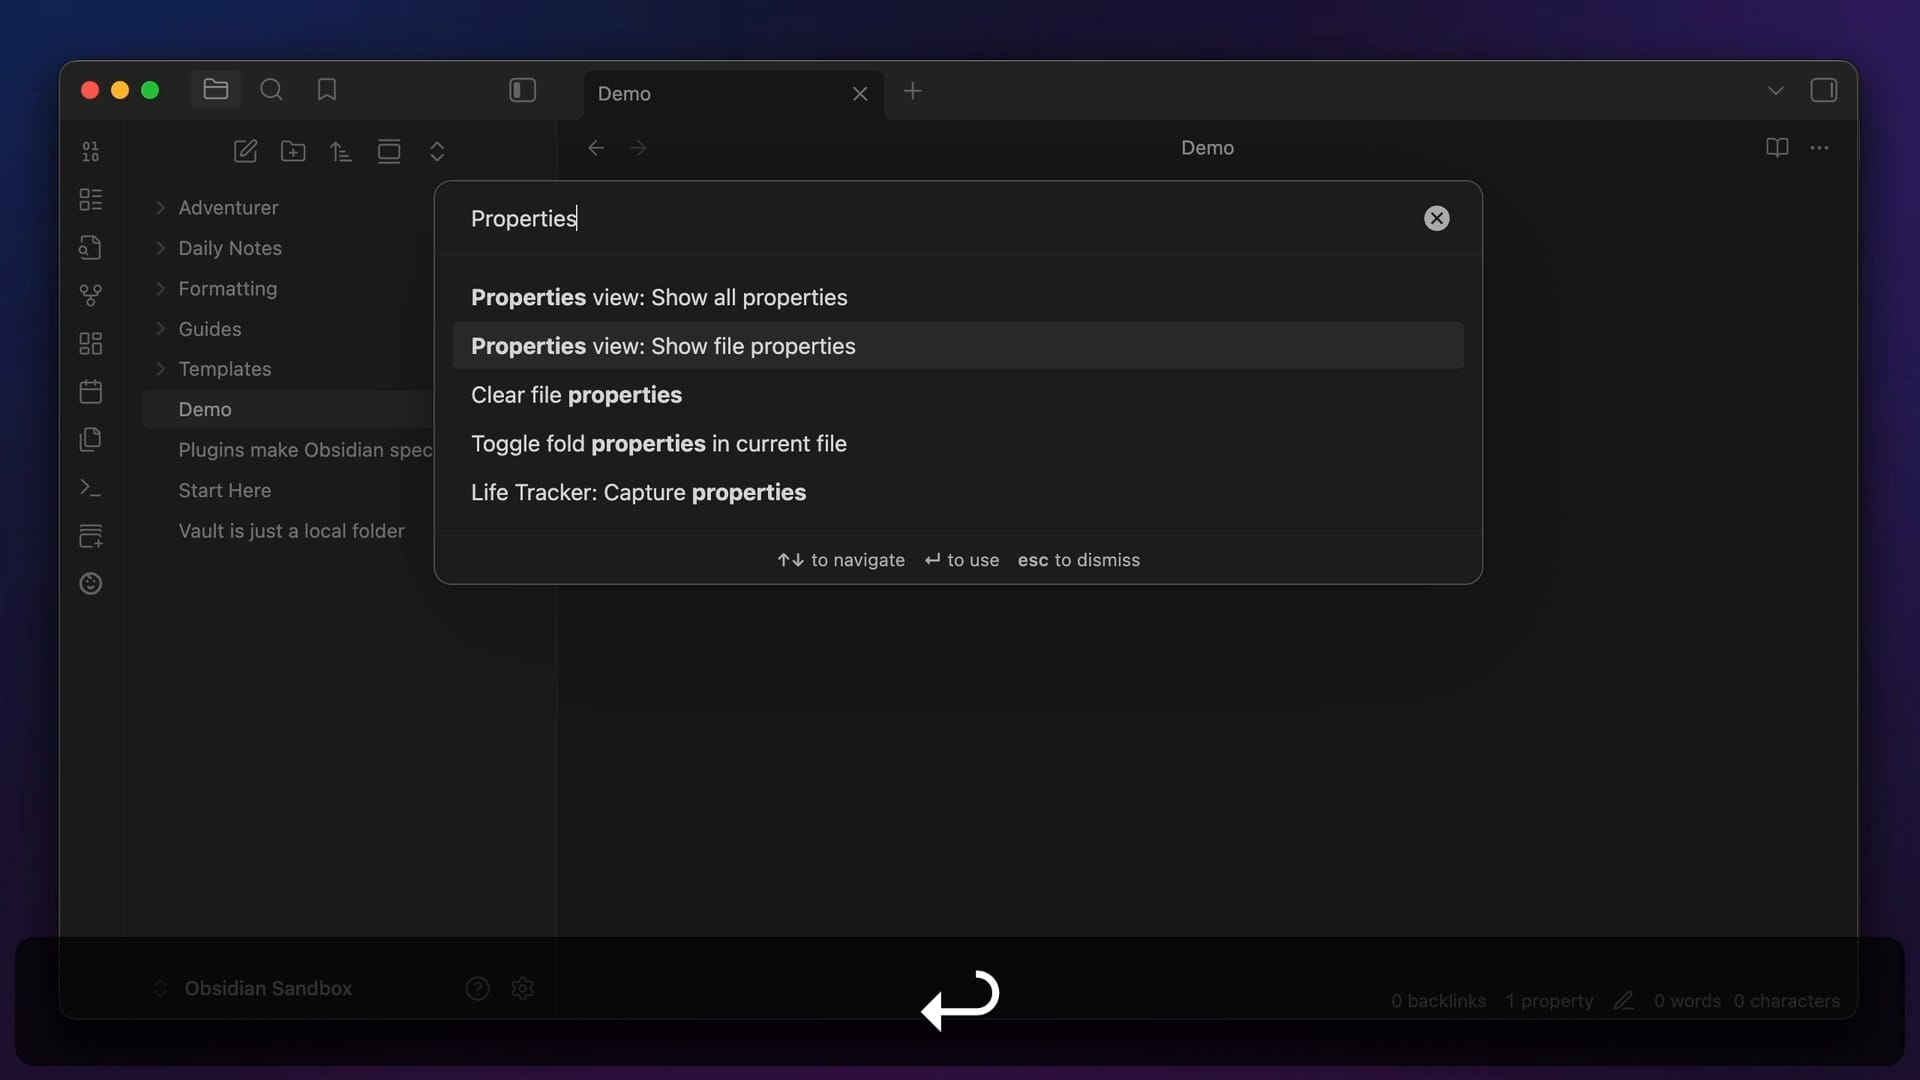
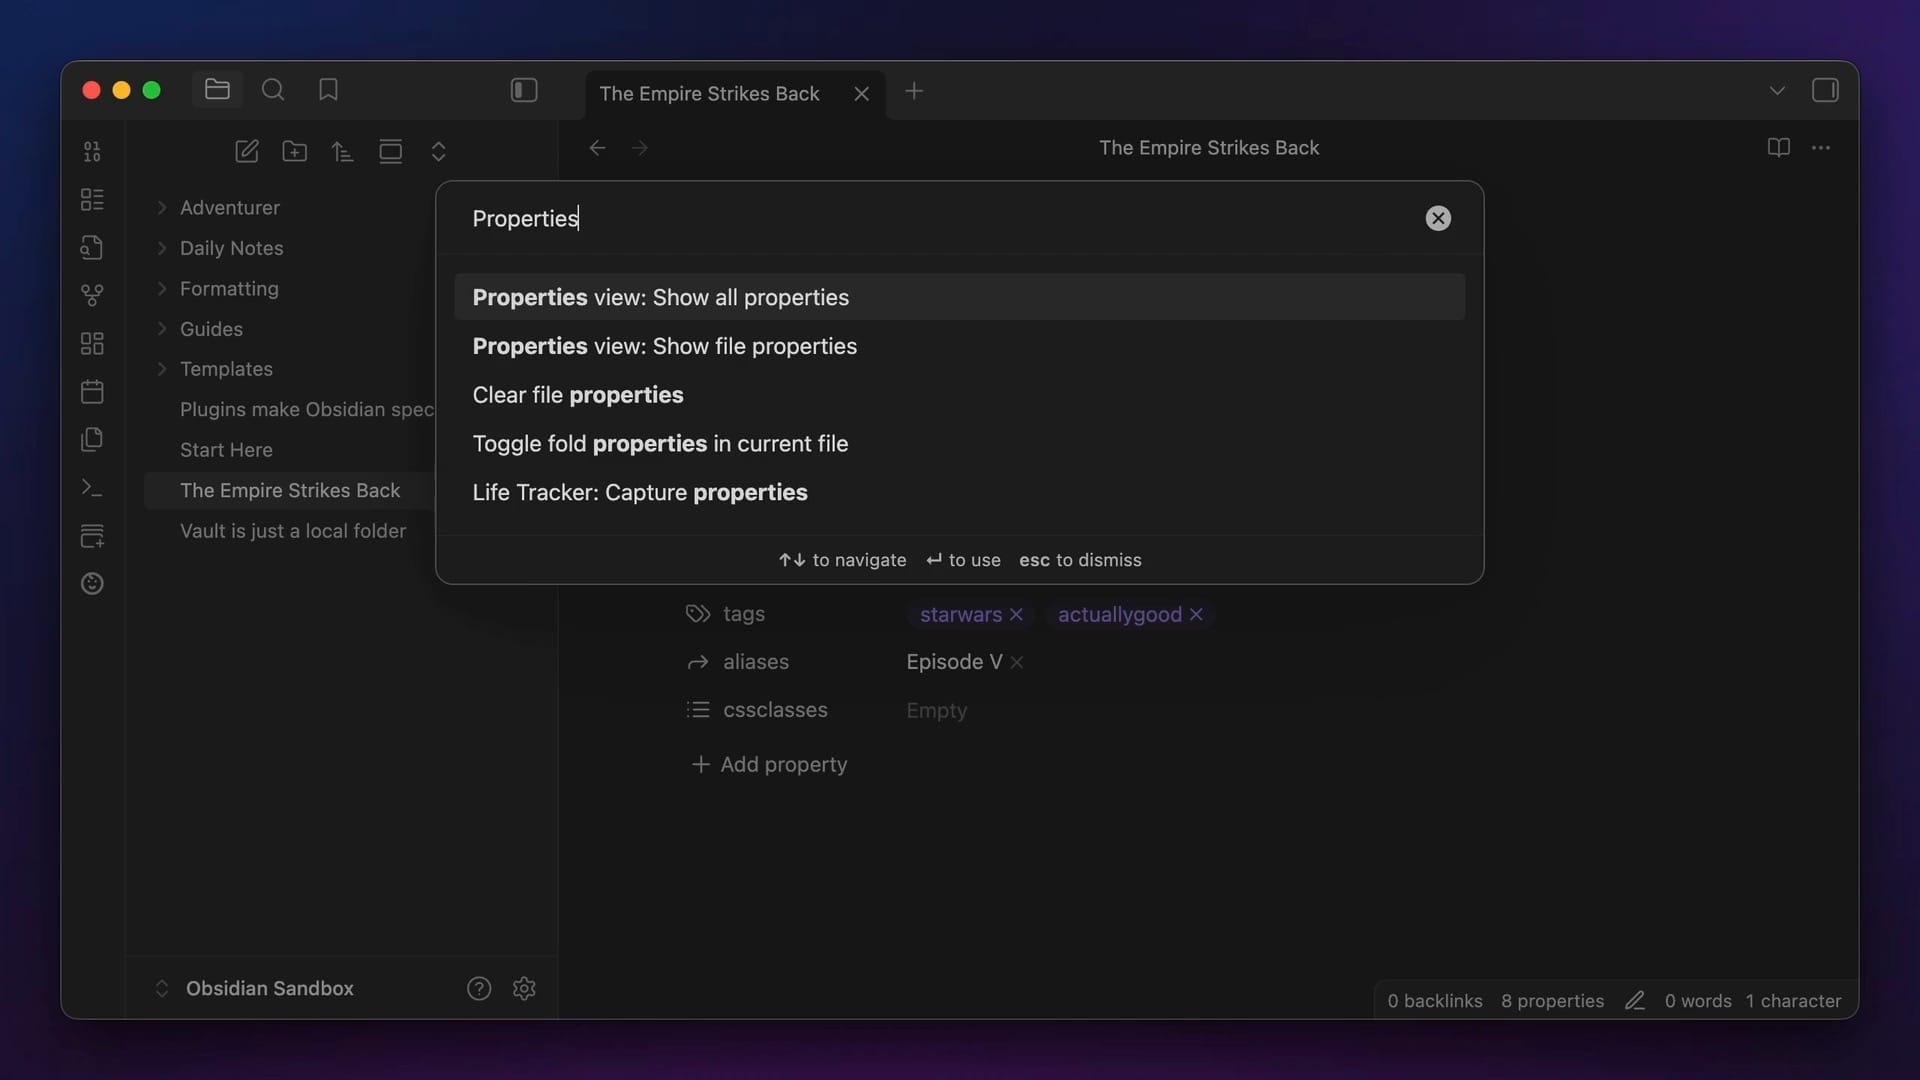
The other options here are Hidden (which hides the properties from the note altogether), and Source (which only shows the raw YAML format) . You can still view and edit properties for a note even if you have them hidden by opening the Command Palette with ⌘-P on Mac (or ⌃-P on Windows) and selecting the Properties View: Show file properties option.
This will open the File Properties in your right sidebar, and you can interact with the properties there like you could if they were inserted at the top of your note.
Just like when you create notes, you can use autocomplete when creating properties. Any properties that you have previously used will show up, and you'll be able to select the one you want from a drop-down list.
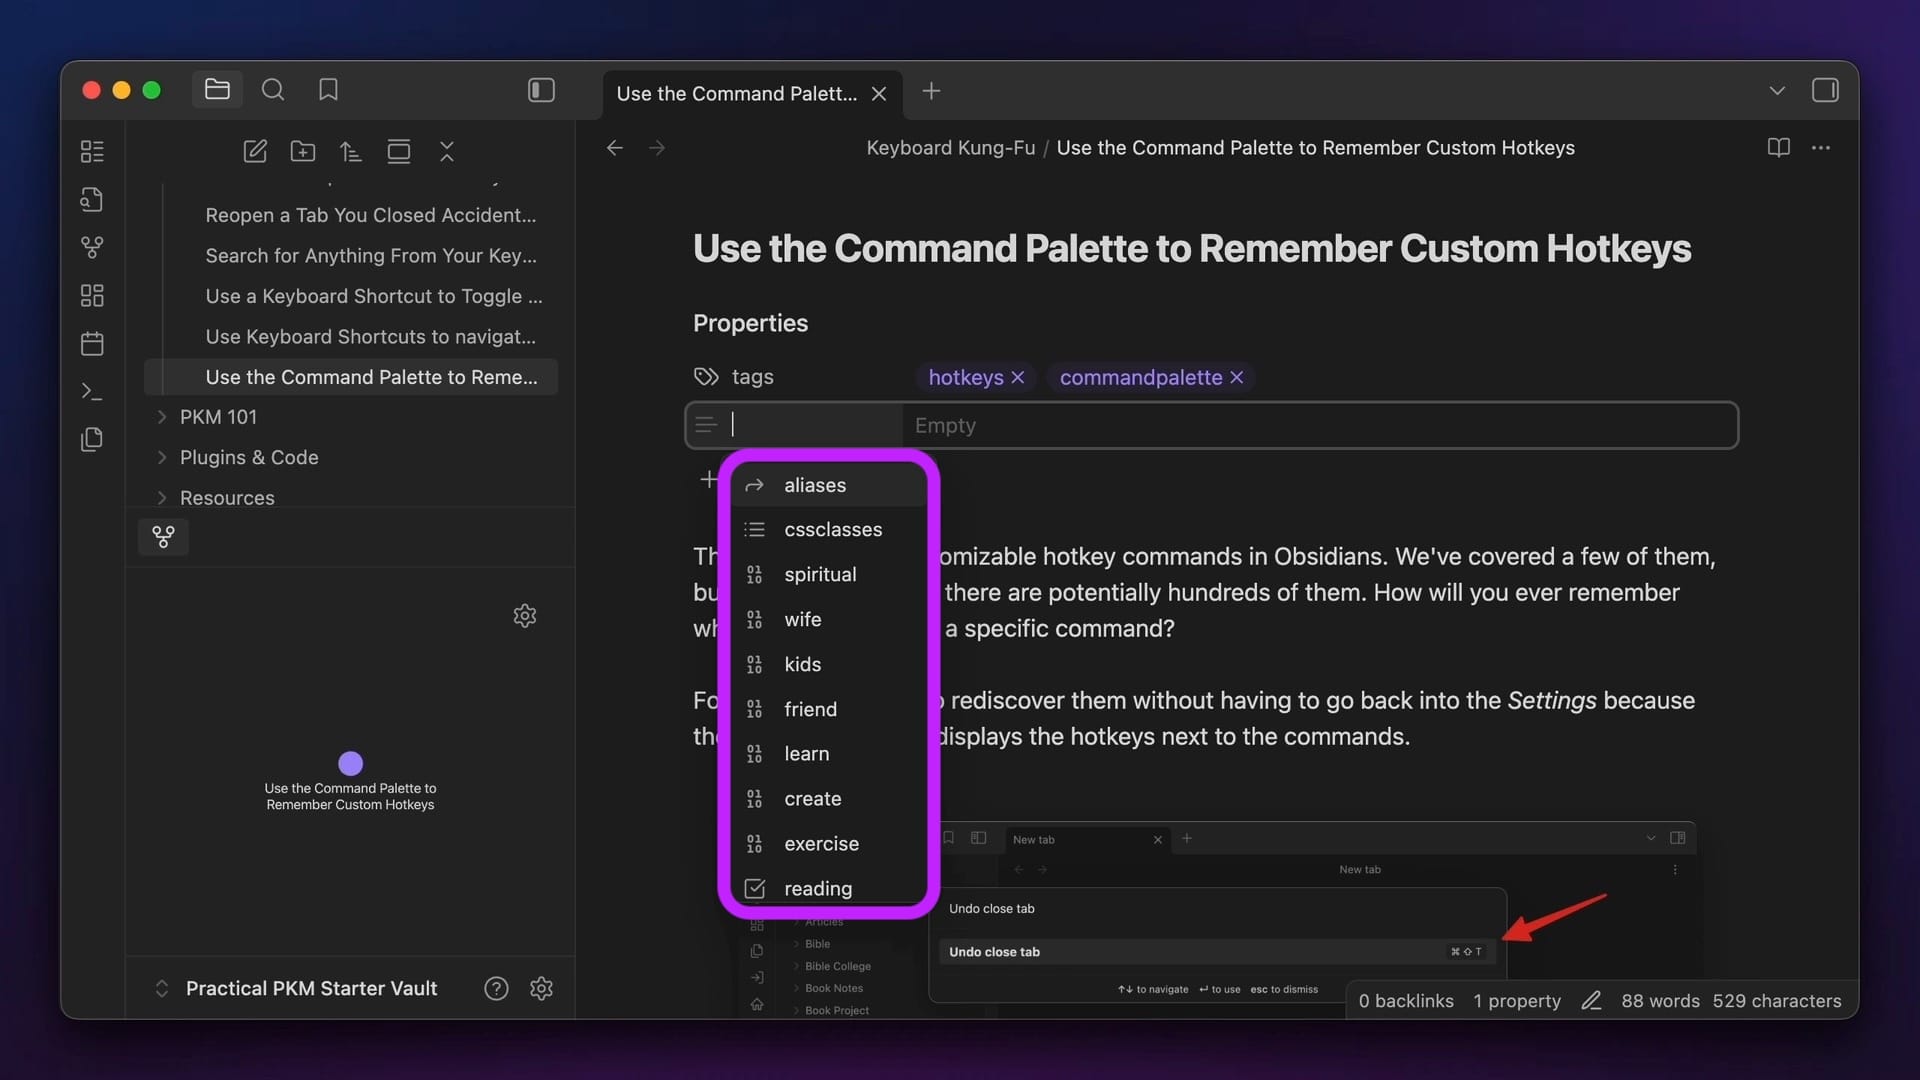
This will help make sure you don't accidentally create multiple similar properties.
You can also add properties by invoking the Command Palette and selecting the Add file property command, as well as by using the keyboard shortcut ⌘-; (or ⌃-; on Windows).
Once you add a property, you'll see that it has two parts:
- the property name (or key)
- the property value
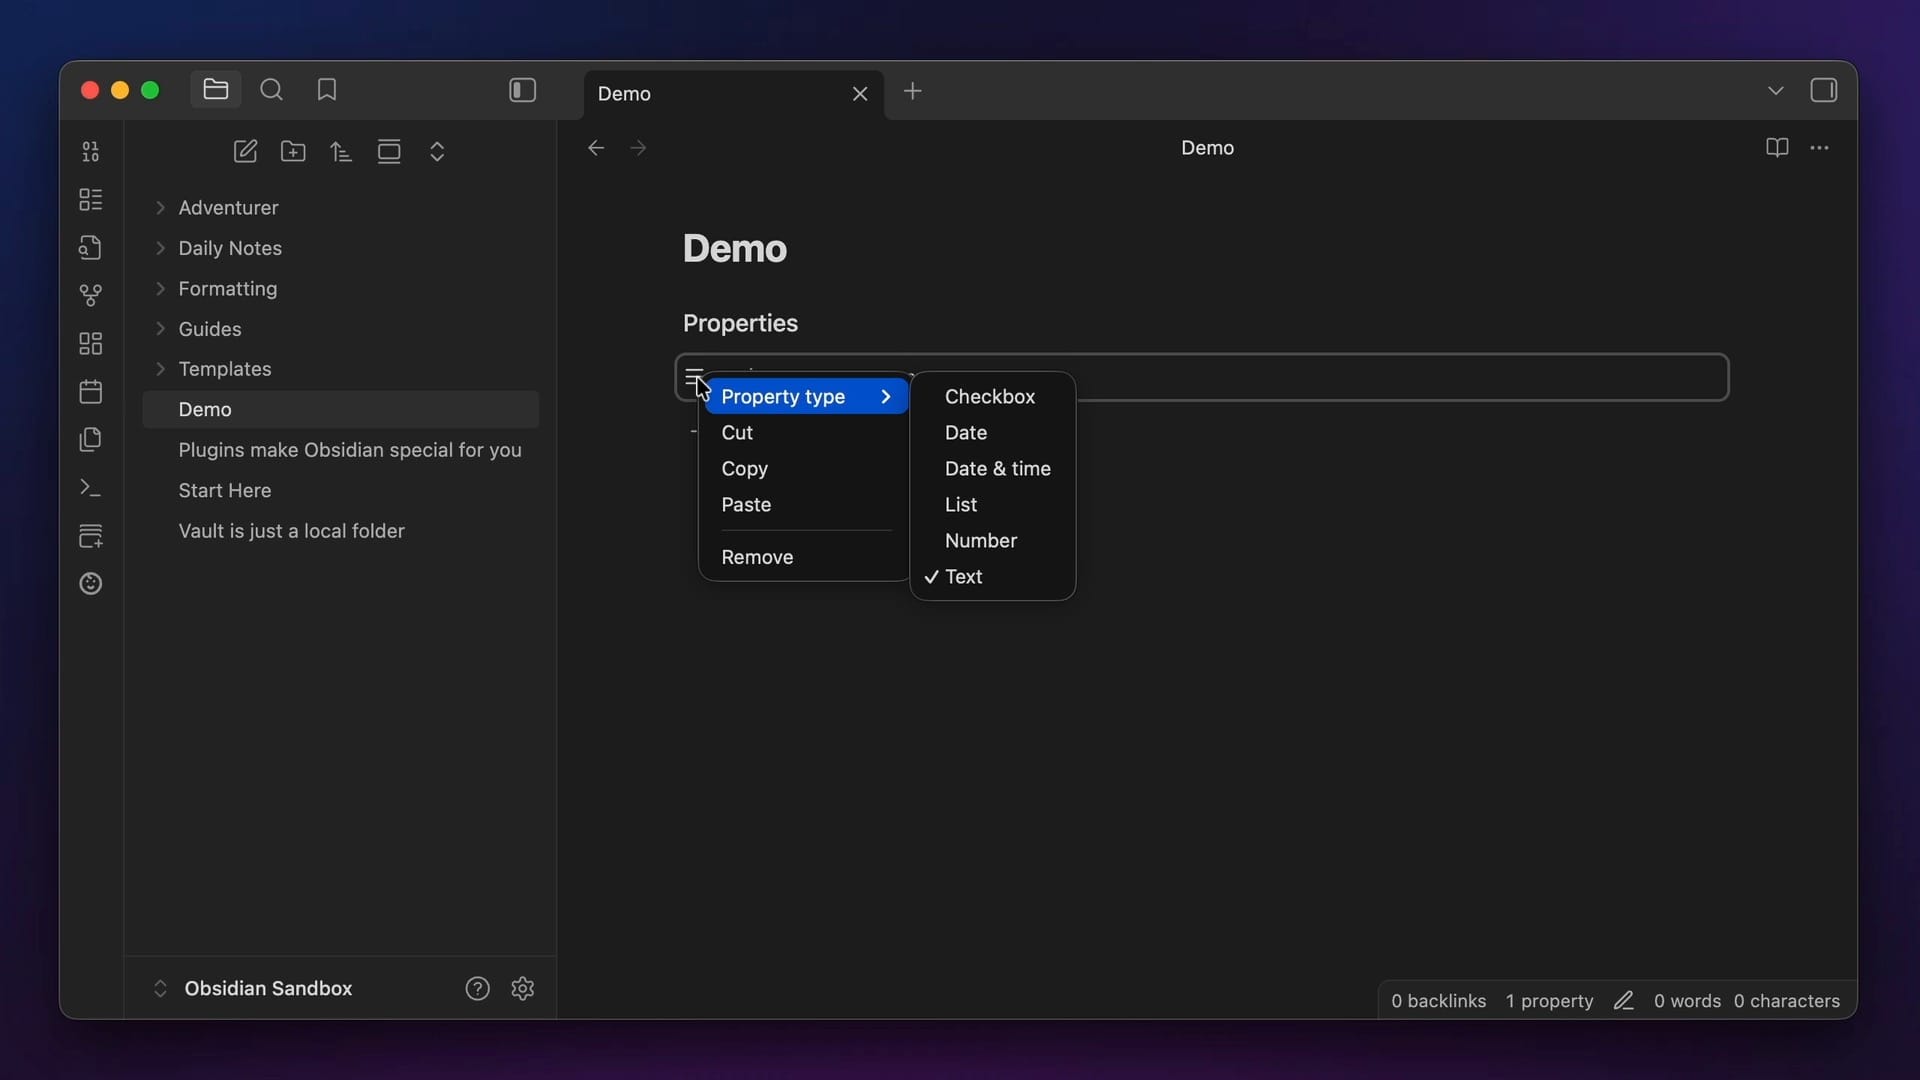
Together, these make up what is known as a key value pair. You can use the keyboard to edit either the key or the value, and if you right-click on the icon to the left of the key, you can choose the type of property you want to use.
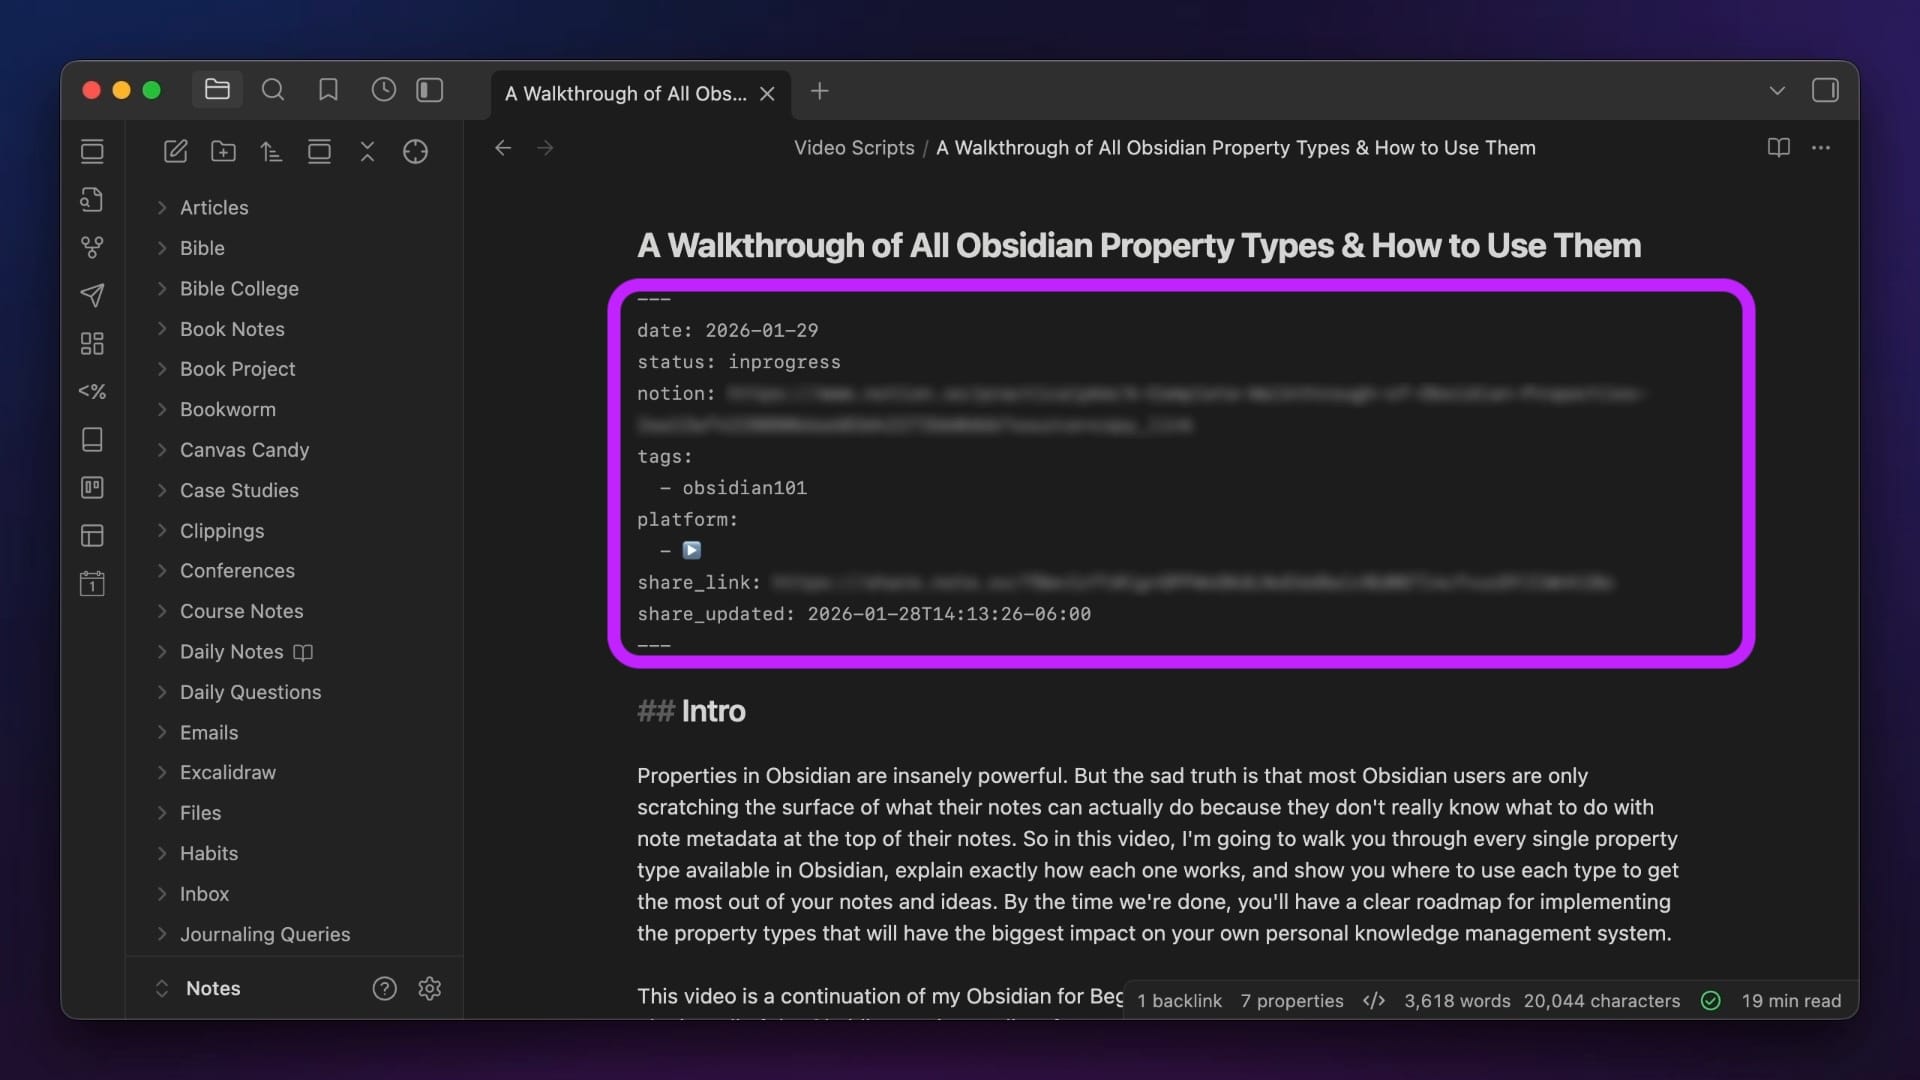
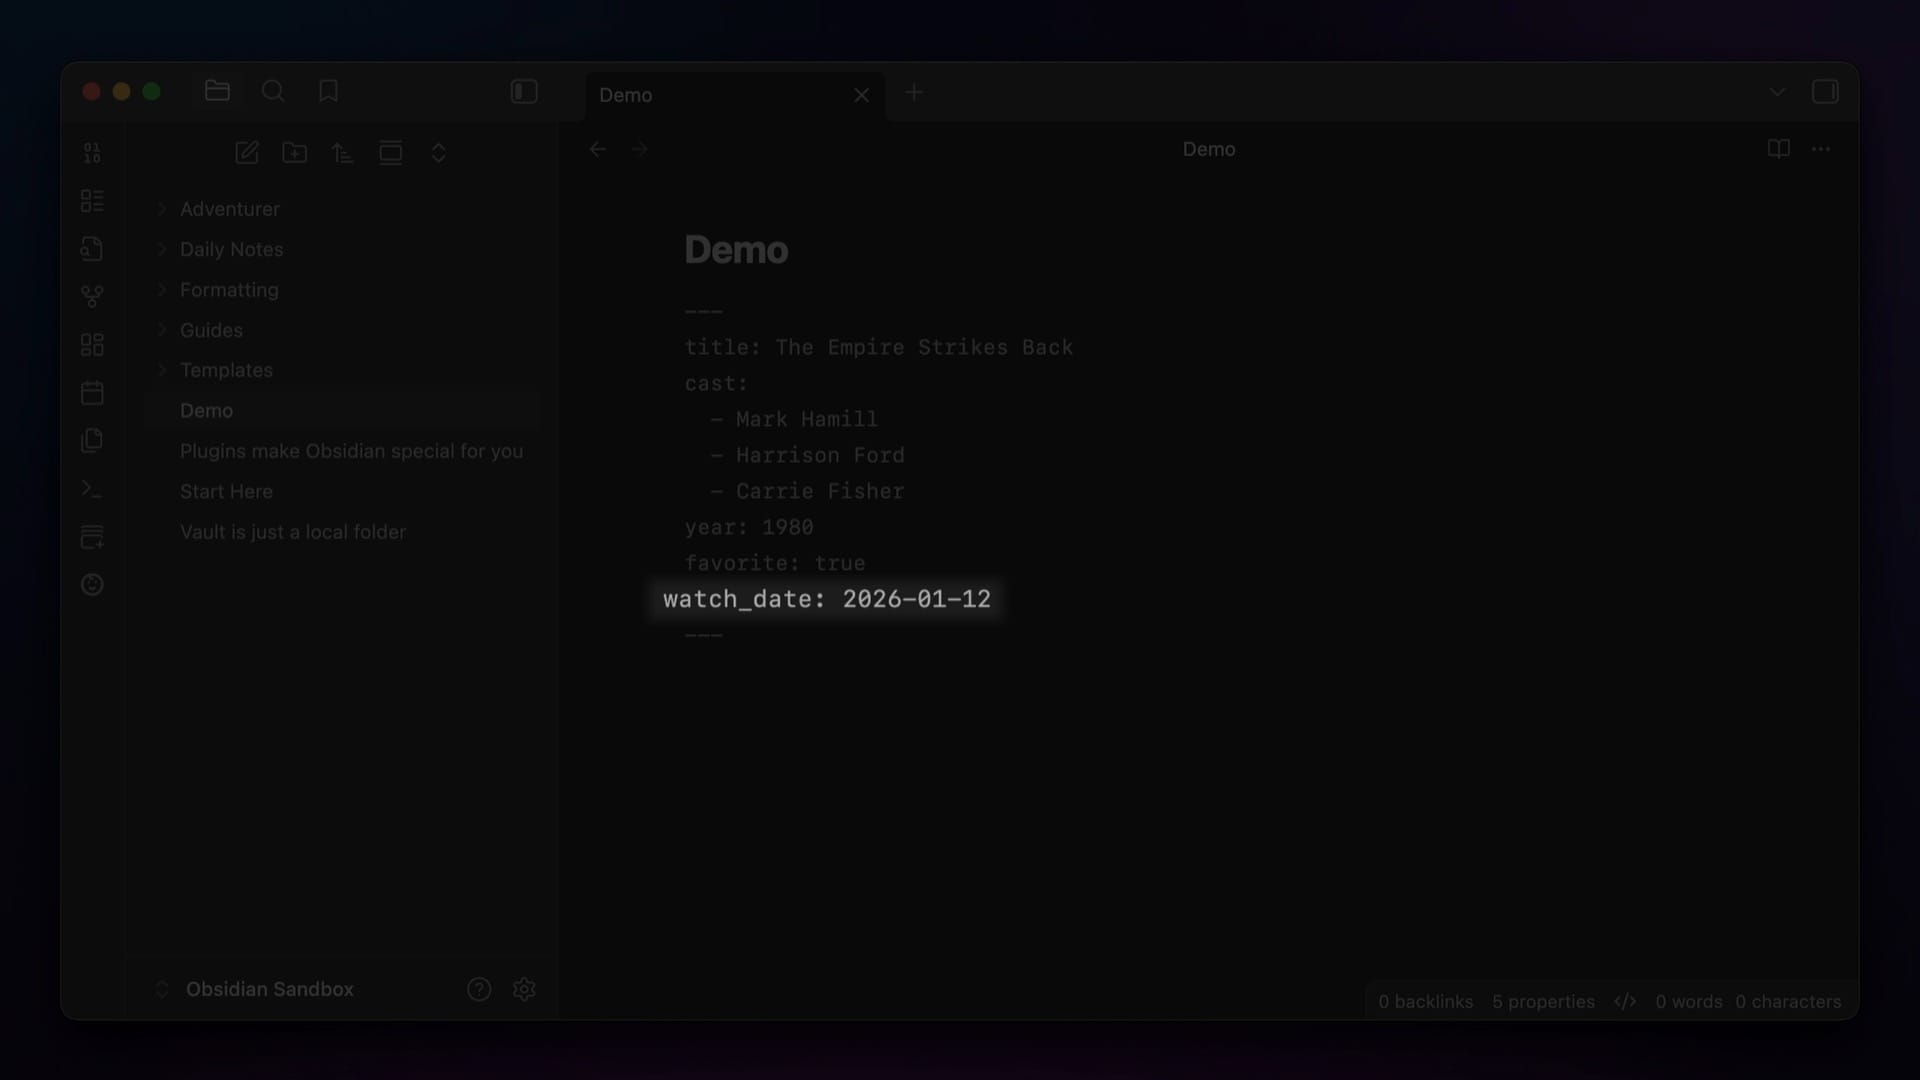
The cool thing about Properties is that while they appear as this nice, clean user interface at the top of your notes by default, they're actually stored as plain text. In fact, here's what it looks like in Source Mode:
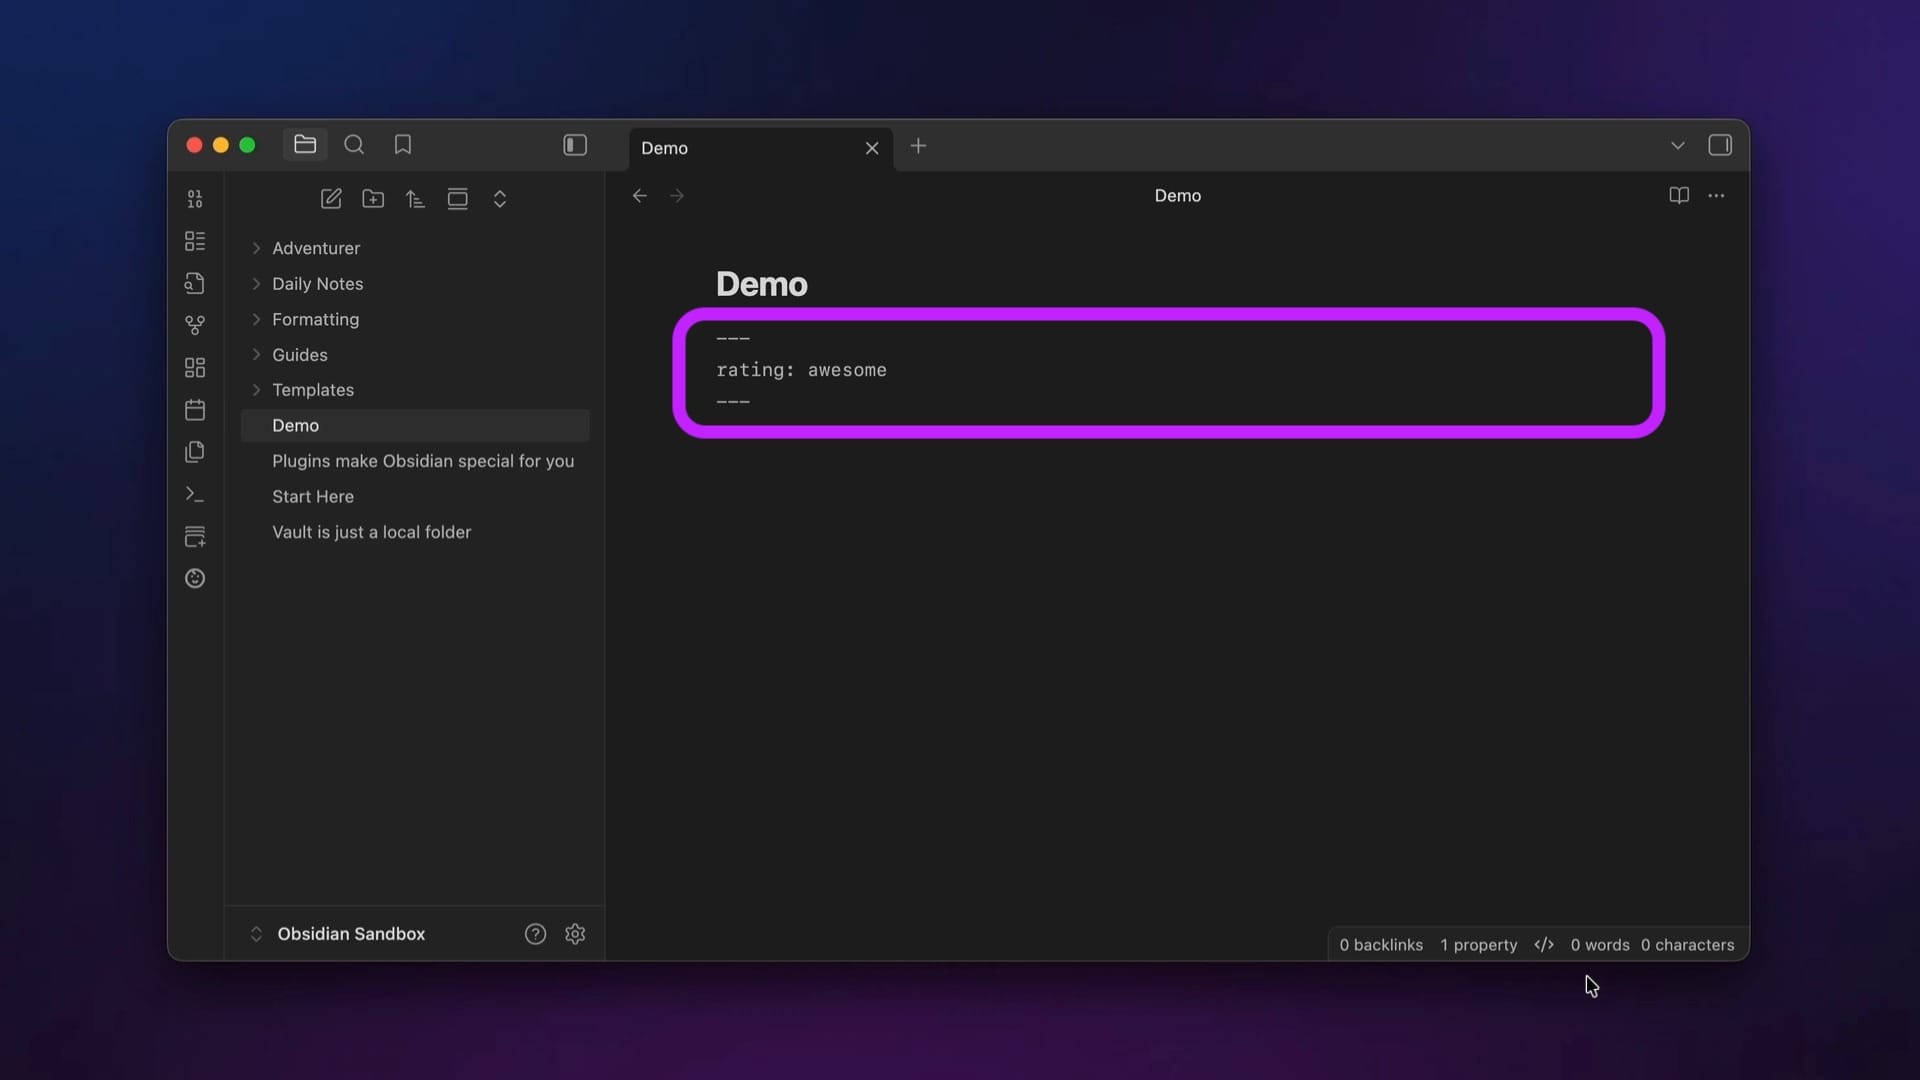
This means your notes are still portable and can be read by other tools if you ever need to migrate from Obsidian. And while visual properties are fairly new, the formatting of this frontmatter is actually the same YAML-formatted metadata that Obsidian has supported from the very beginning.
Property Types
There are 6 different property types in Obsidian:
- Text
- List
- Number
- Checkbox
- Date
- Date & Time
Let's break these down individually and cover what each property is, how it works, and some examples of when to use it.
Text
Text properties do exactly what they say on the tin: contain a single line of text. This is the default property type, and it's really flexible.
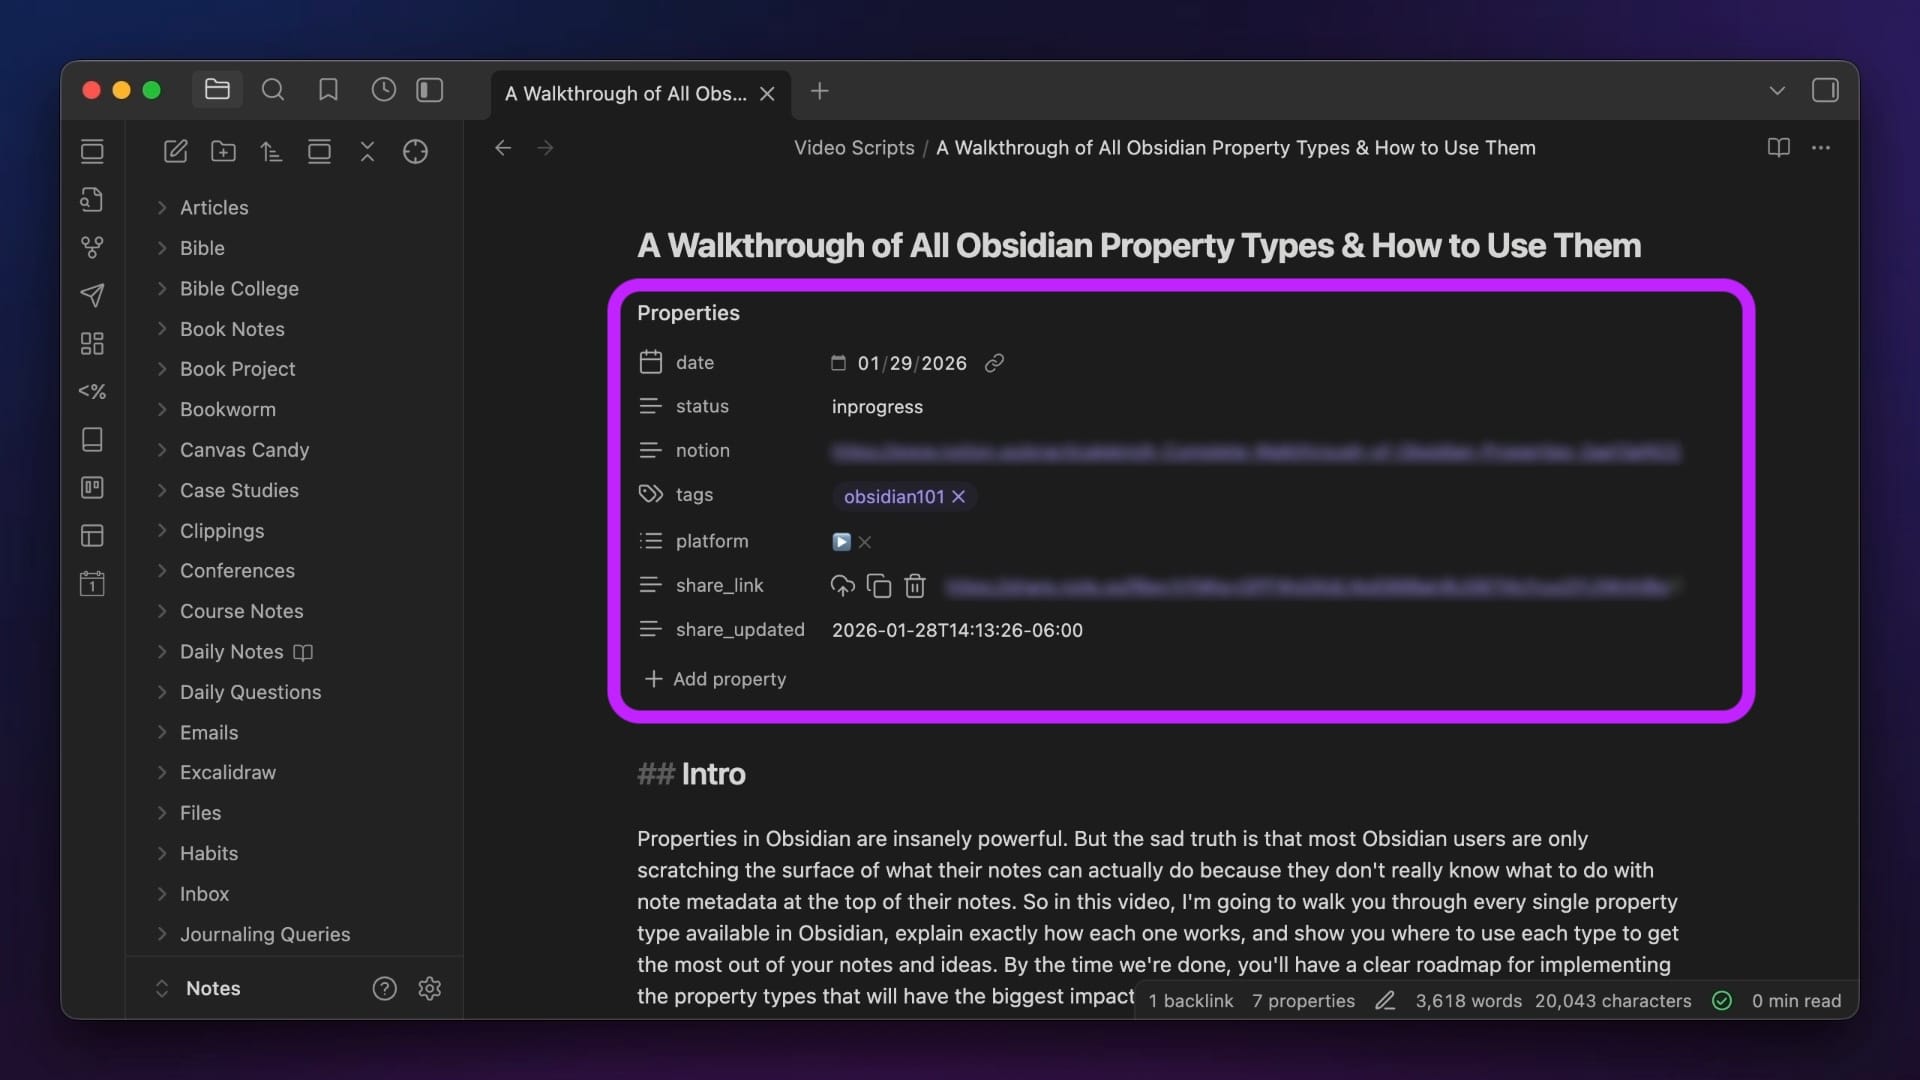
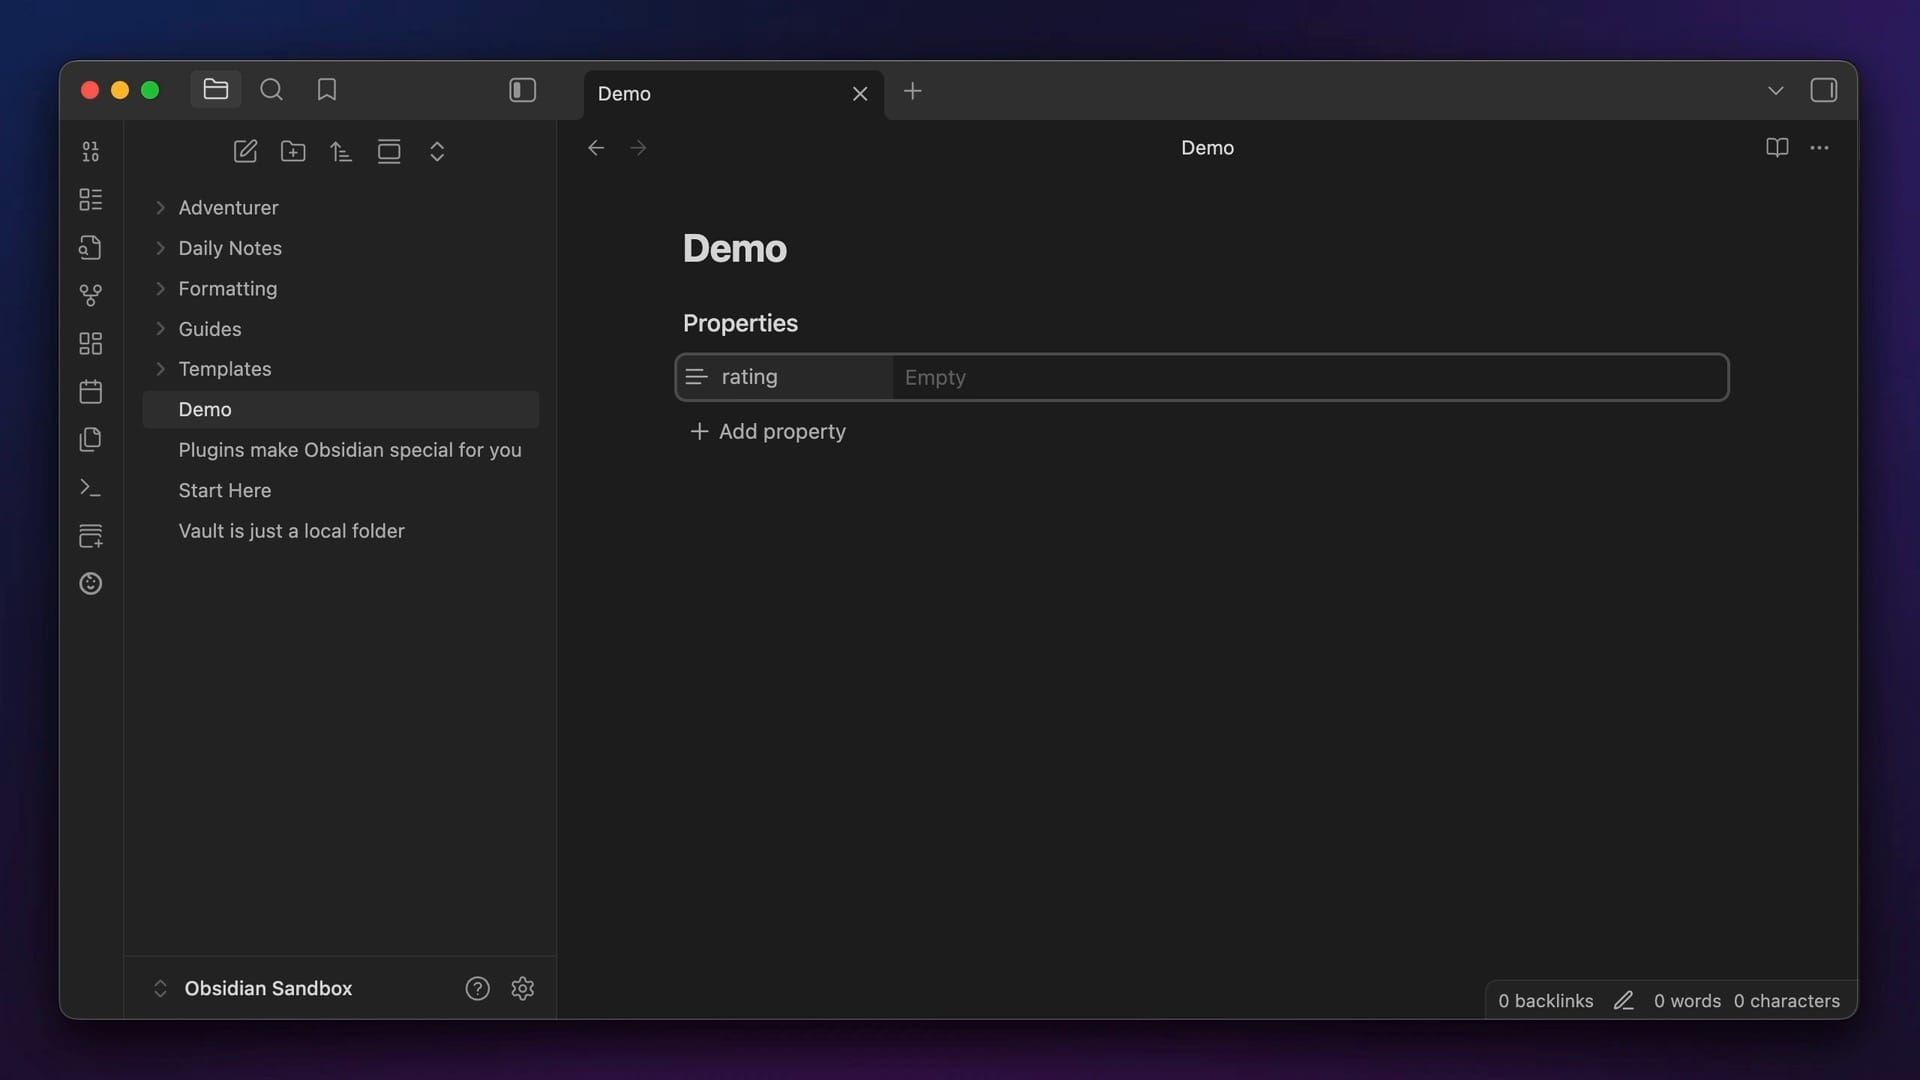
To create a text property, just type the text that you want, and the whole string will be considered the value for the property. One way I like to use text properties is for the status property that I assign to all my creative projects:
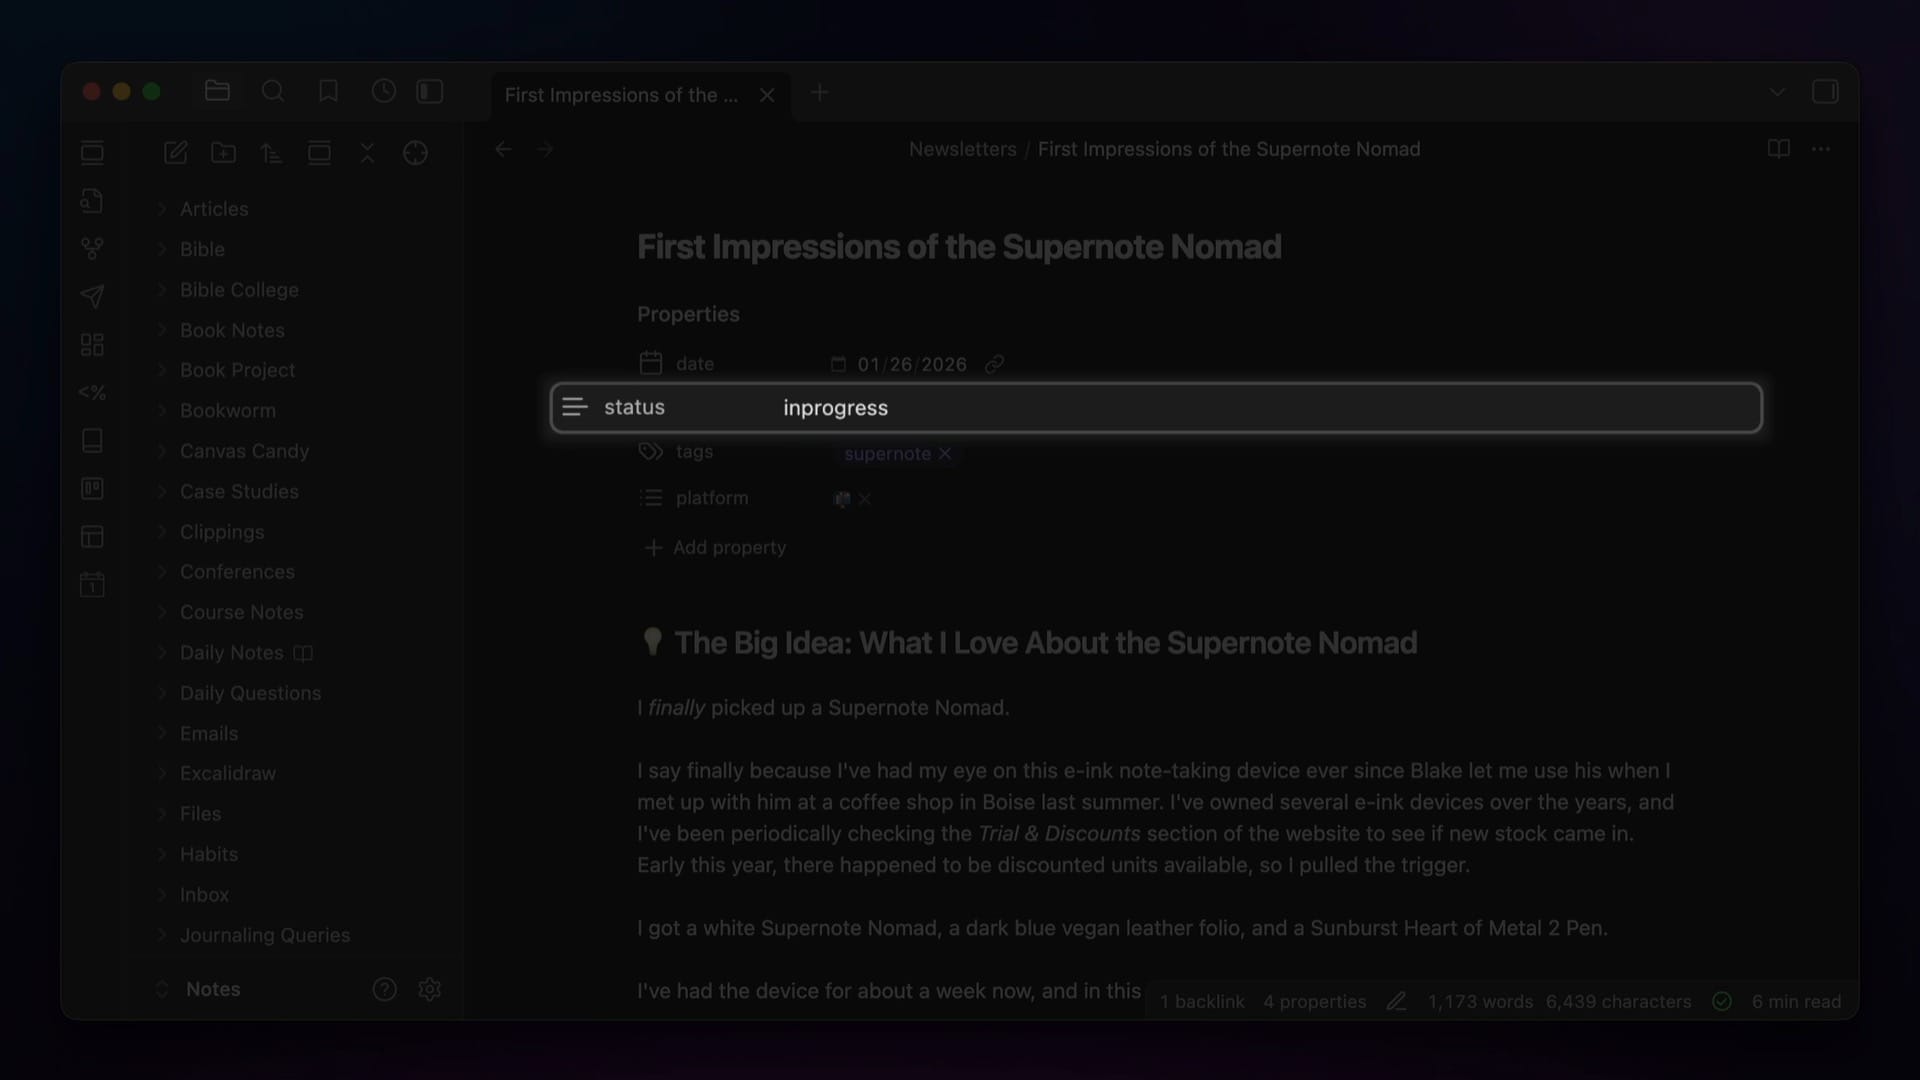
status property at the top of an Obsidian note.As I work on the newsletter, I'll update the property from backlog to inprogress to published.
I also use a text property in the metadata for my book notes, where I assign a rating to the book from 1 to 5 stars. The cool thing about these text properties is that they allow you to autocomplete any value you've previously used, so because I have ⭐ through ⭐⭐⭐⭐⭐ ratings in my vault, I can just select the number of stars from a drop-down list:
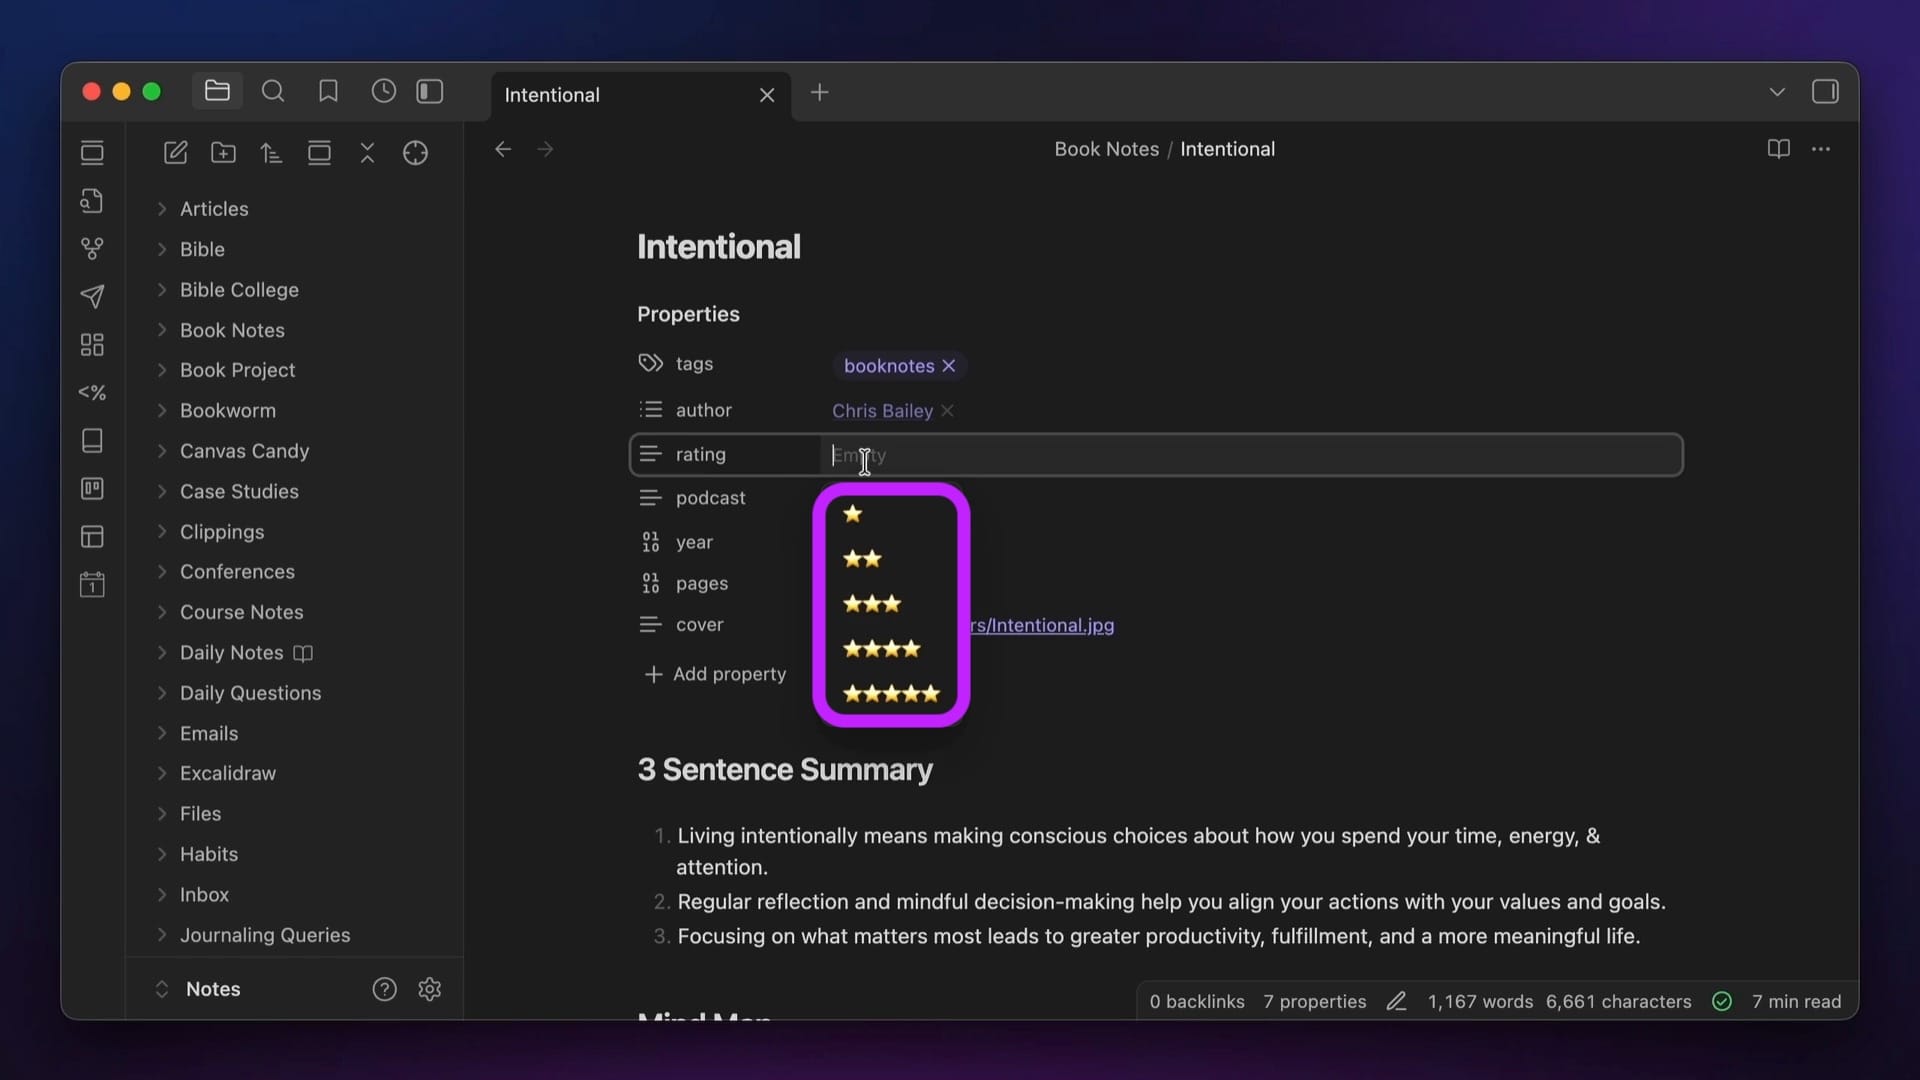
rating property.You can also use links in text properties, though you can't actually use Markdown formatting for them.
If you want to use an external link, you can just paste the entire link in the text field, and Obsidian will make it clickable. For example, when I'm working on my YouTube video scripts, I have a notion property where I paste the URL of the page in Notion where my editor & I go back and forth on thumbnail & title ideas.
Internal links also work in text properties. If you want to add an internal link, you can do so by typing [[ in the value field, just like you would in the body of a note. Just be aware that in the actual text, Obsidian will add quotes around the link.
List
List properties are just like text properties, but can contain multiple values. To add a value to a list property, you simply hit Enter after the text. This creates a value with whatever text you typed and adds an x character near the end that you can use to remove the value if you don't want it anymore.
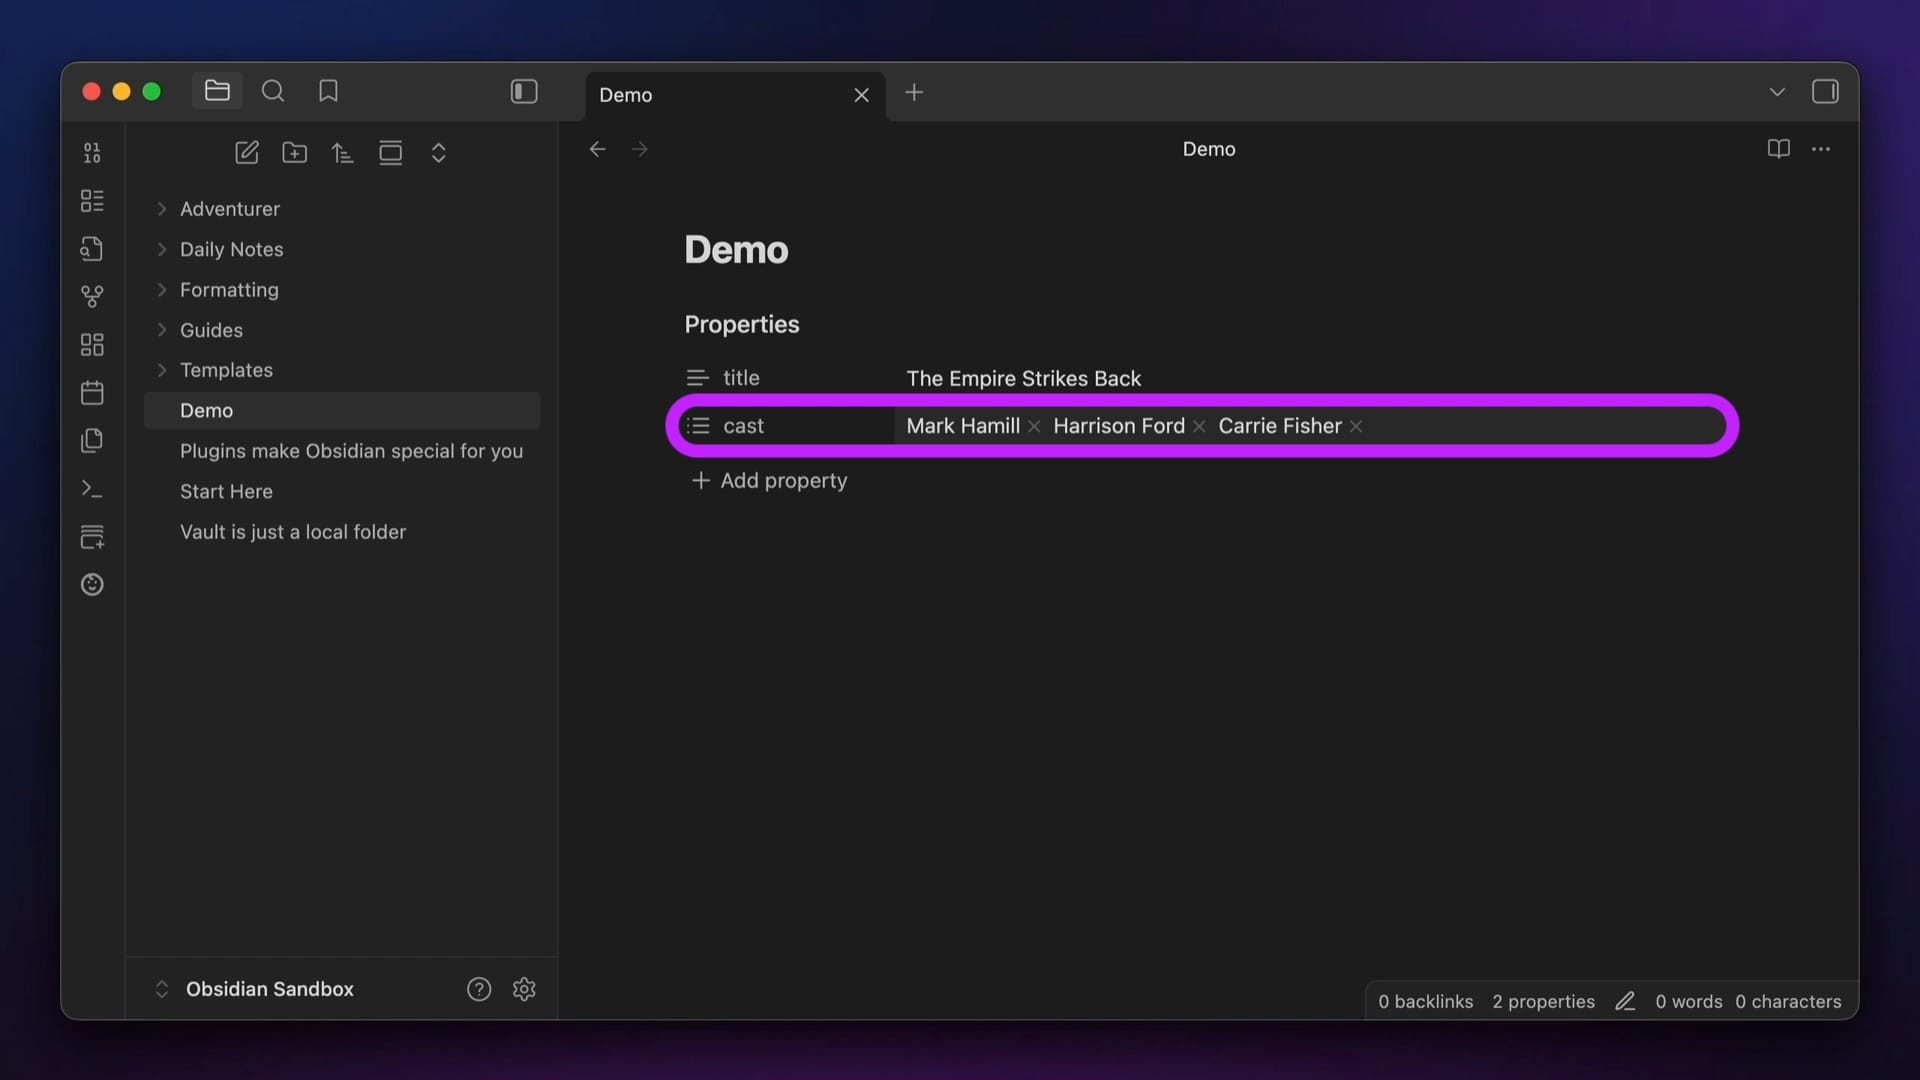
In Source mode, each value in a list property appears on its own line, preceded by a dash and then a space.

The only difference here is that, unlike text properties, you can't use standard URLs for a list property. You can still use internal links, though, as long as they are surrounded by quote marks.
Number
Number properties are very similar to text properties, except that the only thing you can enter in the value field is a literal number. You can use integers and decimals, but no expressions or operators.
I use number properties for the Daily Questions scores I log as part of my daily journaling routine at the top my Daily Note Template.
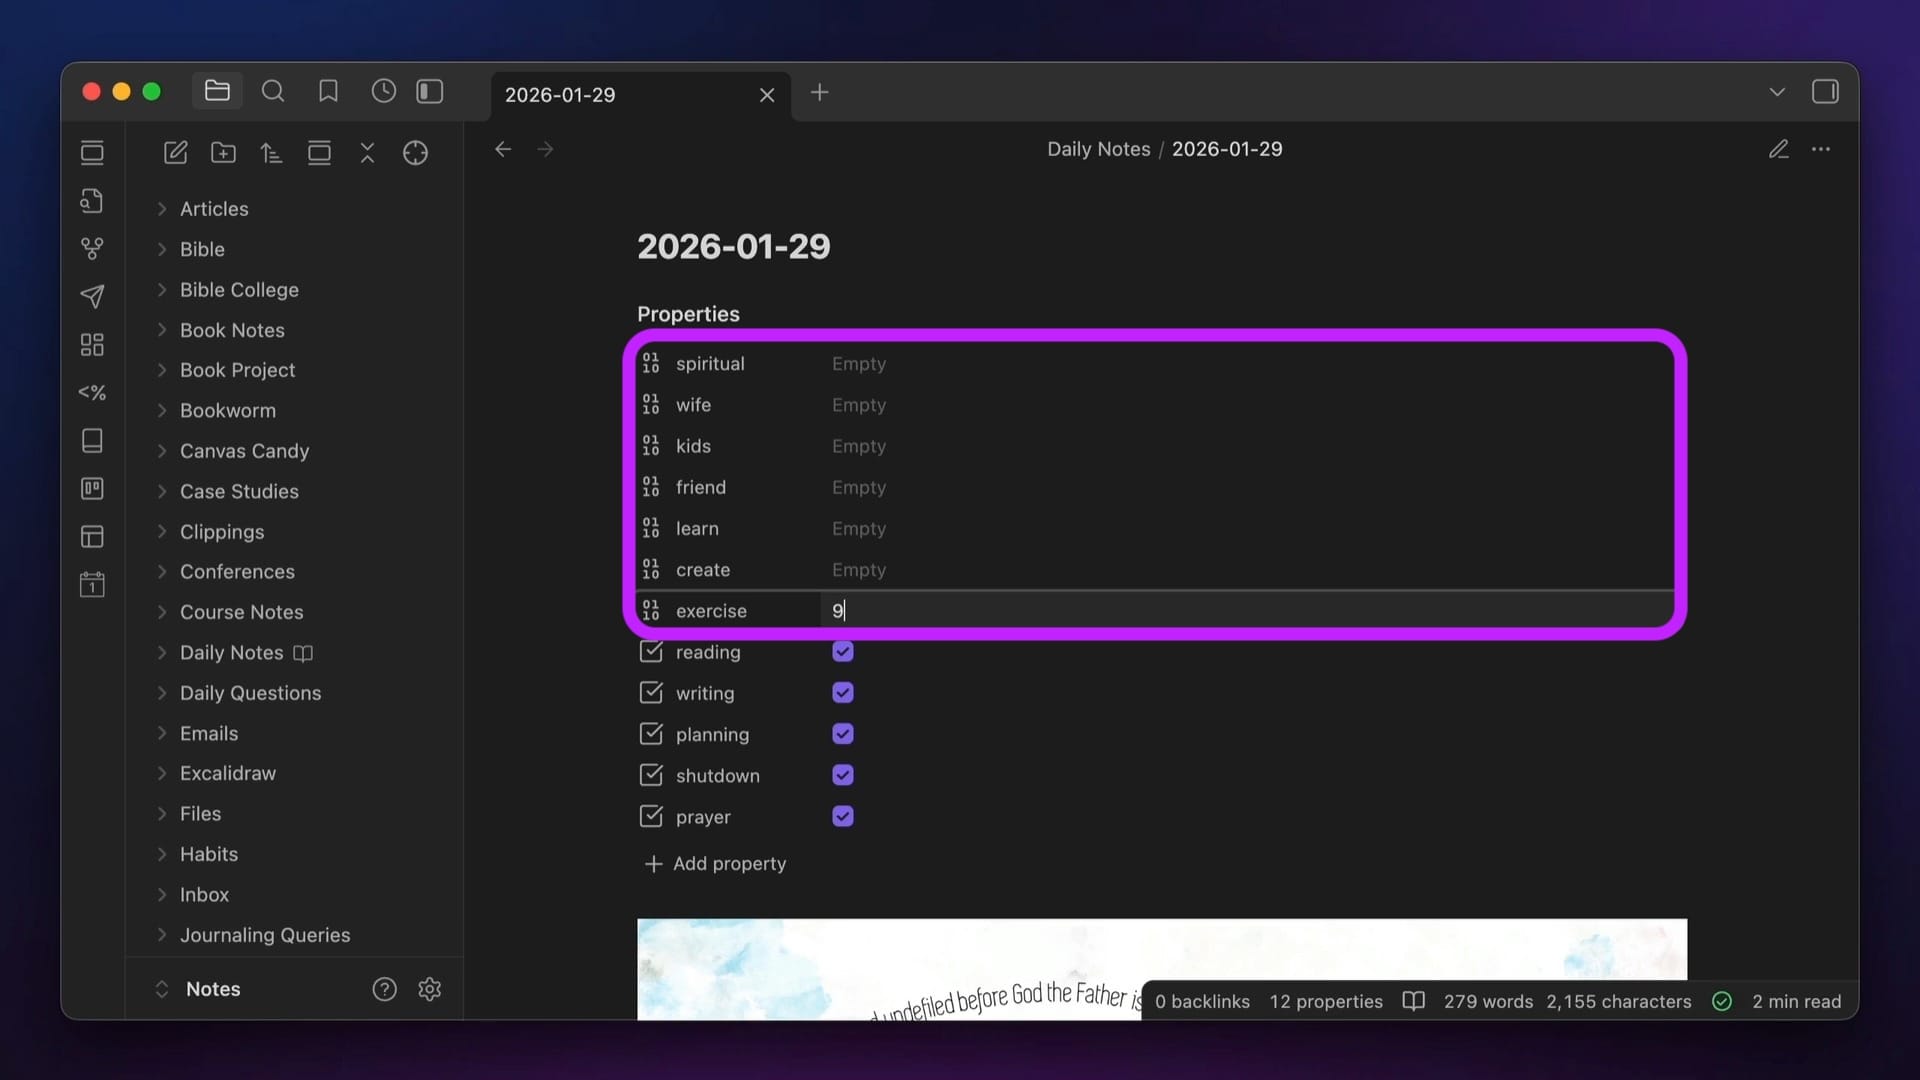
By using number properties here, I make sure that I don't accidentally type something incorrect, as if you press a keyboard key that isn't a number in a number property, the value doesn't register.
Checkbox
Checkbox properties show as checkboxes that you can toggle on or off in Live Preview or Reading mode. These properties have either a true or false value depending on their state. A false value displays an unchecked box, and a true value shows a checked box.
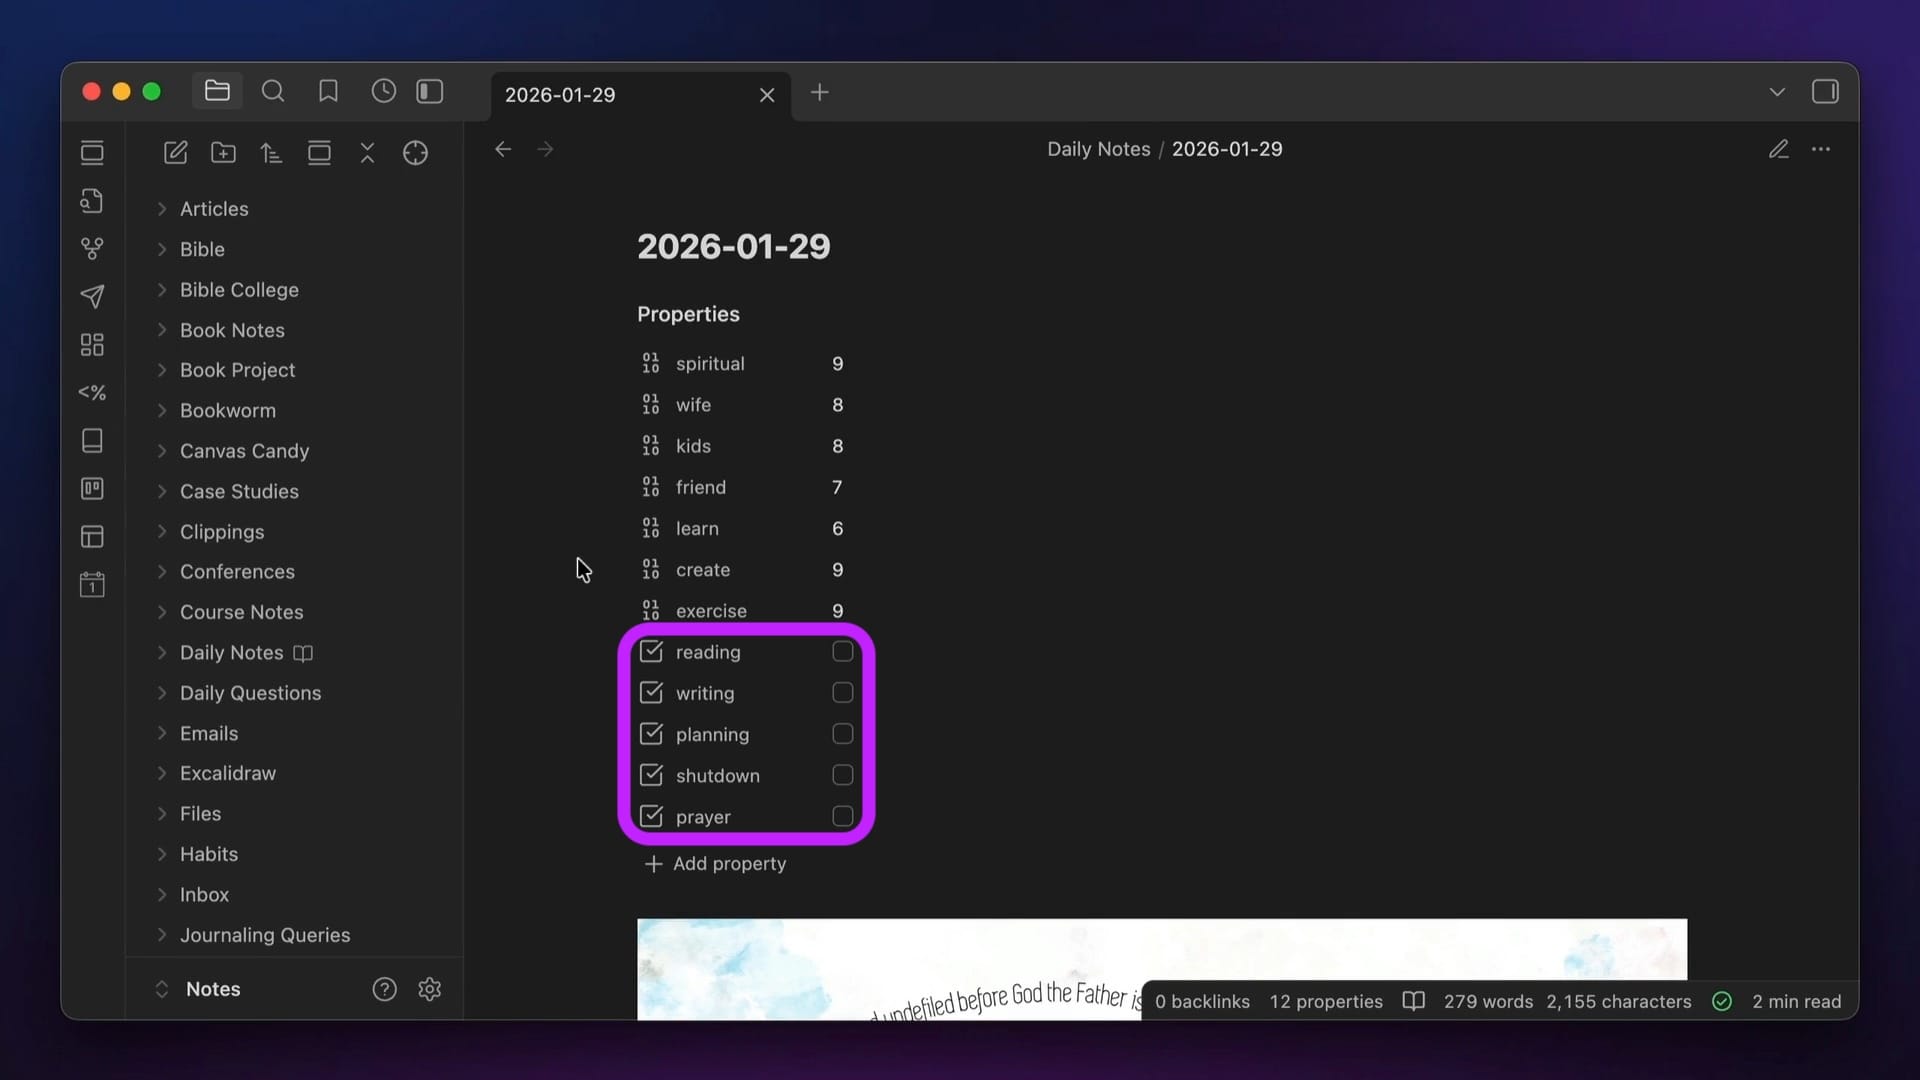
If you check a box while in Live Preview or Reading Mode, the value gets updated from false to true. If you don't have either a true or false value, then the checkbox will show a dash indicating that there is no value set.
I use checkbox properties for tracking habits on my Daily Note.
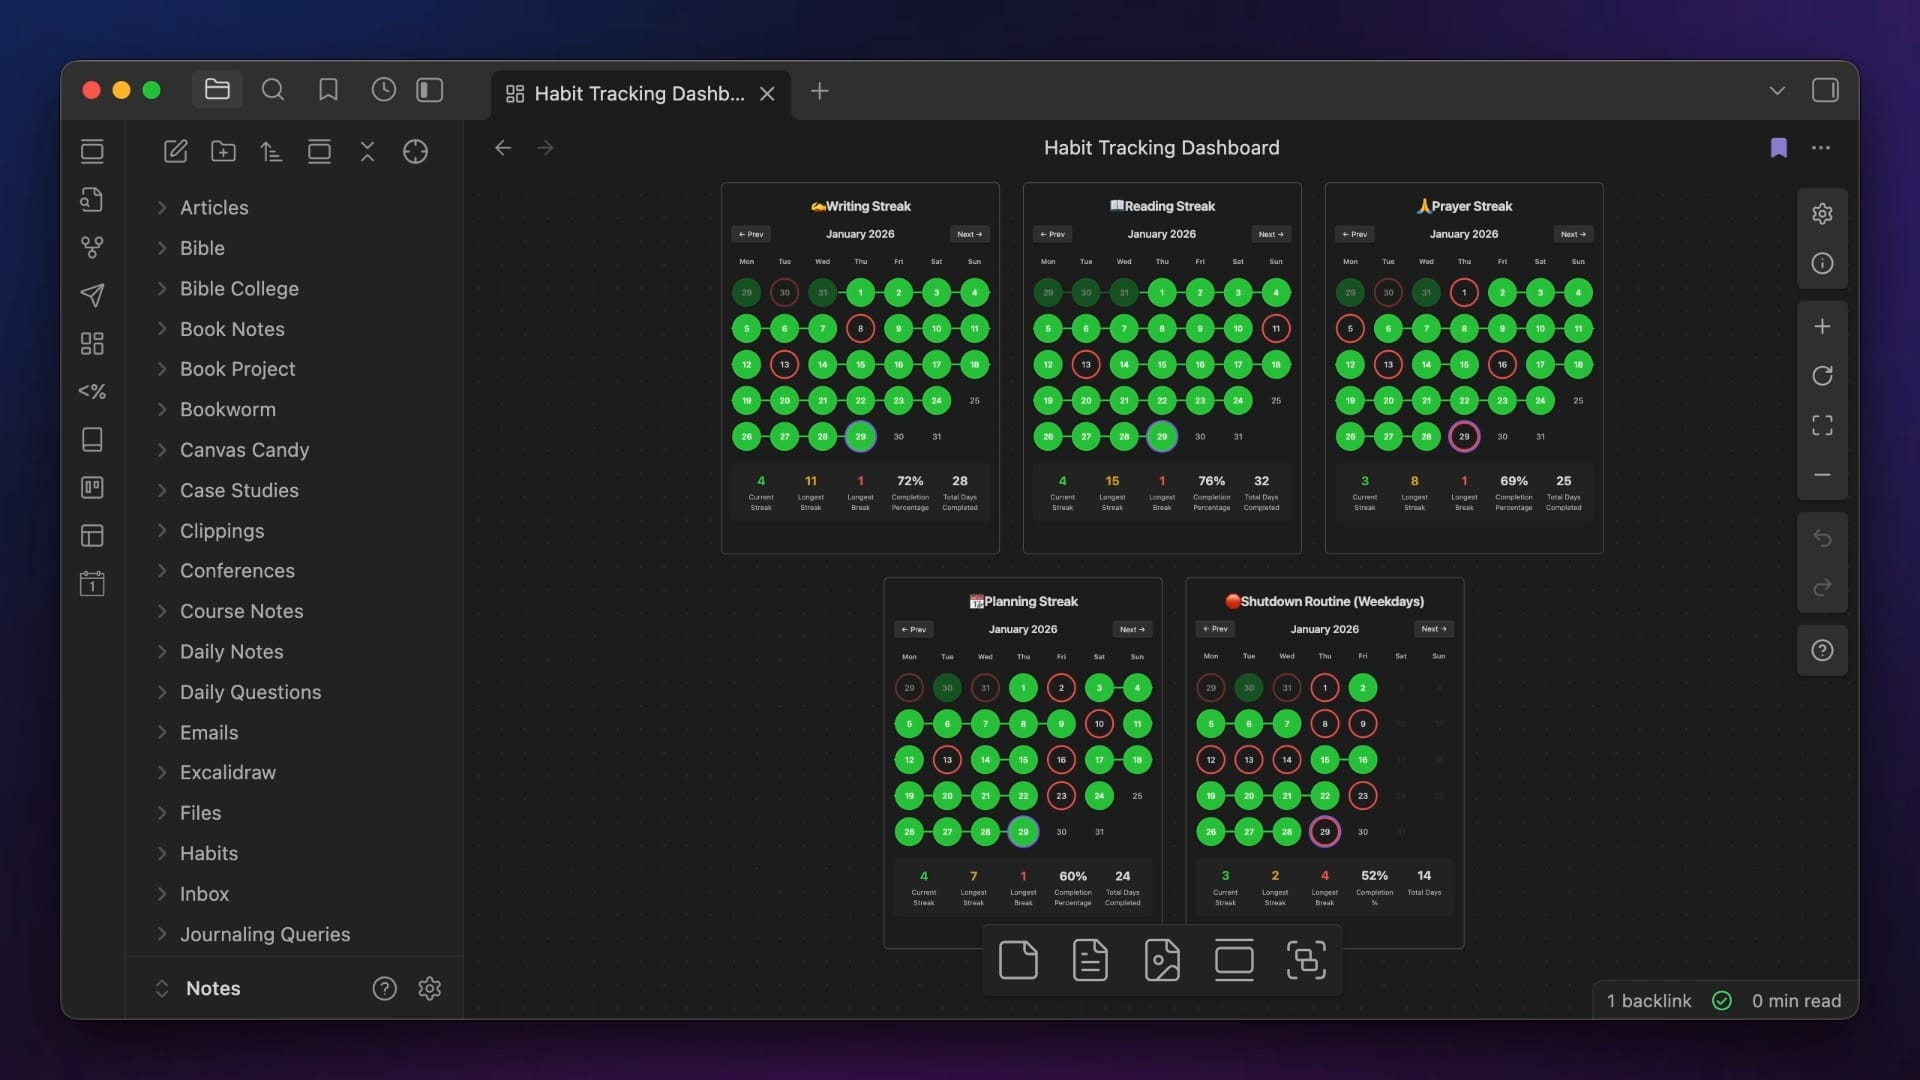
The boxes I check at the top of my Daily Note Template are how I log the completion of my habits, which then get displayed on my Habit Tracking Dashboard.
Date
Date properties show the date according to the date format set in your system settings (not Obsidian settings). On macOS, you can find this by going to System Preferences → Language and Region → Date Format:
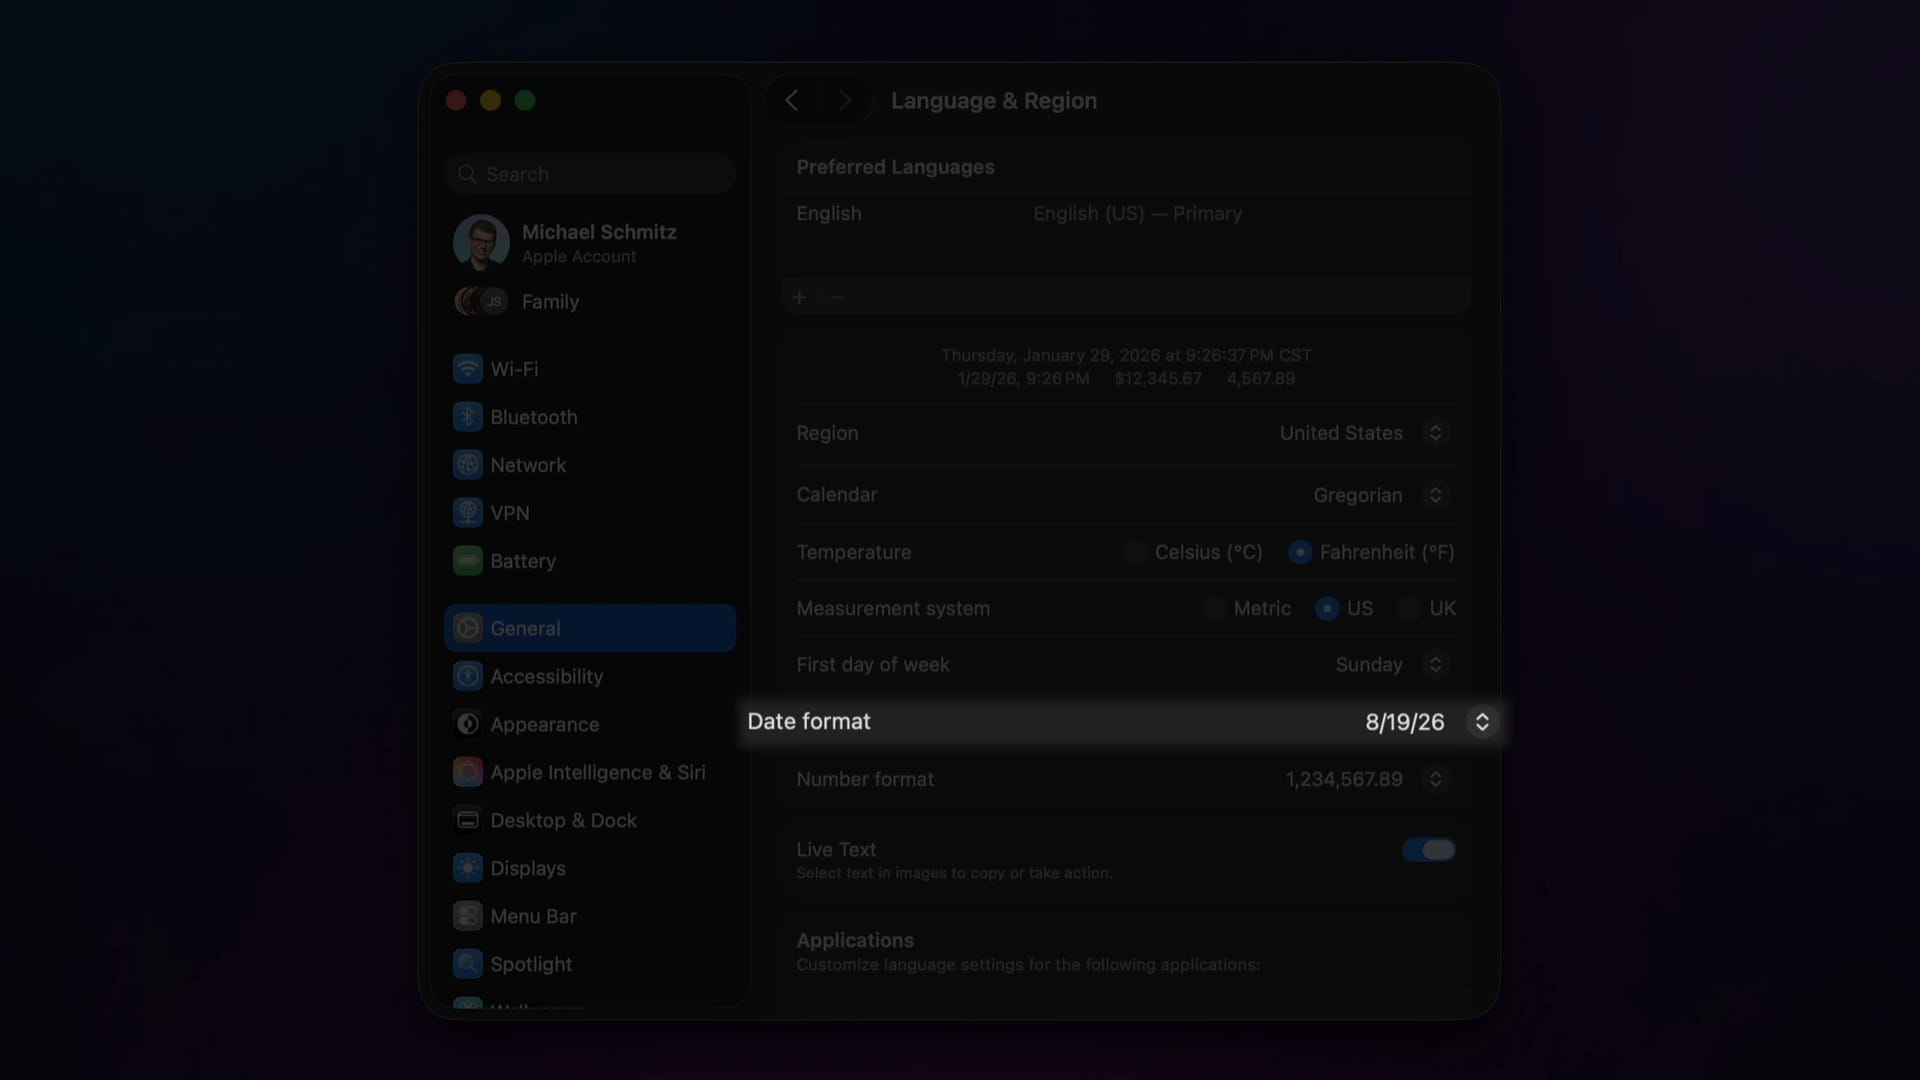
As you can see, I have mine set to something different than the YYYY-MM-DD formatting that is the default in Obsidian. Fortunately, this doesn't really matter, as, if you have the Daily Notes core plugin active, the date you set for this property will still take you straight to that day's Daily Note even if it doesn't match the format you set in your Daily Notes settings.
Here's what it looks like in Source Mode:
As you can see, you actually don't need to put the date inside double brackets to create a link to that day's Daily Note as you used to in the past.
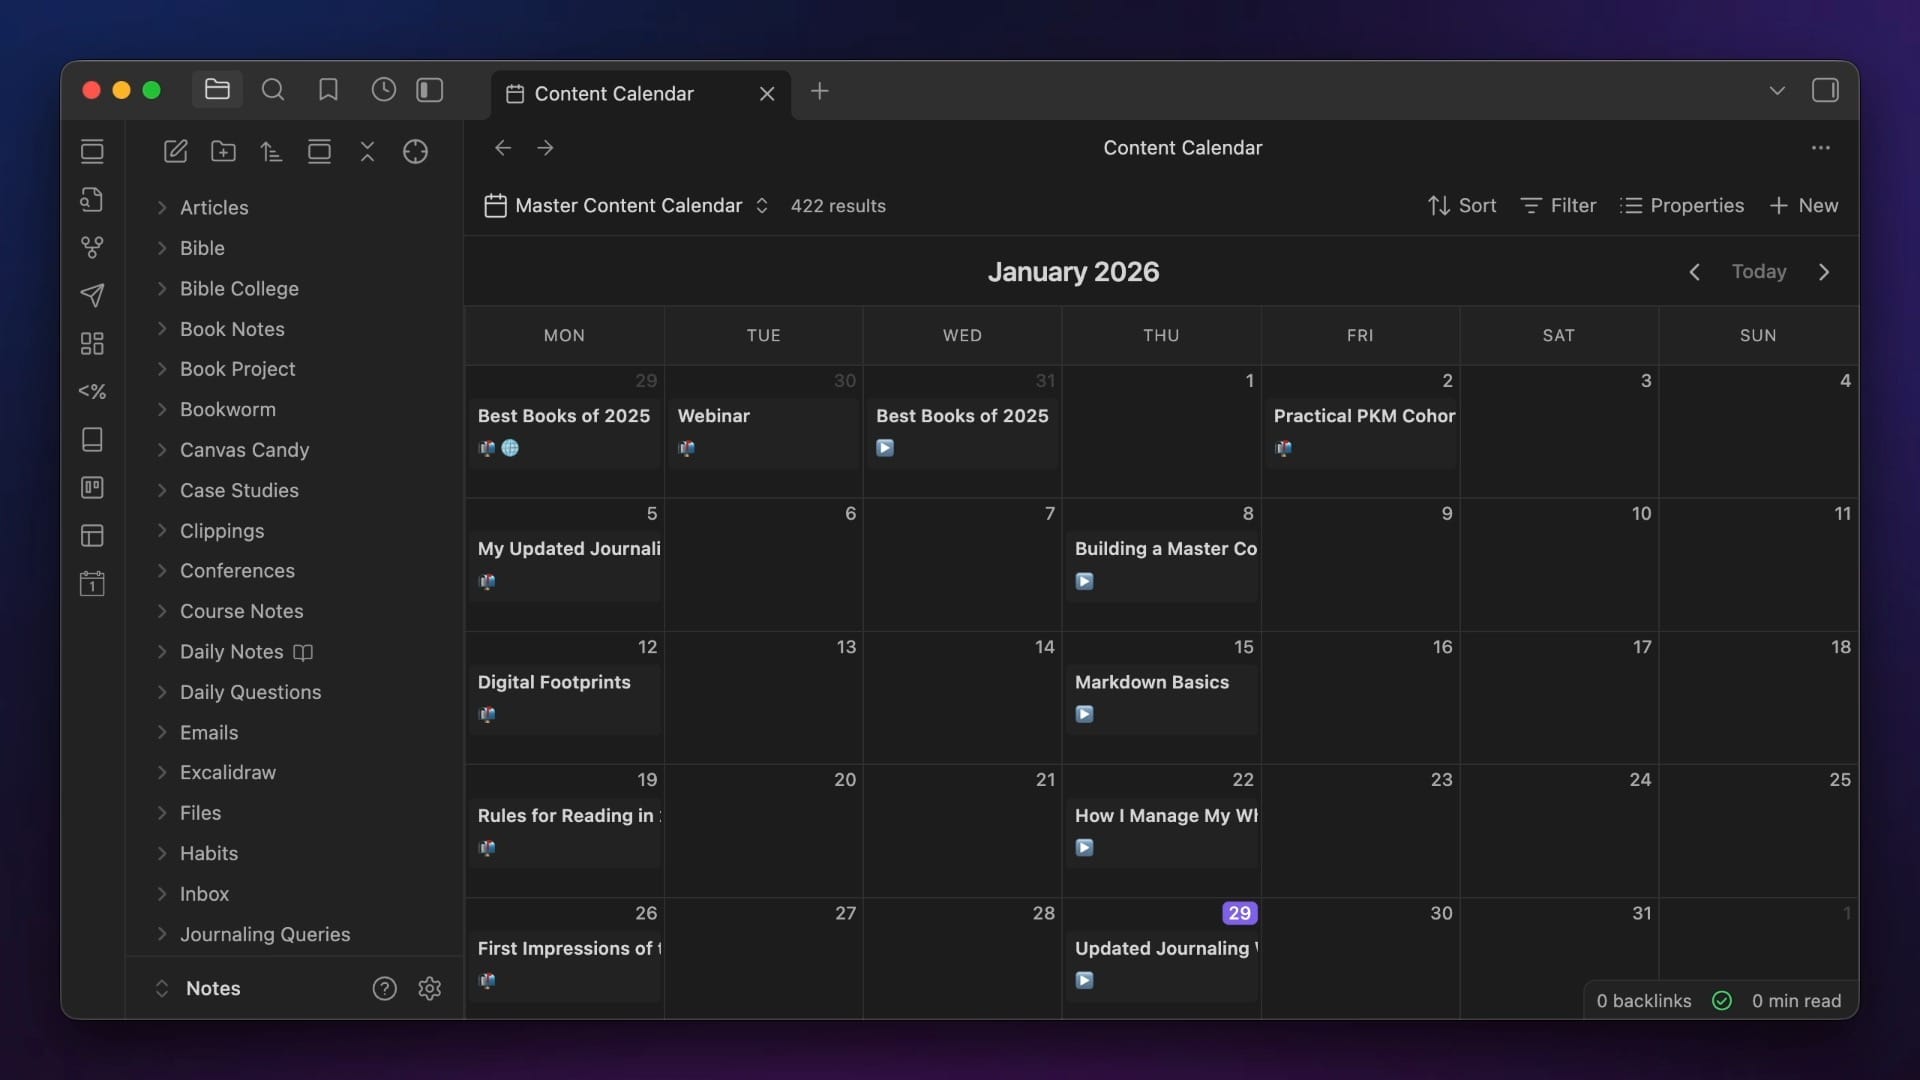
I use this property type for due dates on all my creative projects, and have this added to my newsletter, article, and video script template files. That way, I can visualize the publish dates on my content calendar Bases view that I walk through setting up here.
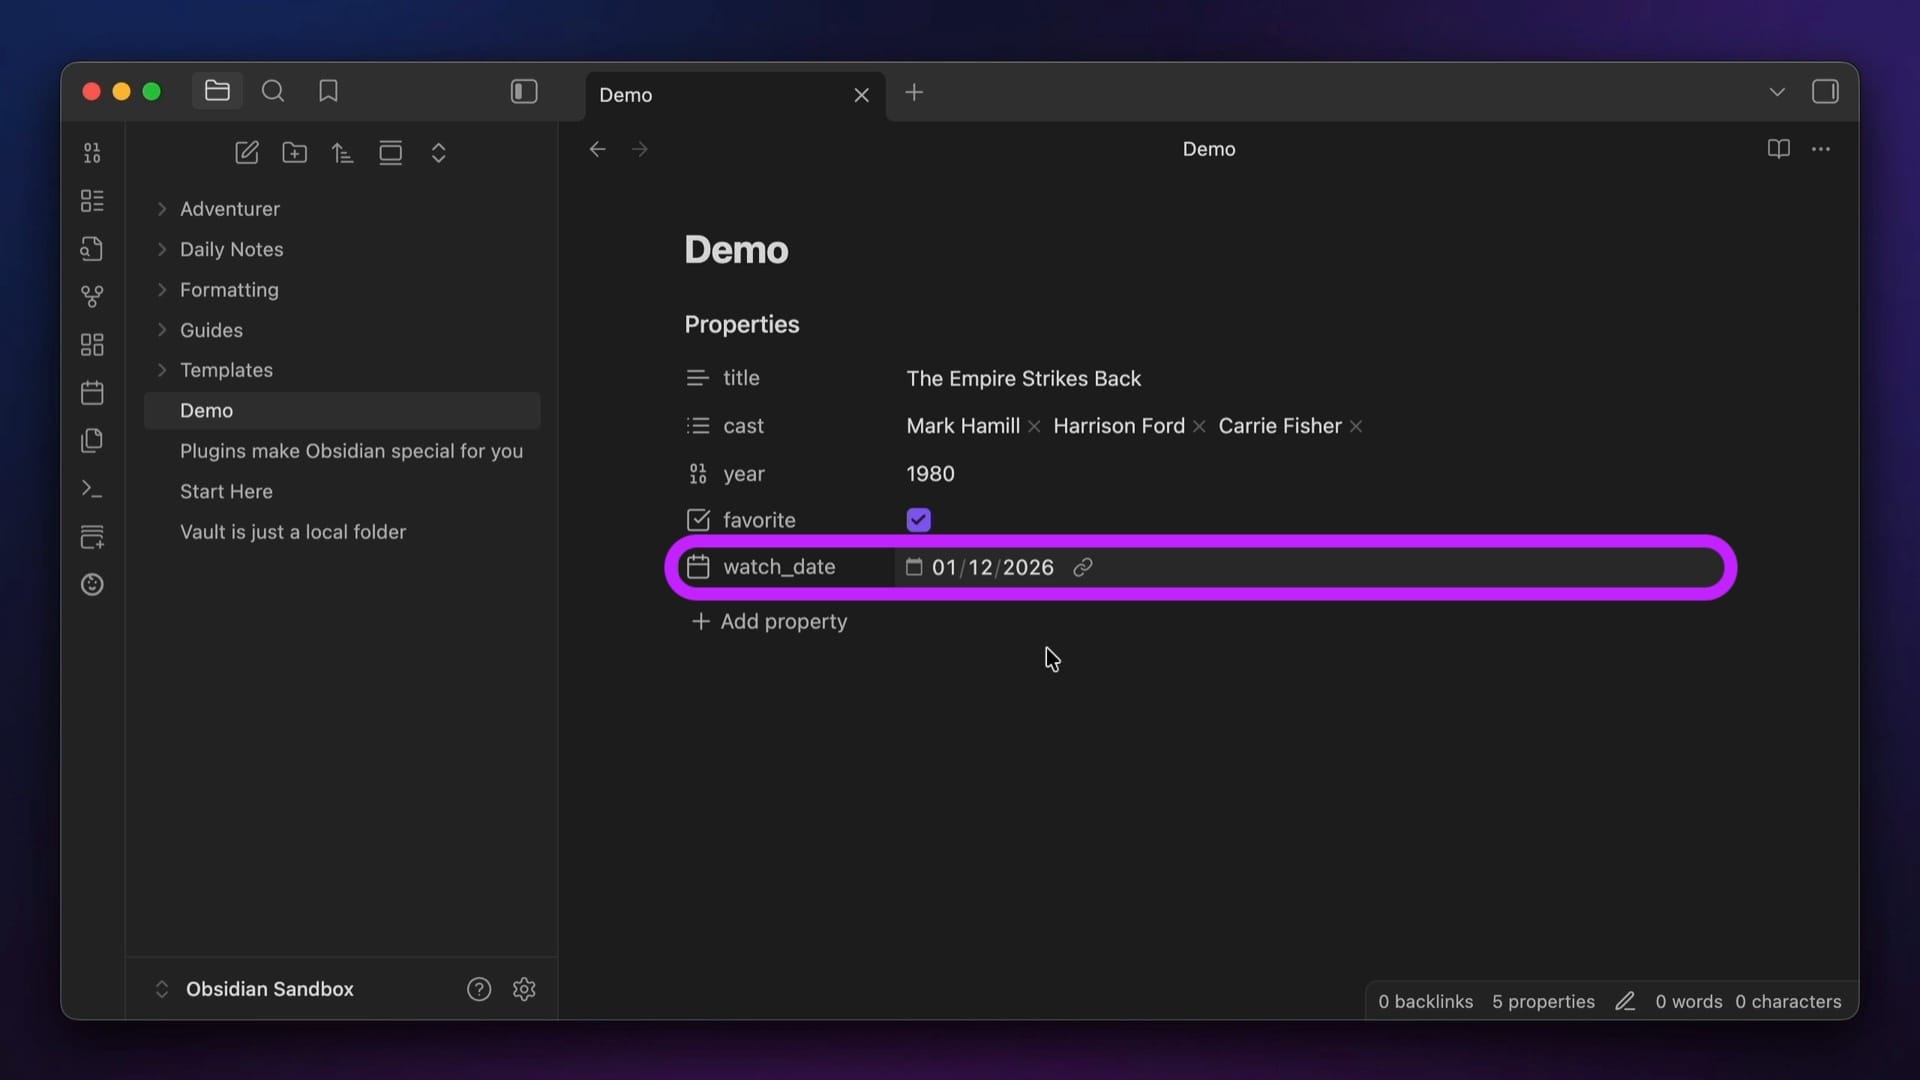
Date & Time
Date & Time is just like the date property, but also adds a specific time to the property value. This property is handy when you want to add a date & time stamp to something, but most of the time I find myself defaulting to just the date property instead.
The one exception to this is a project I'm still experimenting with, where I have a Meta Bind button in my project file that will update the reviewed property for a project note using the date and time of the exact moment I click the button.
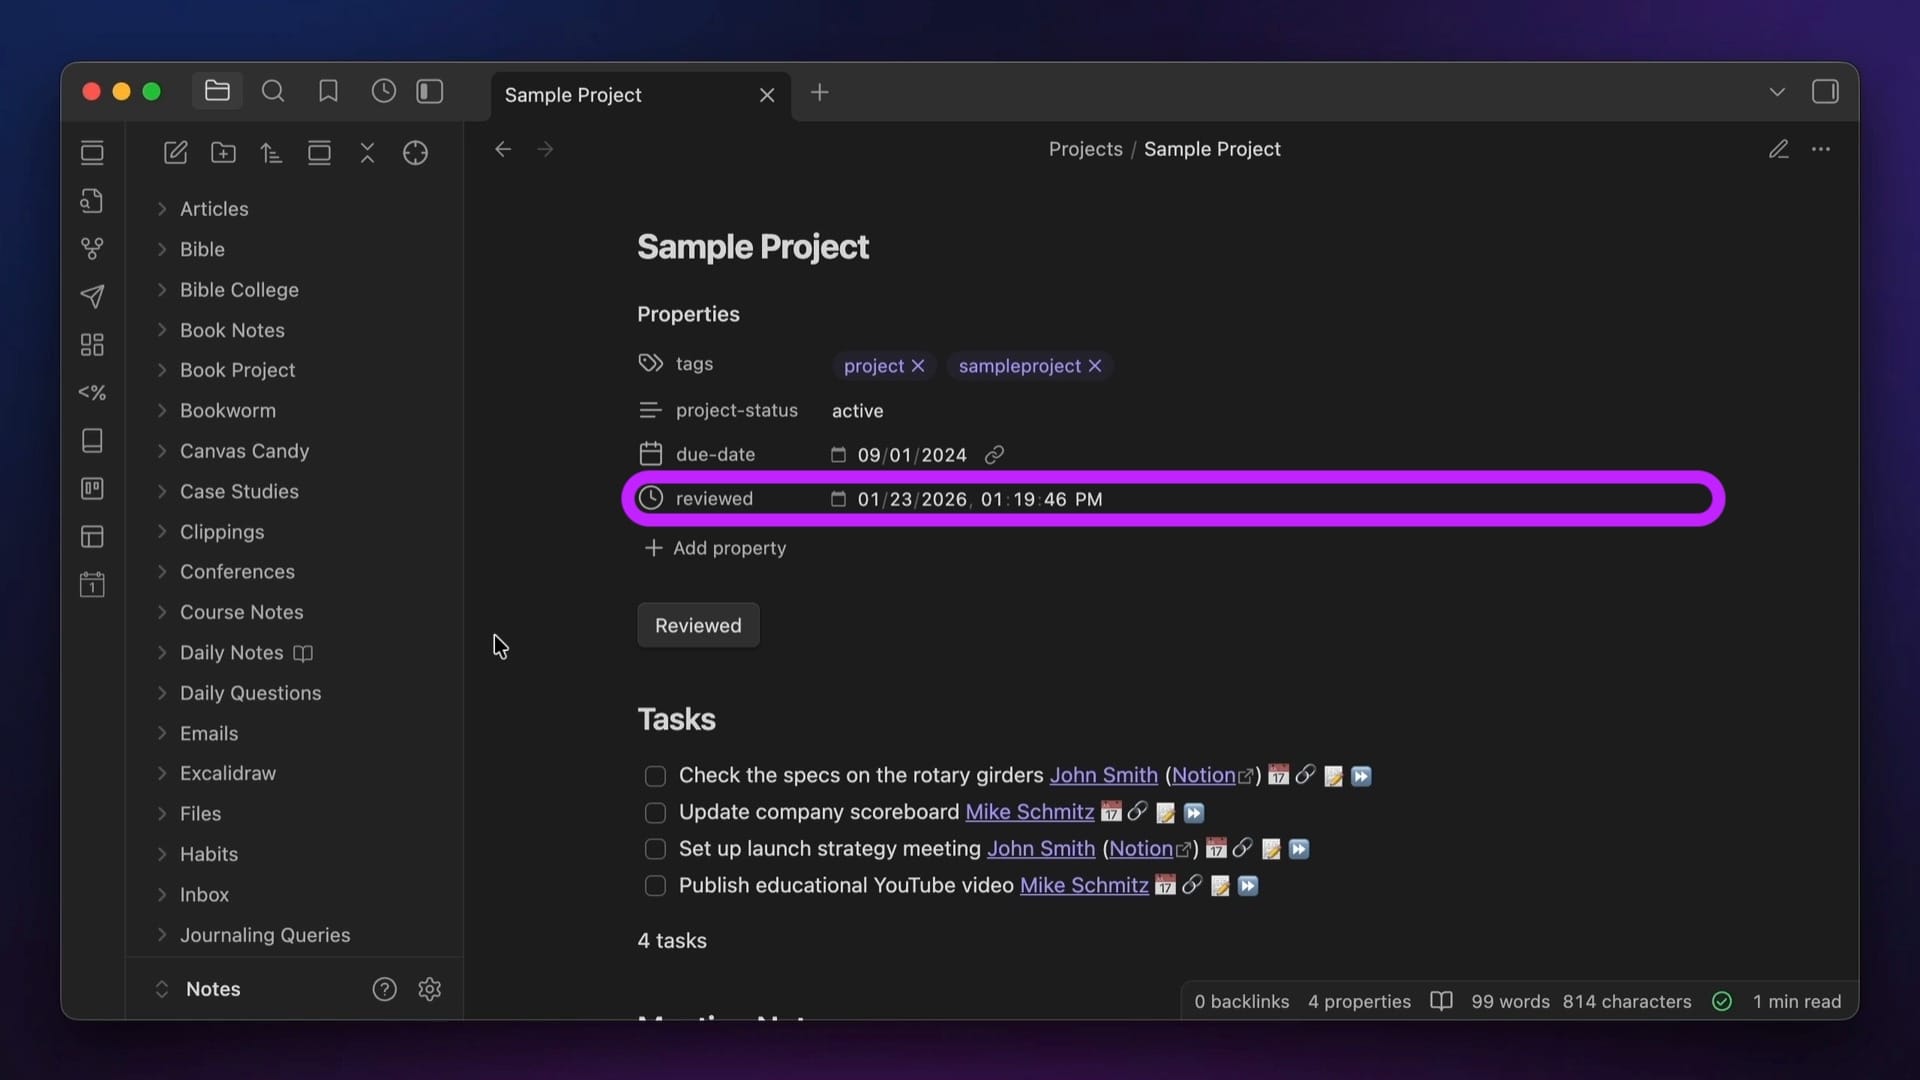
I'm currently building out a Projects dashboard for this in LifeHQ, and the idea is that you can show all the projects that need to be reviewed by listing them if they have a review property that is older than 1 week ago.
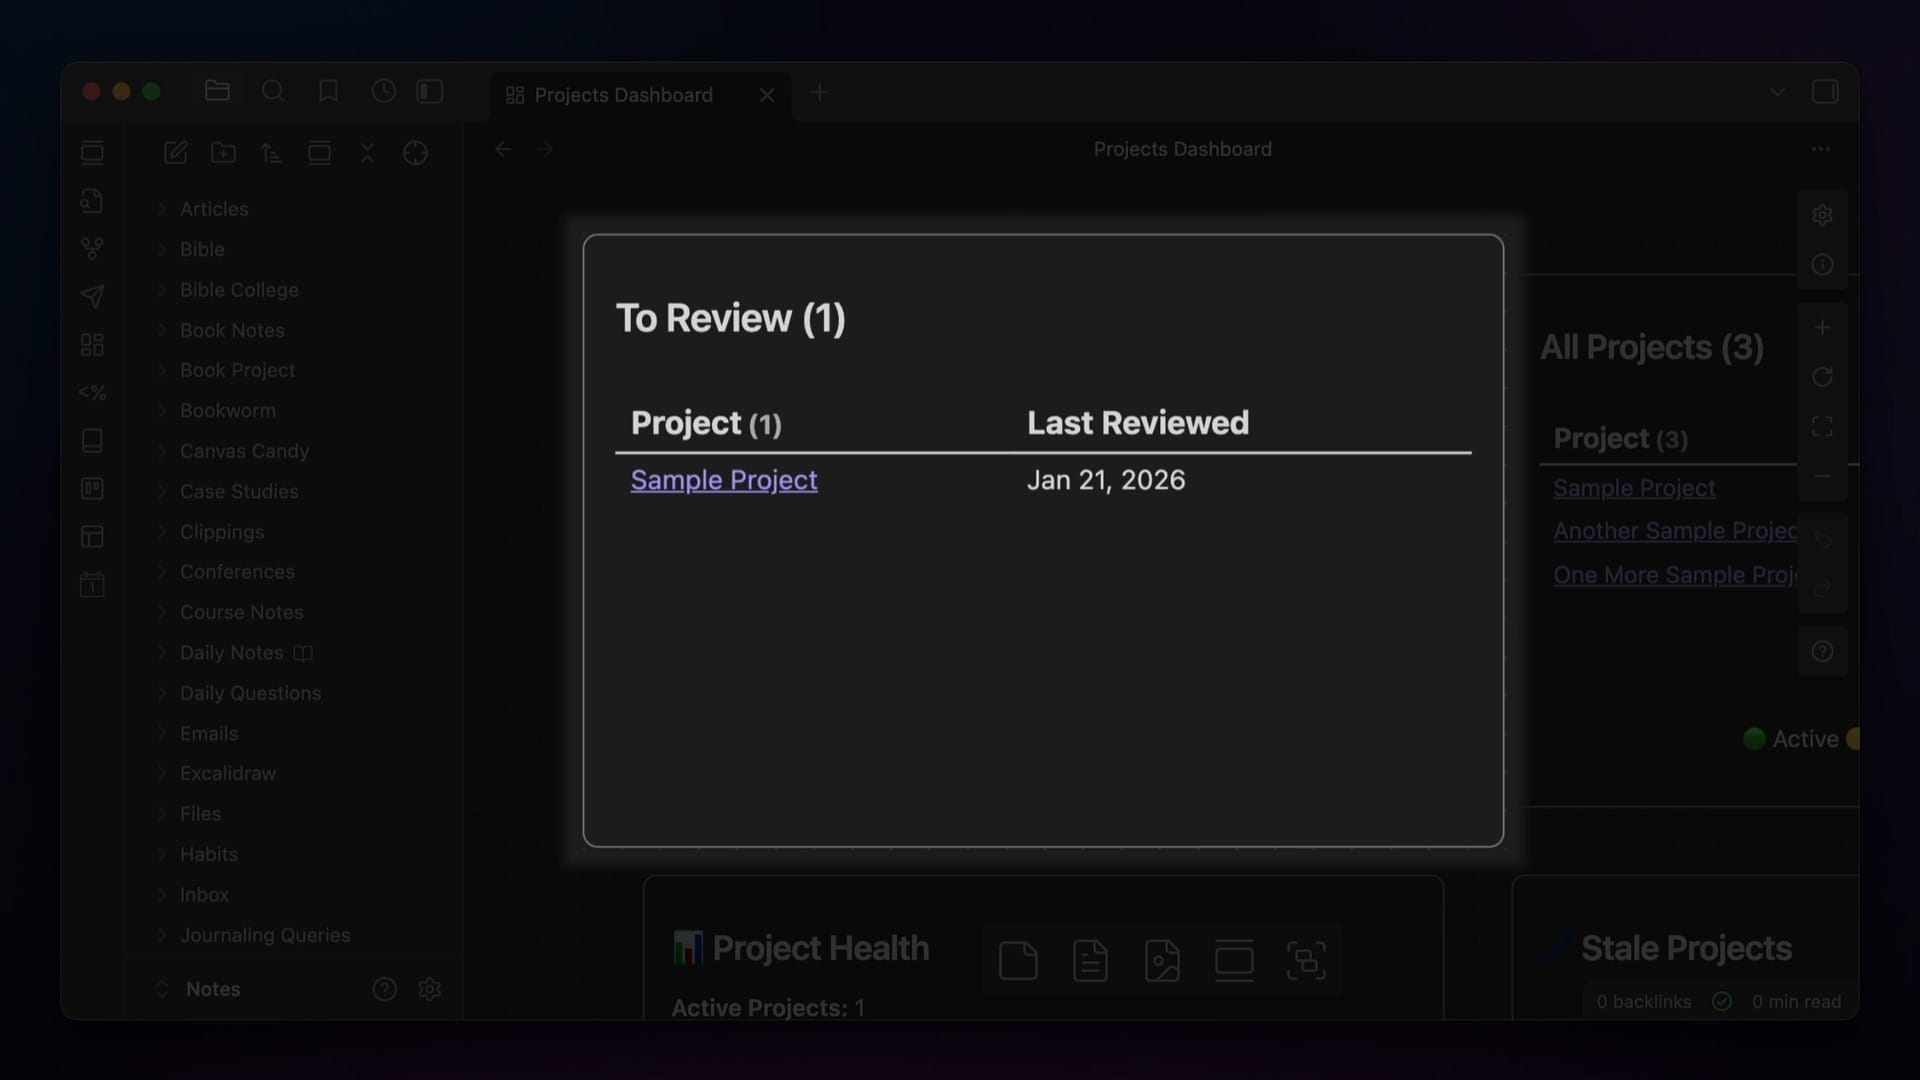
review property.It's still experimental, but I will share more about it once I get it dialed in (all LifeHQ owners will get the update for free 🙂). For now, just know this property type can be handy if you need to know exactly when something happened, and here's what it looks like when you're in Source Mode:
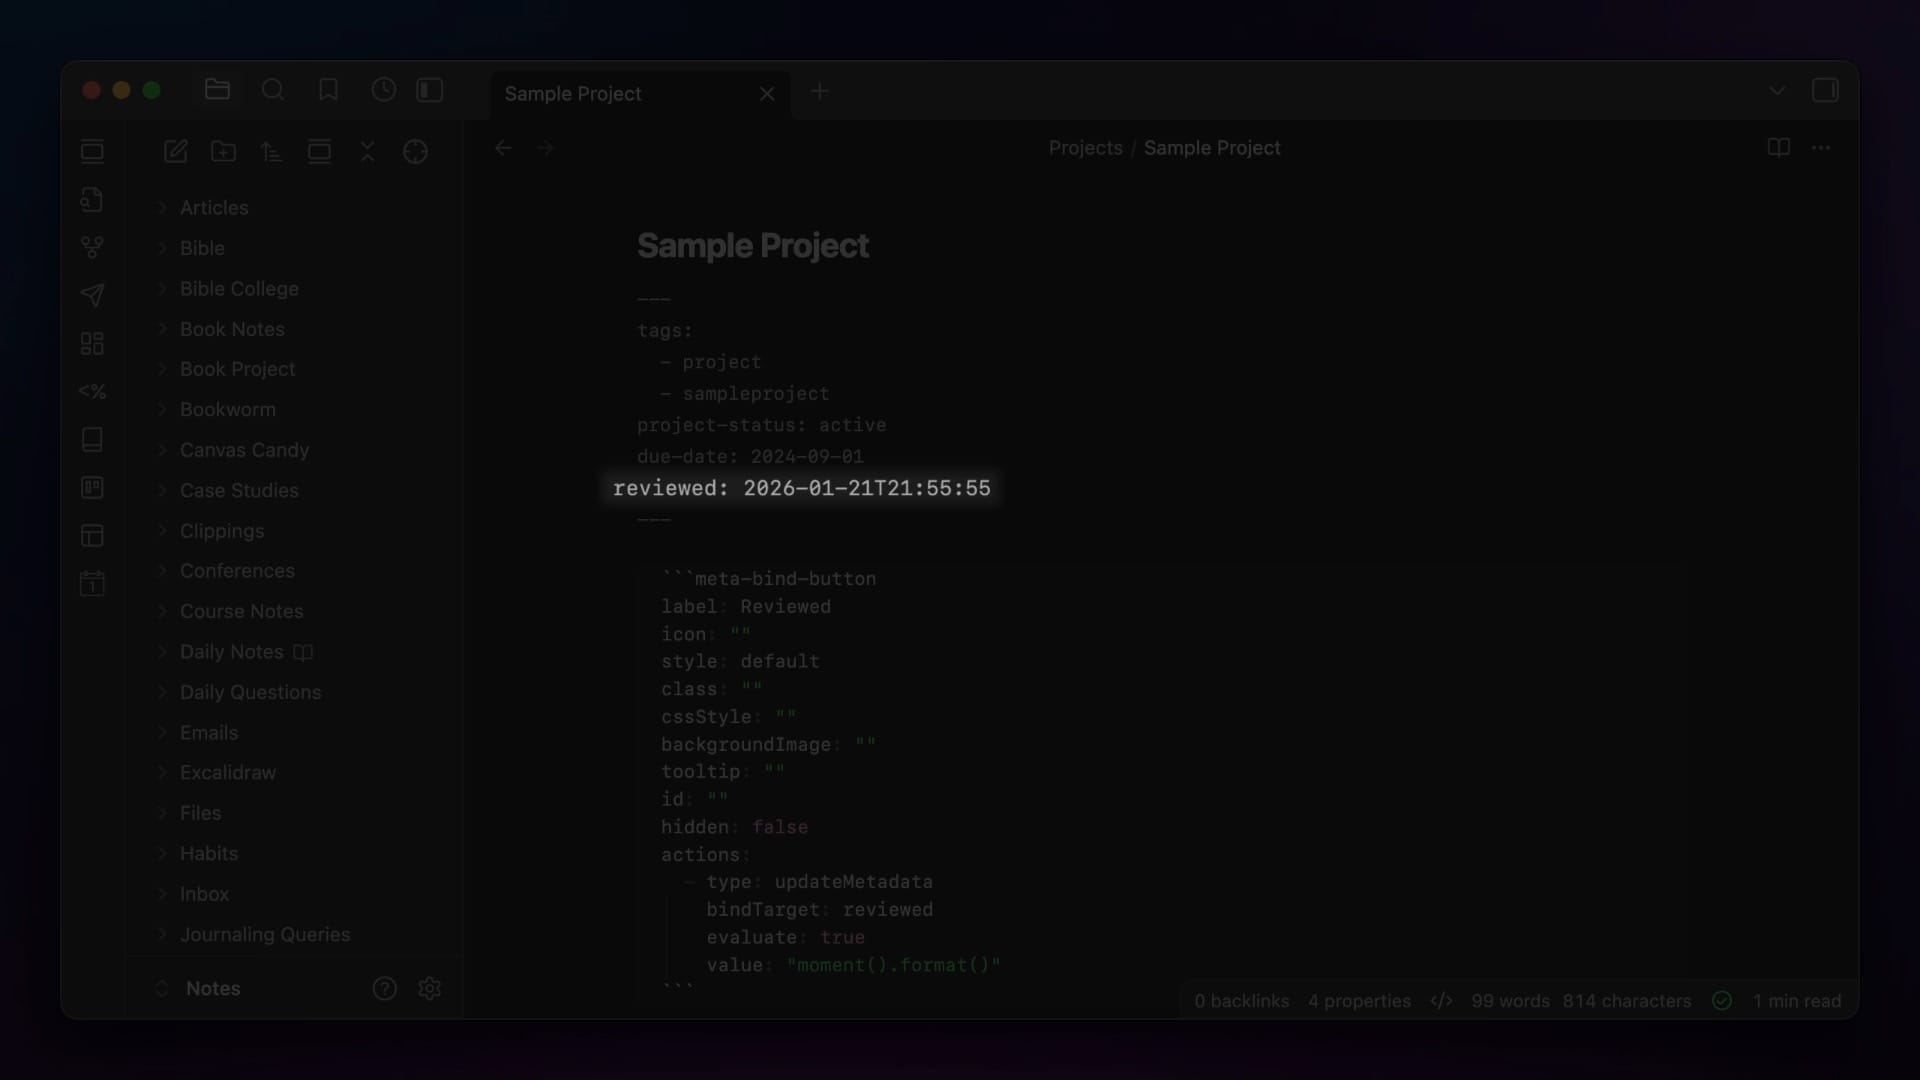
As you can see, the date part is the same as the date property, but it's also followed by a T and the exact time in the HH:MM format.
Default Properties
There are also three different types of default properties that are baked into every Obsidian note:
- tags
- aliases
- cssClasses
Tags
The tags property actually functions just like the list property type. This default property lets you add note-level tags to your note in Obsidian.
Tags are a useful way to group things together by topic, and are actually enabled by default even if you don't use them. However, you won't be able to work with them very easily until you turn on the Tags view core plugin, which will give you a list of all your tags in the right sidebar.
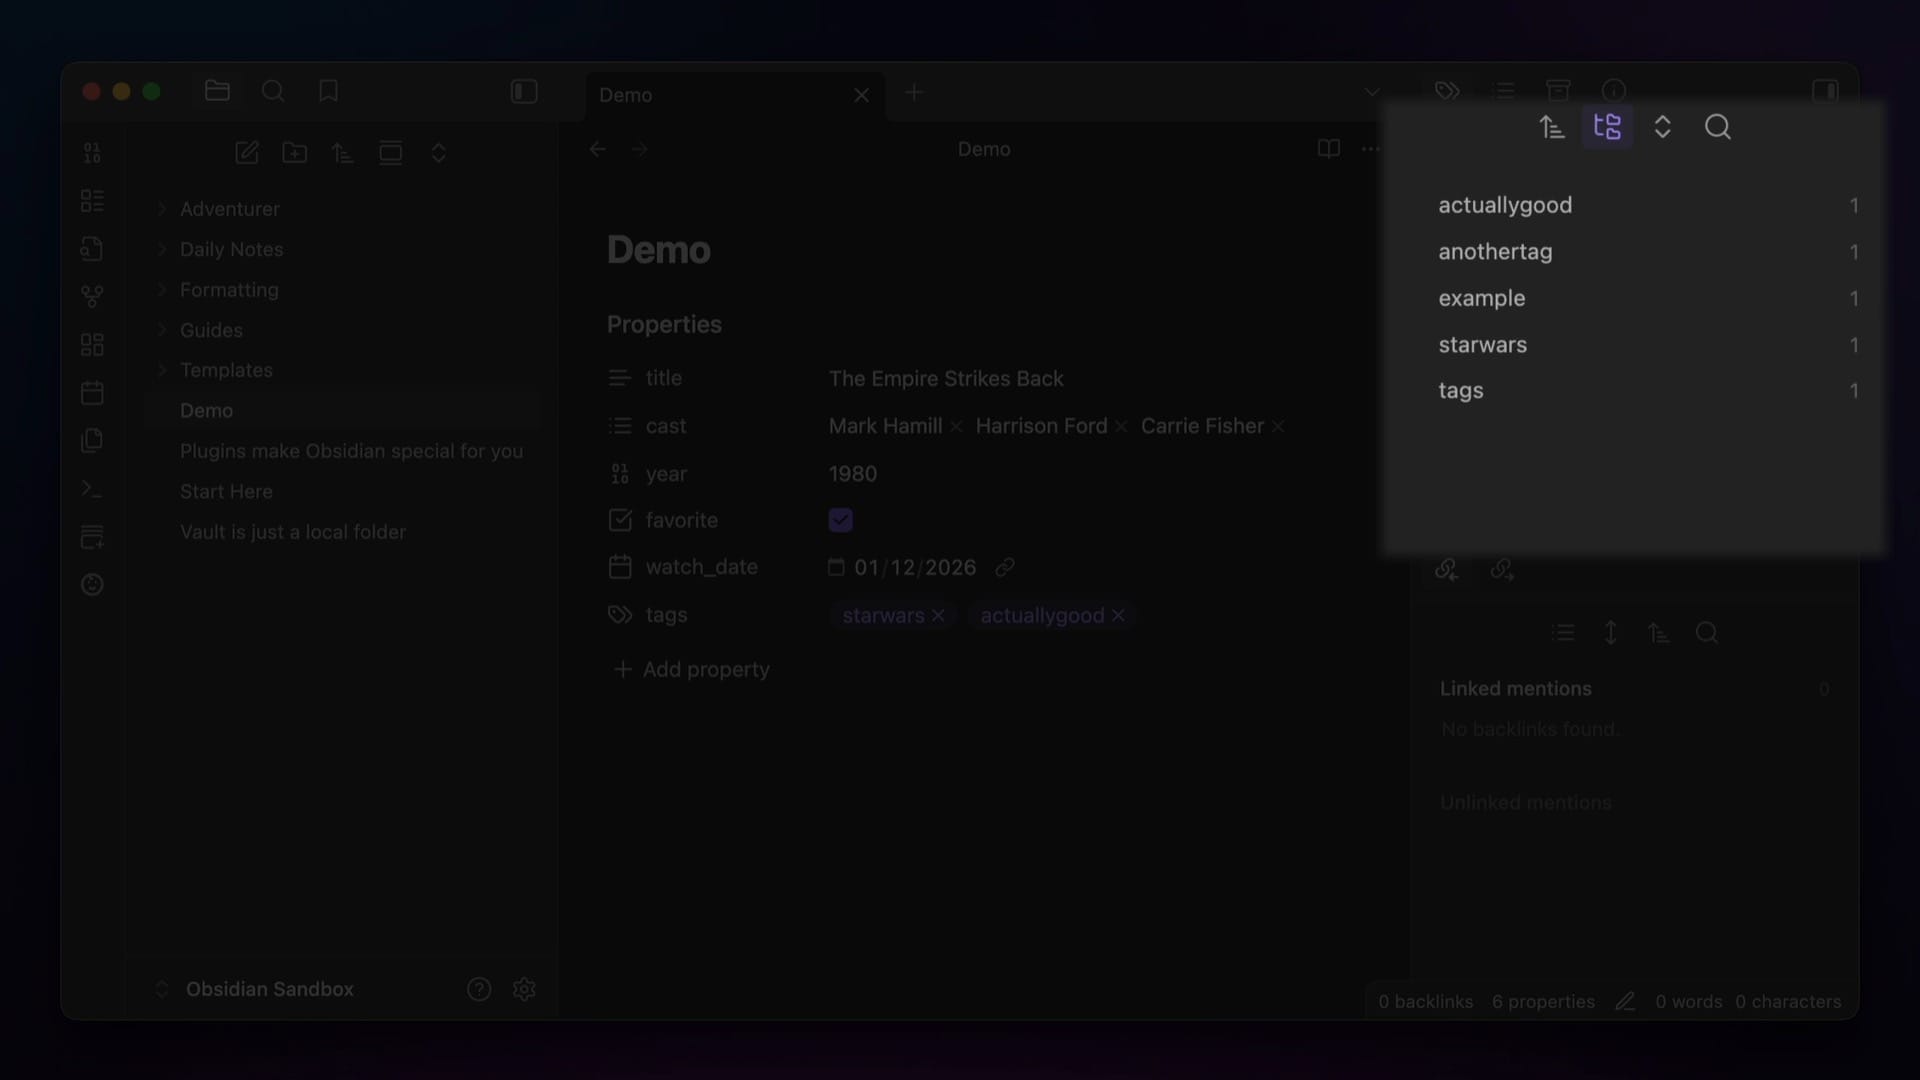
One way that I use tags is for the places where my articles get published. For example, I write an article every month for the ScreenCastsOnline newsletter, and each one gets the sco tag. This makes it easy to tell which articles I wrote for that newsletter and which ones appear on my own website, so I don't confuse the two.
Aliases
Aliases are additional names you can use to reference the note when creating links. For example, you usually link to notes in Obsidian by placing the note title between two square brackets.
The note title is also what shows up in the Unlinked Mentions section for both backlinks and outgoing links. But if you add an alias to a note, you can actually use that when linking with double brackets or in the unlinked Mentions.
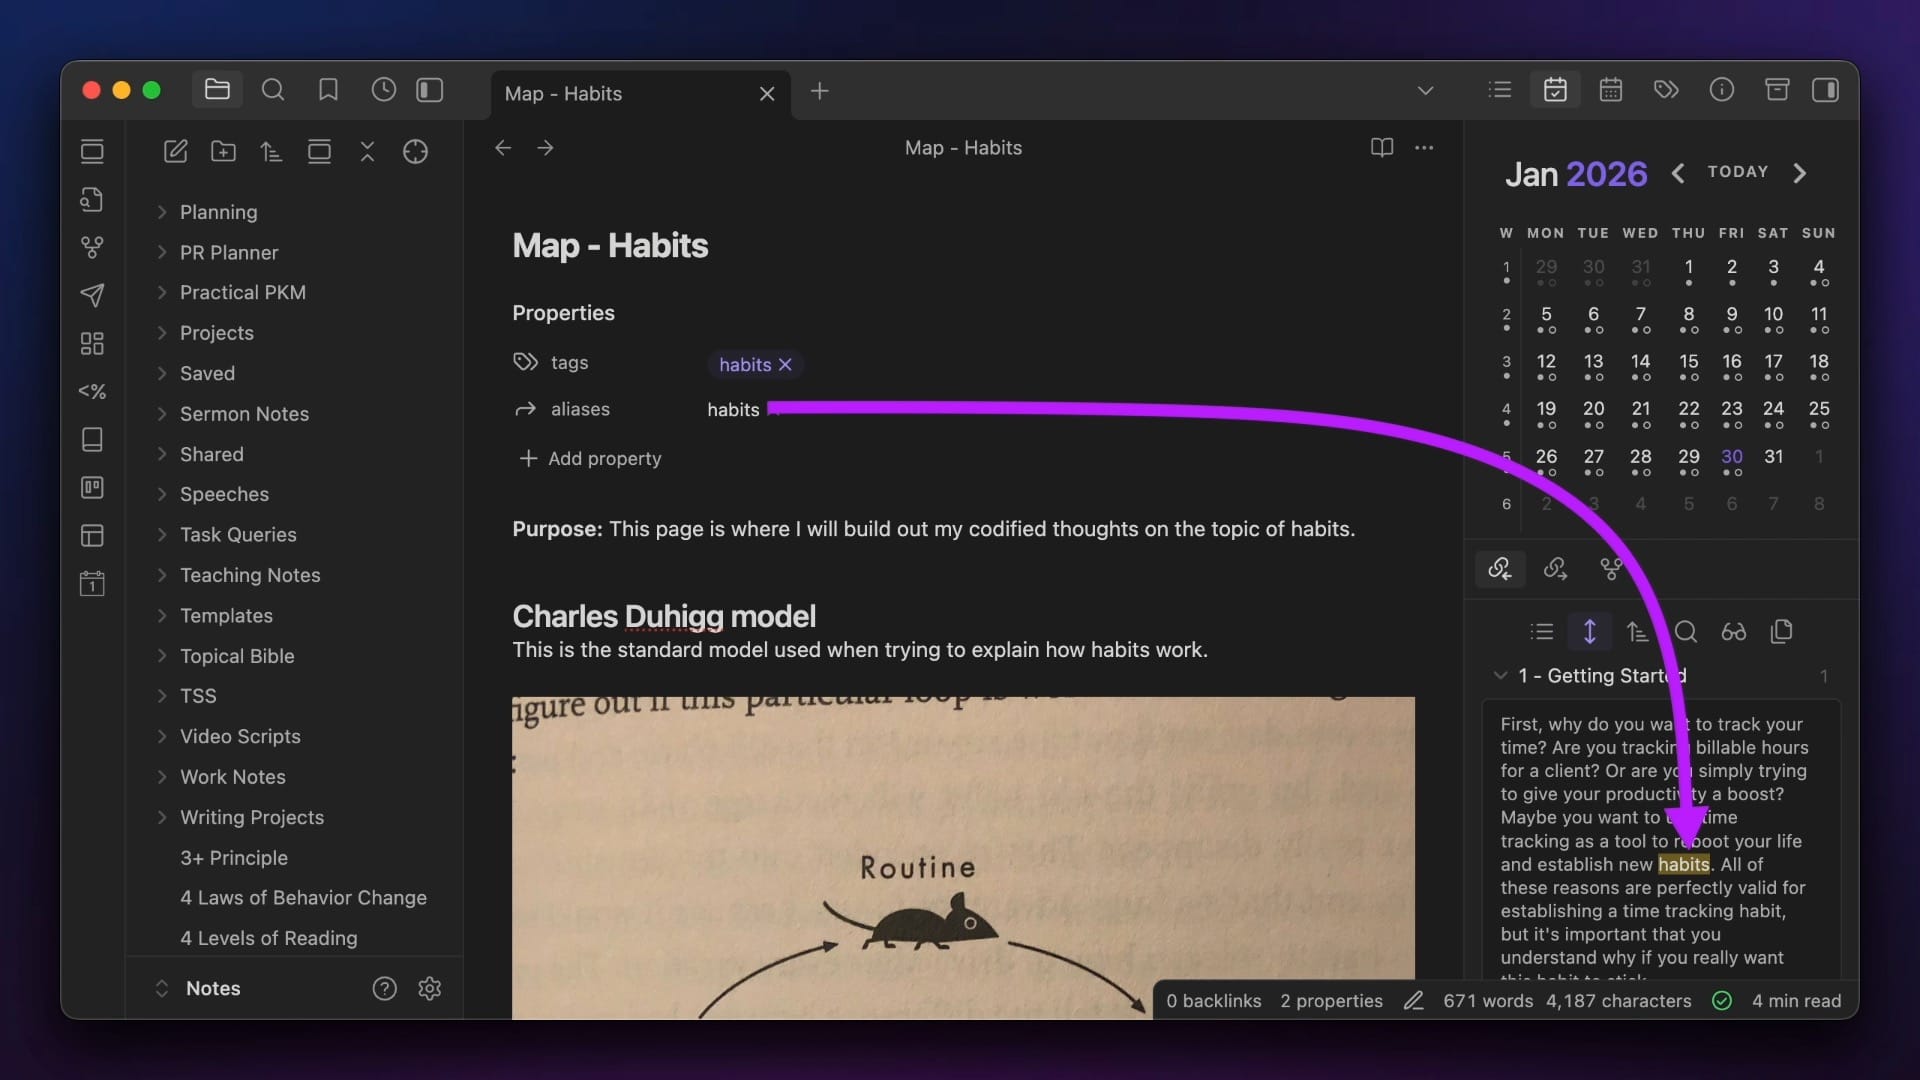
Whatever aliases you have listed for a note will be accessible when linking.
CSS Classes
The last default property is cssClasses. If you have added any CSS snippets to your vault and have them activated in the Appearance settings, you can apply the formatting from those snippets to a note by calling the class via a cssClassses property. This tells Obsidian which code to apply when rendering a note.
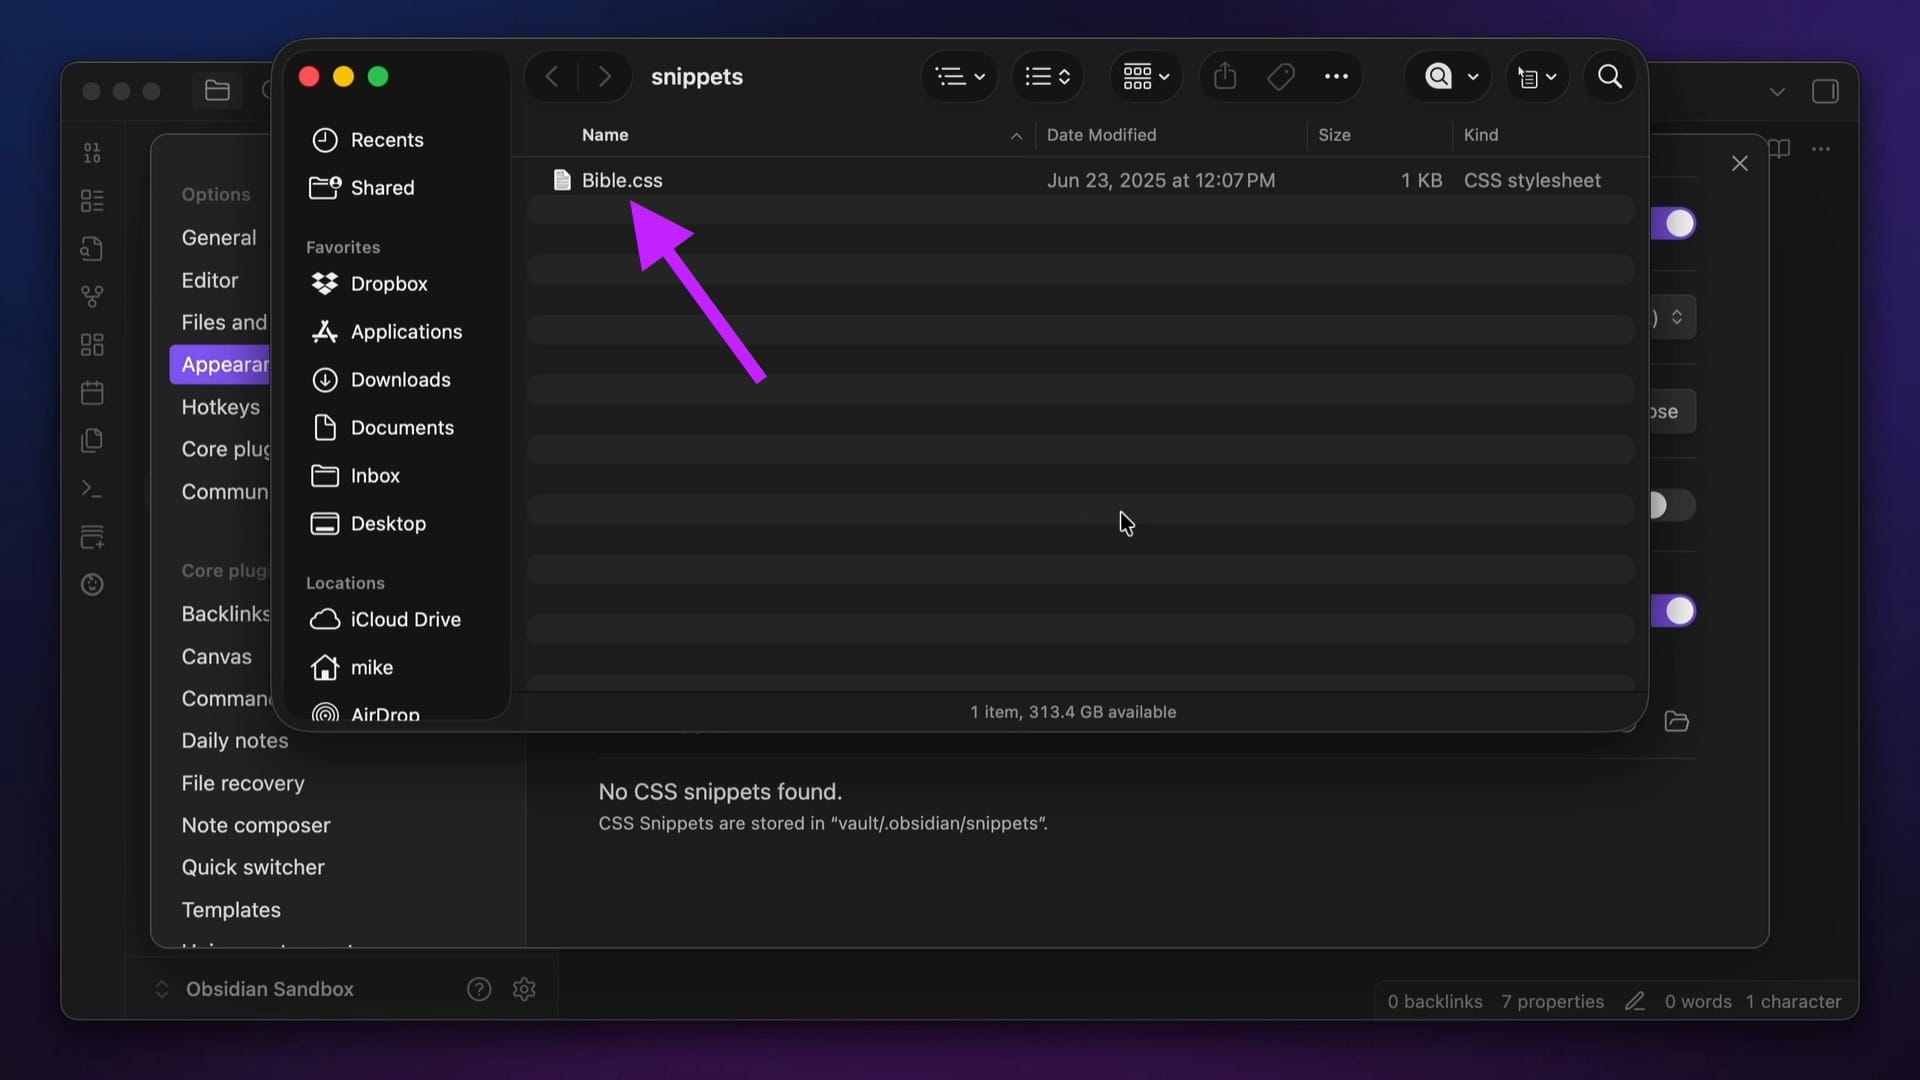
To add a CSS snippet to your vault, go to Settings → Appearance → CSS snippets and open the Snippets folder.
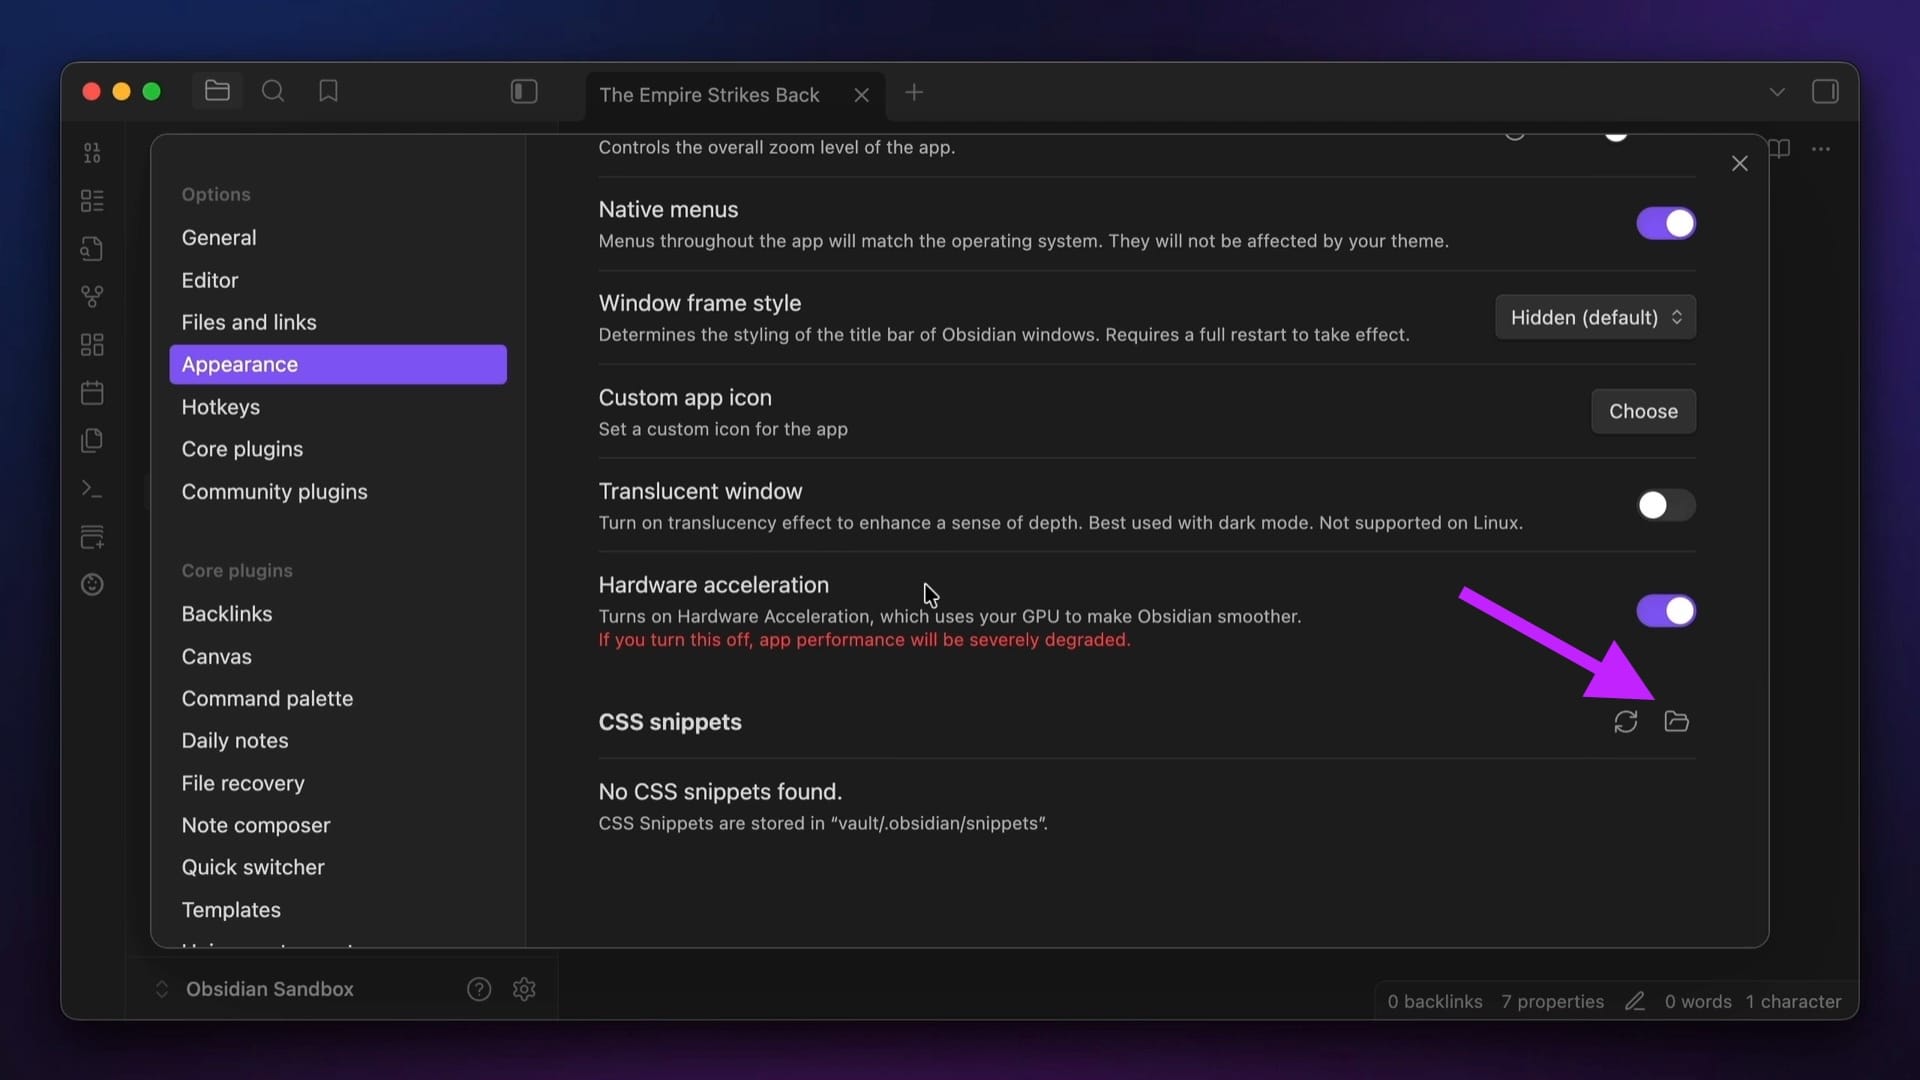
Put your CSS file in that hidden folder, then go back to Obsidian and reload the snippets:
Once you see the snippets in the list in the Obsidian settings, toggle the one you want to use on.
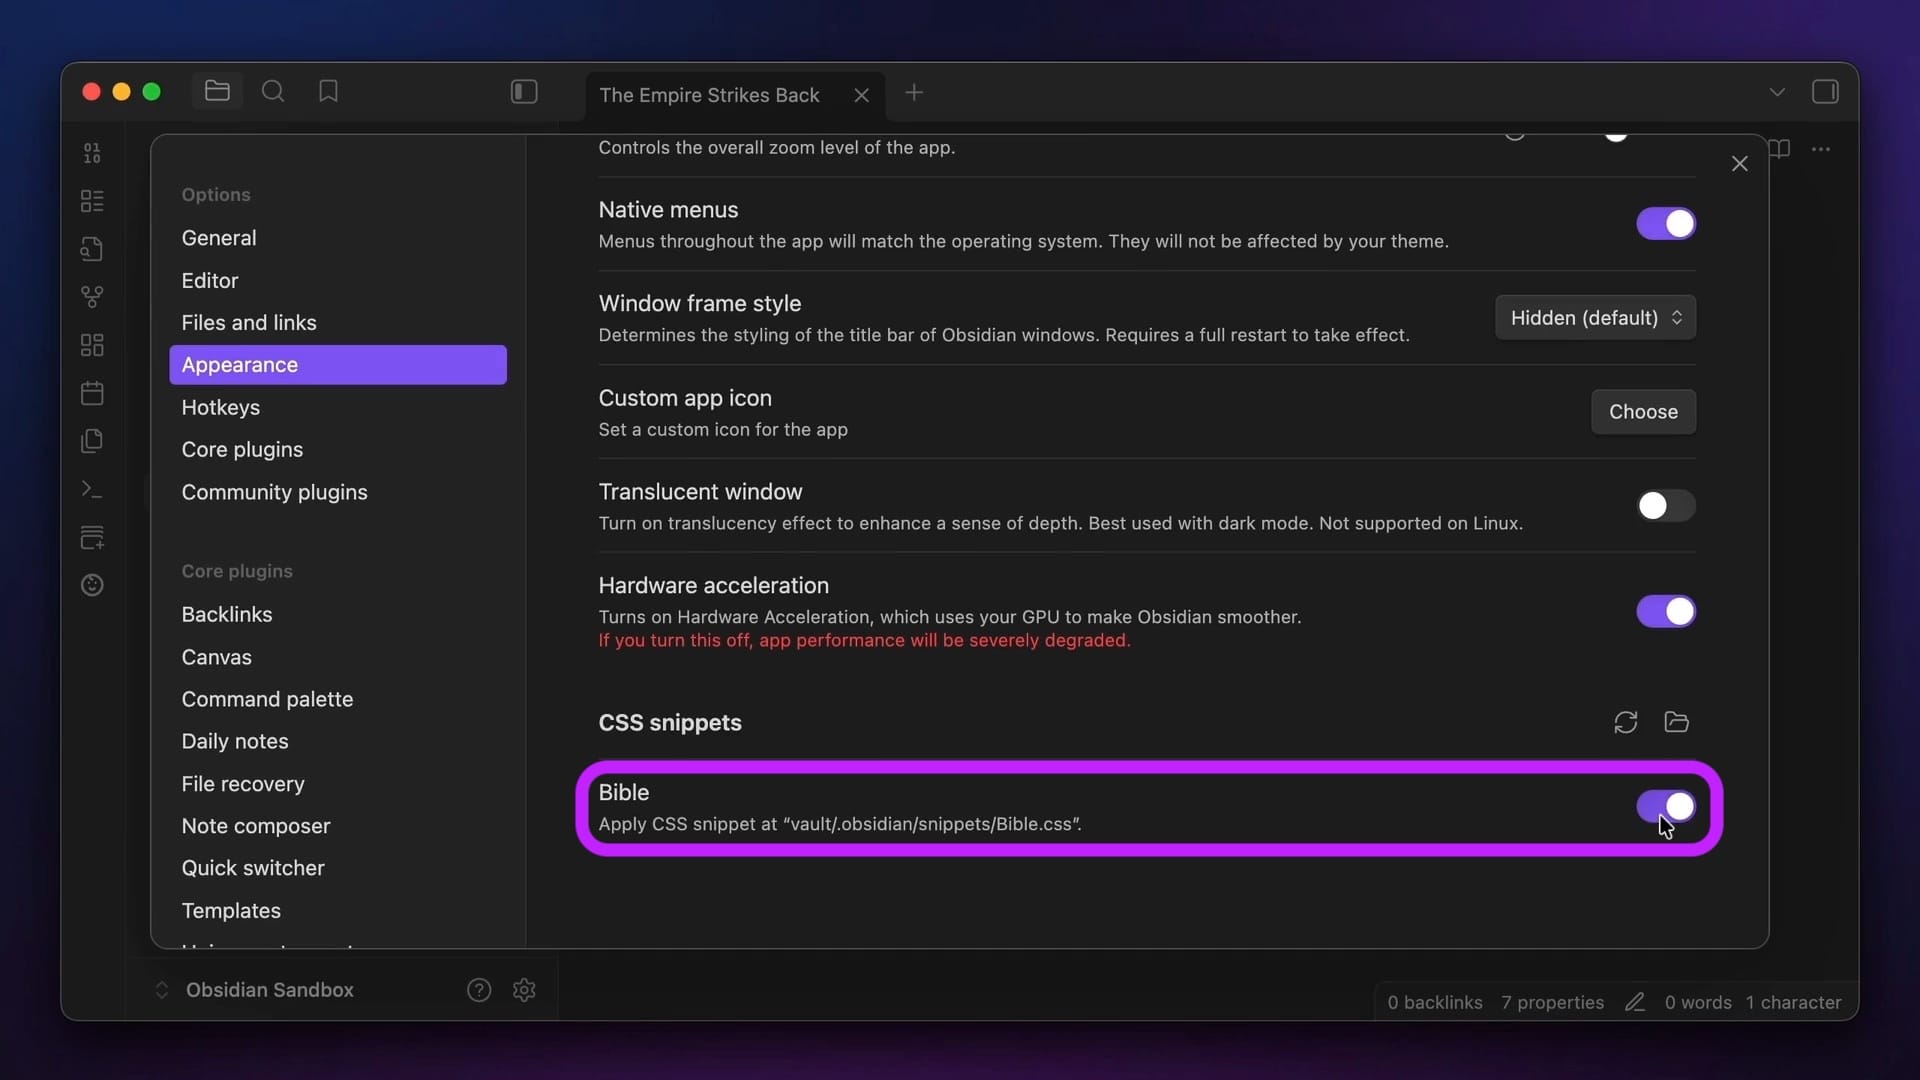
If you have set the class correctly in the CSS file, you can then activate it by typing the class name in the cssclasses property.
Here's an example from my Bible chapter notes I use to make them more readable, which modifies certain links for the lexicon files I use and also the verse headings:
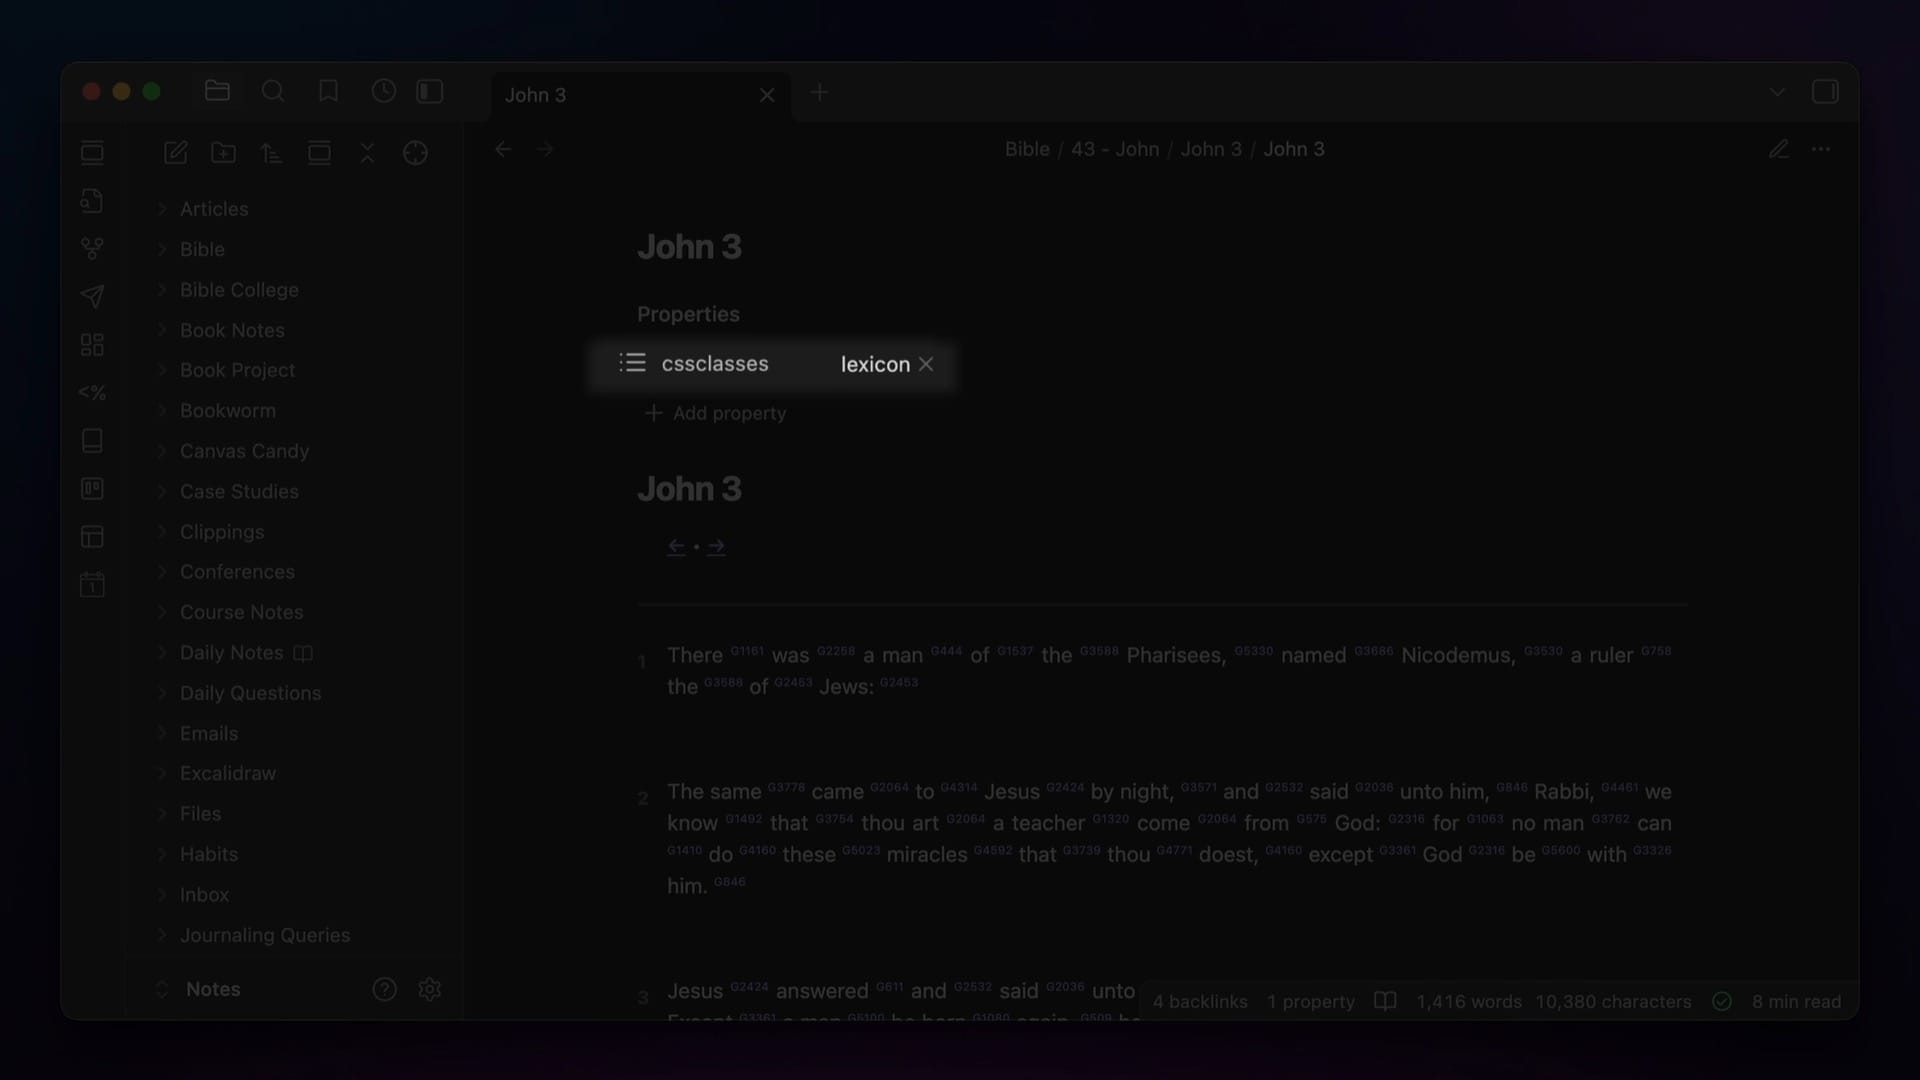
lexicon class added.Note that all of these default properties are plural: tags, aliases, and cssclasses. That's important, as the singular versions of these properties (tag, alias, cssclass) have all been deprecated. So if you try to use the singular version of these default properties, it won't actually work.
Rules & Best Practices
While there isn't a single "right way" to use Obsidian Properties, there are some rules and best practices that we should go over. Let's start with the rules.
Rules for Properties
When it comes to using Properties, there are three rules you should keep in mind.
- Be Consistent. If you're going to use a property for something, make sure that you use it the same way every time. If you don't, your property searches won't be useful because they won't show you everything you're looking for.
- Be Specific. Because property values auto-suggest from every value you've entered in your vault, you may want to use different versions of a property for different workflows. For example, if I had a different writing workflow for video scripts than I did for newsletters, I would break the status property into separate properties like
newsletter_statusandvideo_status. That way, when I go to add the value, the auto-complete is only showing me relevant statuses to choose from. - Use Sparingly. It's easy to overdo it with properties. Just like with tags and backlinks, less is often more. Not every note needs a property, but every note that has a property should help your workflows in a specific way.
Best Practices for Properties
There are also a couple of recommended best practices to help keep your properties from becoming a complete mess.
- Default to singular properties whenever you can. This will help keep you from making duplicate properties, for example,
ratingandratingswould actually be two separate properties and could make it tricky to find what you're looking for. The one exception to this is when you are using a list property, which allows multiple values. All of the default property types in Obsidian actually allow multiple entries, so by using a plural in the property name in that instance, you can use it as a clue that you can actually add multiple values. - Don't use spaces when naming your properties. You can technically do this, but it's not a good idea when tagging, and for consistency's sake, I recommend you carry this over to your use of properties as well. Just like tags, Obsidian will actually combine both the lower case and upper case versions of a property, so
Bookandbookare treated the same in Obsidian. But not every text editor does that, so it's worth making sure your property metadata labels are consistent in case you do decide to move to some other app in the future. - Utilize autocomplete when you're adding your properties. This will make sure you don't spell something wrong and accidentally create duplicate properties in your vault.
By the way, if you do make a mistake or just want to rename a property in the future, you can actually edit them. First, make sure you have the All Properties view active by running the Properties View: Show All Properties command from the Command Palette.
Next, go to the All Properties View in your right sidebar. Right-click on the property you want to change, select Rename, then type the new property name you want to use.
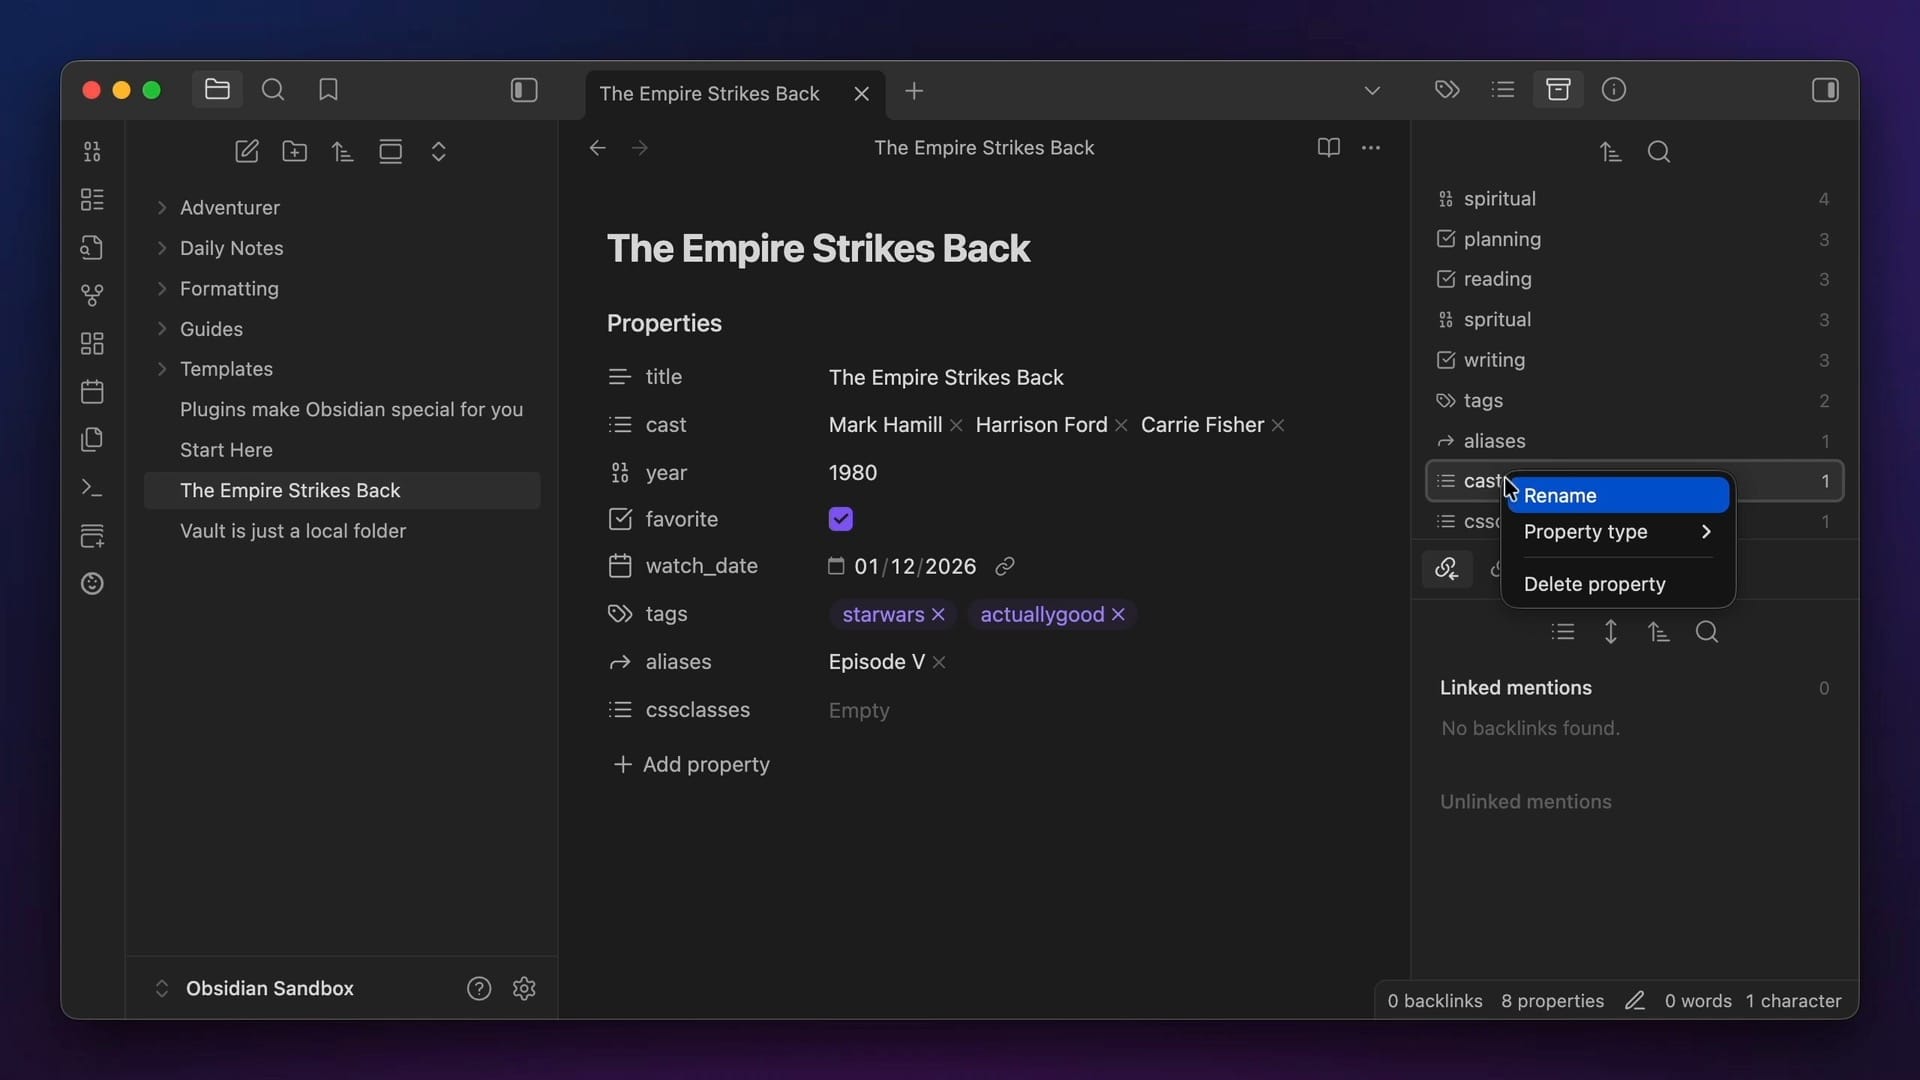
Doing this will update that property throughout your entire vault.
Now if only you could do this with tags as well 😞
But the very best tip that I can give you when it comes to using Properties in Obsidian is to add them to your template files. This basically makes sure that all of the best practices are followed at once, and when you create new files from those templates, you are guaranteed that the right properties will be added to the note and all the properties will be formatted correctly.
Want more Obsidian tips, templates, and resources? Grab my free Obsidian Starter Vault and start getting more out of your notes and ideas today.


