


Want to give your Obsidian vault an immediate upgrade?
In this post, I want to share 10 quick tips that can help remove a lot of the friction from your PKM system. We'll start with the basics and work our way up in terms of complexity, but the goal is that by the end of this post, your vault will start to feel a little more powerful and a lot easier to use.
1: Use the Quick Switcher
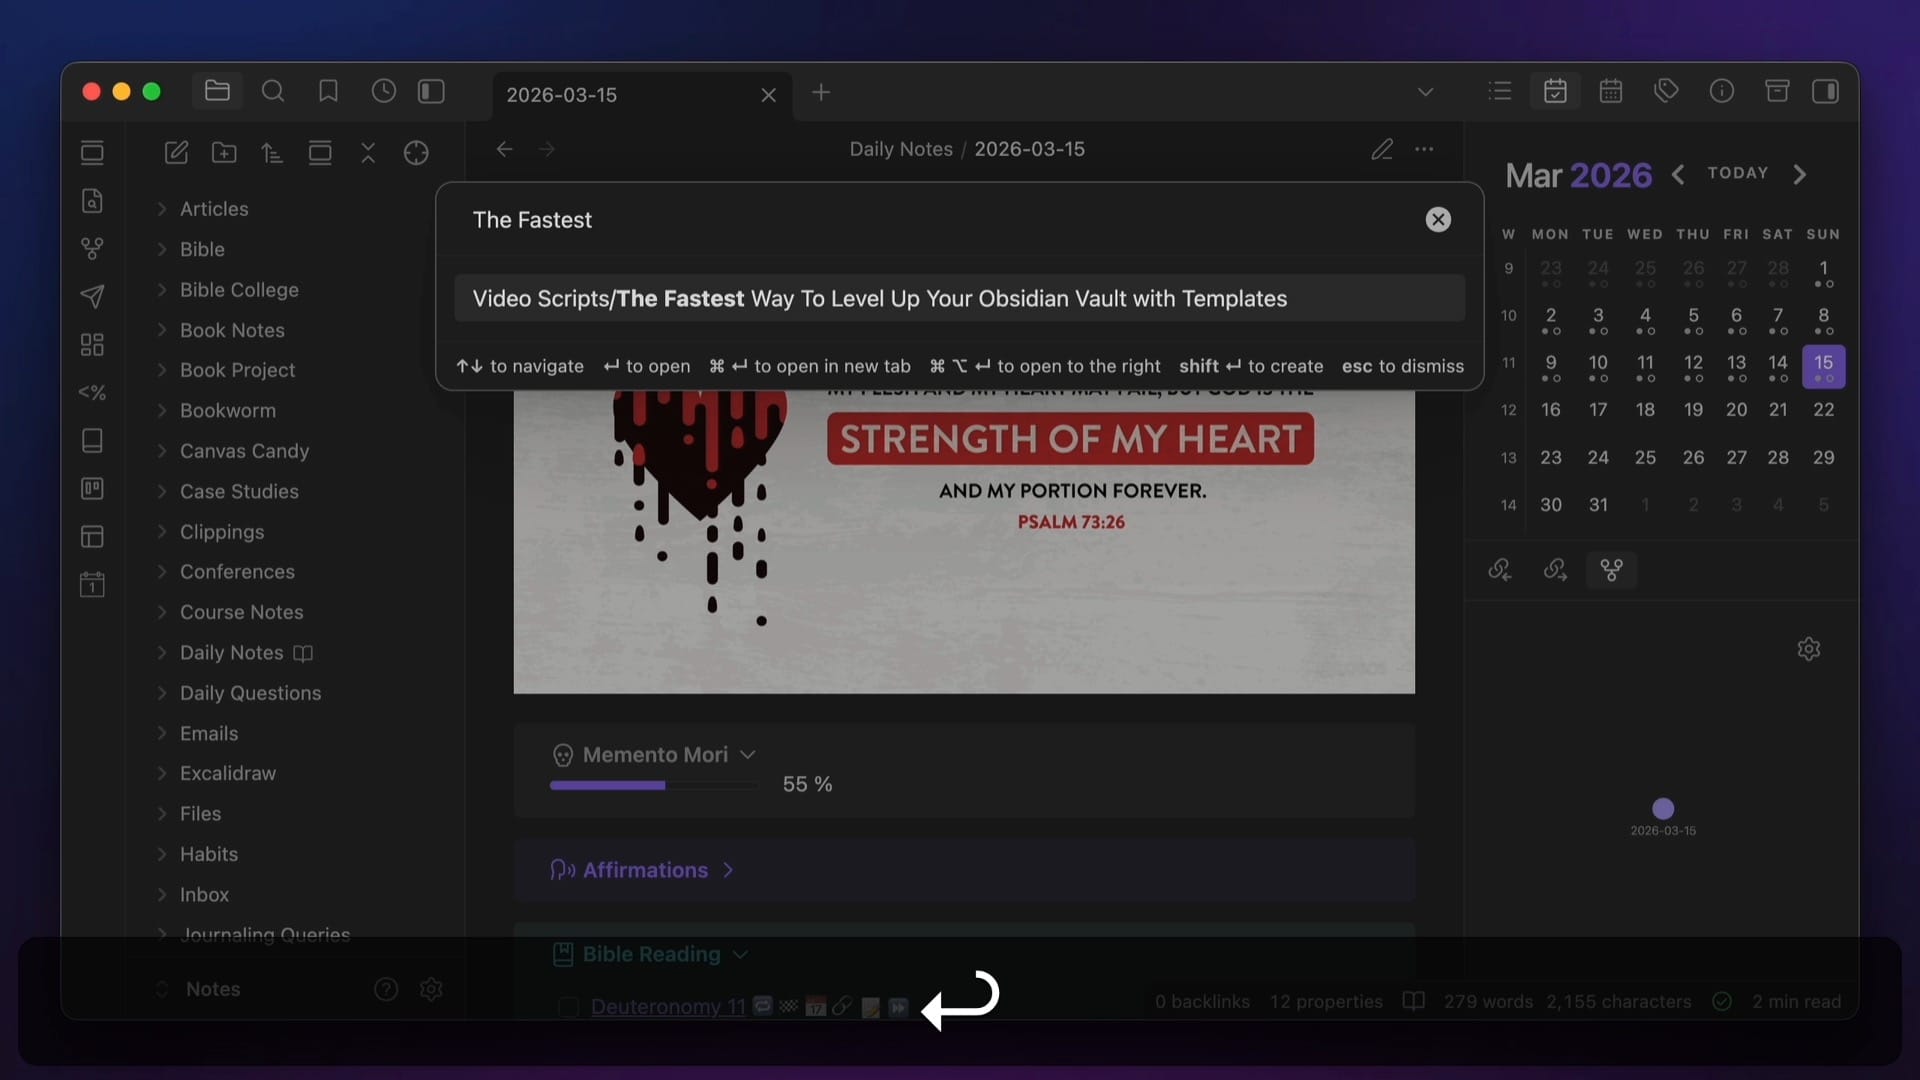
Just hit ⌘-O (or ⌃-O on Windows) to open the Quick Switcher, then start typing the name of the note you want to open. The auto-complete feature shows all the notes that match your typed text, and from here you can select the note you want with the arrow keys and hit the Enter key to open it (or hold the ⌘ key while hitting Enter to open it in a new tab.)
You can also create a new note from the Quick Switcher by typing the name of a note that doesn't exist yet and hitting the Enter key to create it. This will create the new note and add the title you typed automatically.
One of the places the Quick Switcher is most useful is in the mobile version of Obsidian, which doesn't display the File Explorer onscreen while you are looking at the contents of your note. So on your phone, you may want to configure the Mobile Quick Action to use the Quick Switcher so you can find notes easily without having to open the sidebar. Just go to Settings → Toolbar, then tap the Configure button to configure the Mobile Quick Action, and then select the Open Quick Switcher command.
IMG
Once this is set up, you can swipe down anywhere in the contents of an open note, the Quick Switcher will open, and then you can just start typing the name of the note you want to open.
2: Use Hover Preview
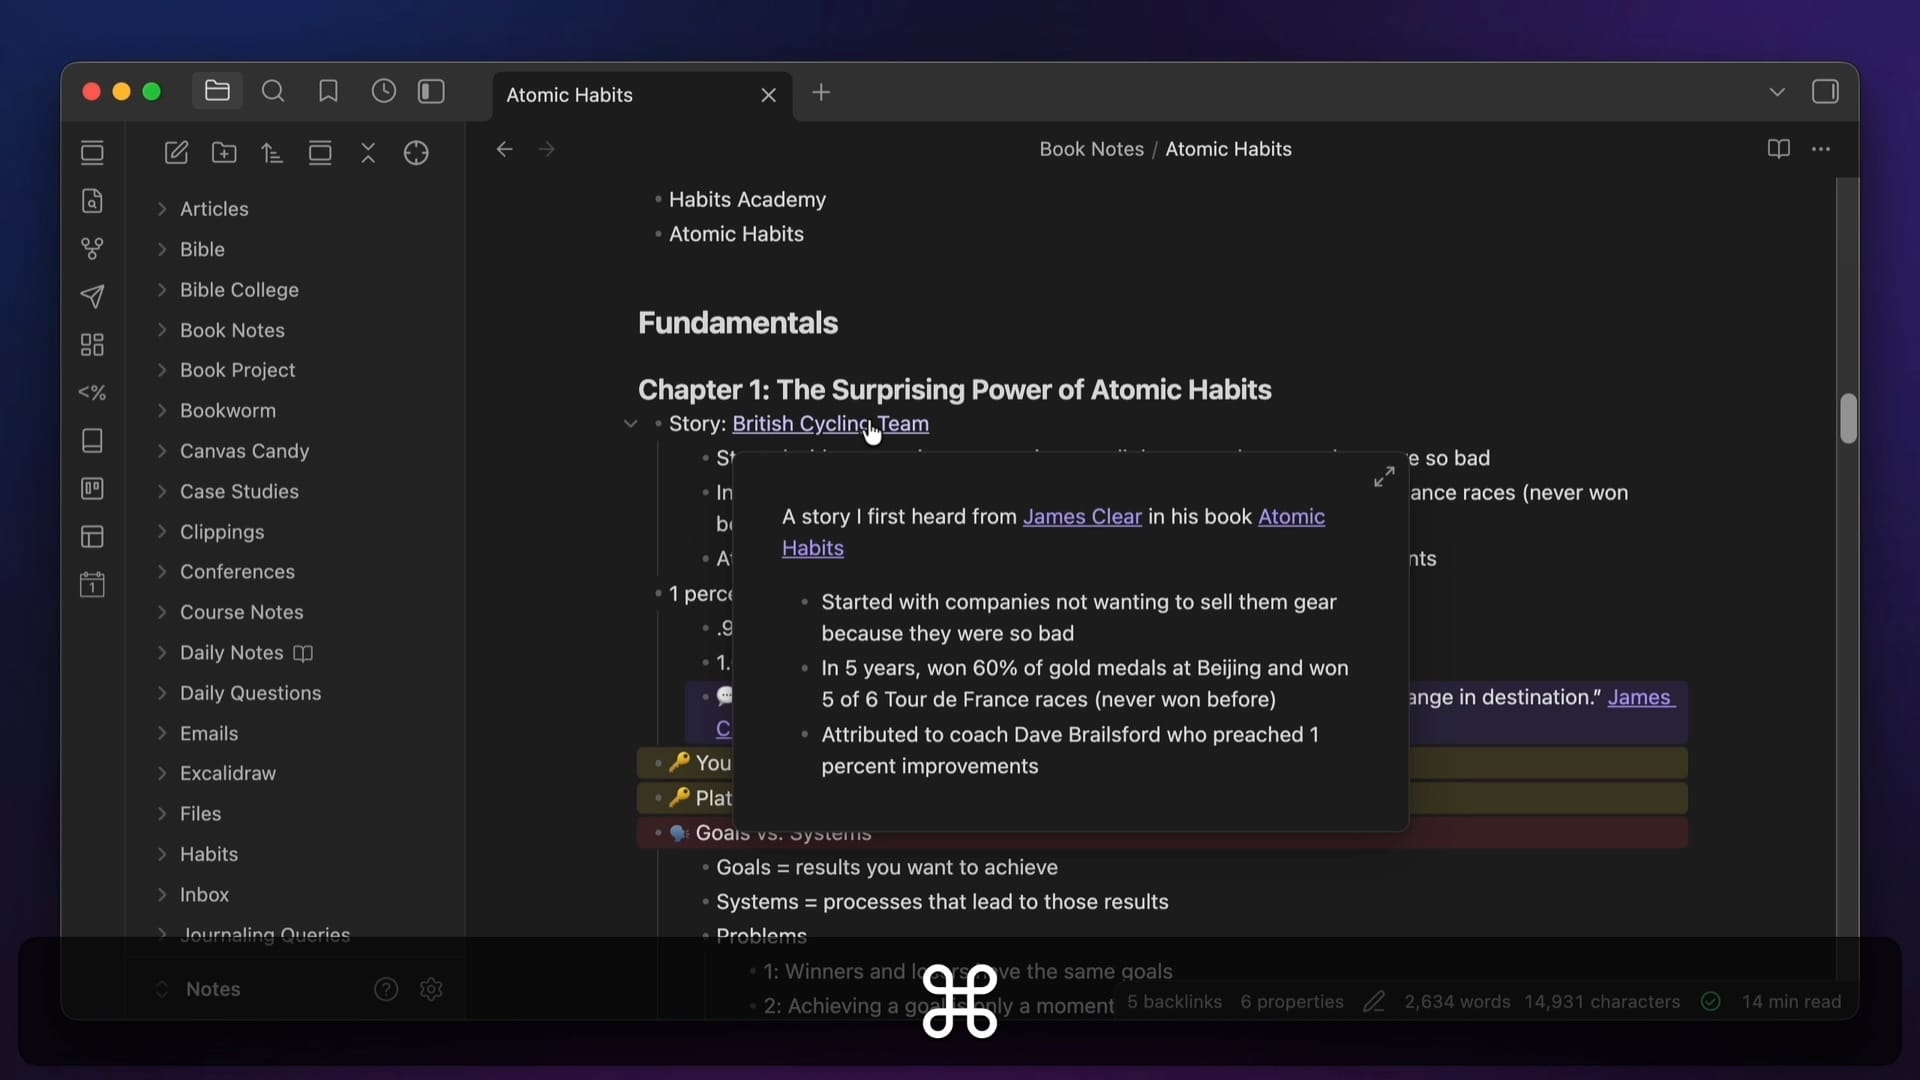
To use Hover Preview to see the contents of the notes you link to without actually leaving the current note, just hold the ⌘ key on Mac (or the ⌃ key on Windows) and hover your mouse cursor over an internal link in Obsidian. This will preview the contents of that note in a pop-up window.
One place I use this frequently is in my Obsidian Bible Study Resources, where I link to the Hebrew or Greek definitions for the English words in the Bible text in my notes. With Hover Preview, I can hold the ⌘ key and see a preview of the Strong's definition for the original language alongside the English text in the note itself.
This is the kind of thing that is a signature feature of Bible study programs that cost hundreds or even thousands of dollars. But using the built-in Hover Preview feature in Obsidian, I can do the exact same thing for free.
Another place this is useful is in my kanban boards I use for my creative projects. Using Hover Preview, I can see the contents of the notes for my video scripts without leaving the kanban view:
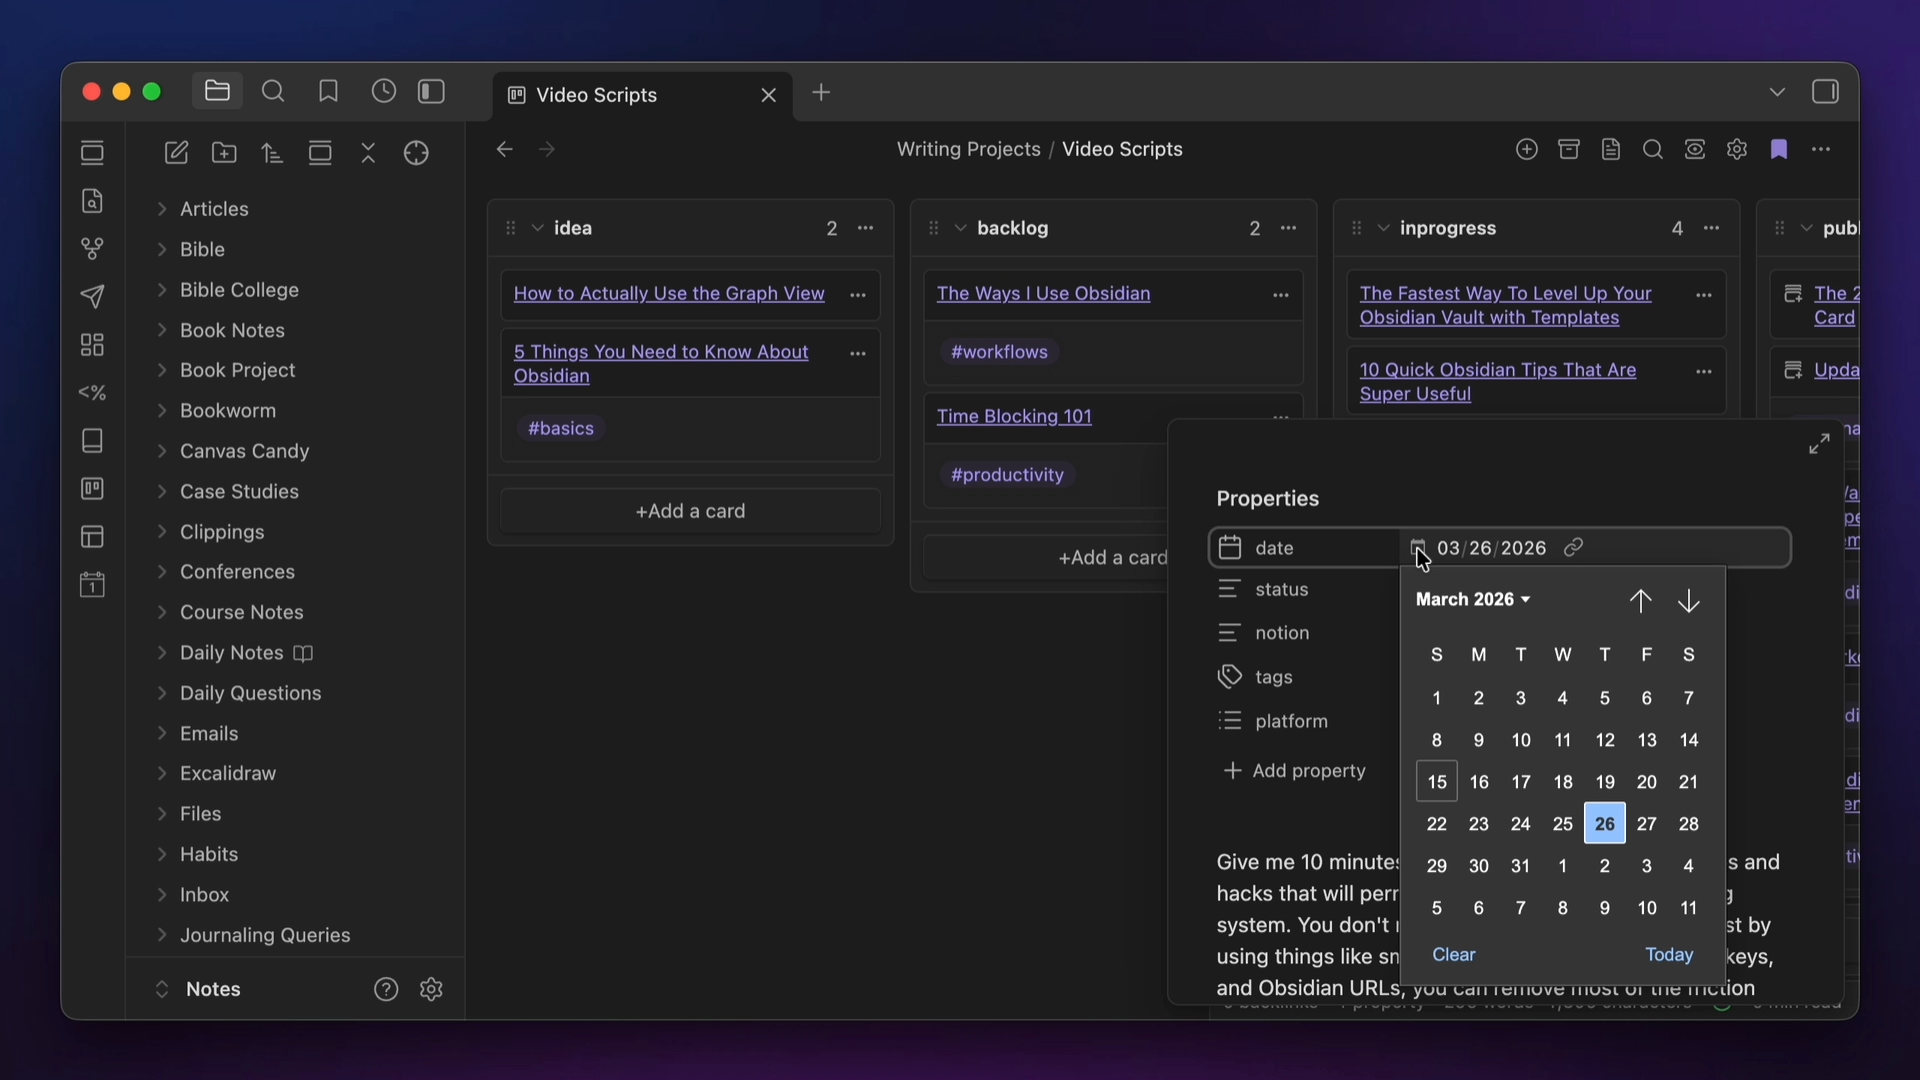
I can even click inside the previews to modify the note metadata and change the publish date.
One of the reasons this is so useful is that it immediately starts to reinforce the concept of linked notes, which can be a little bit tricky for new users to grok. This gives you an immediate reward for making those links, which is great for beginners who are trying to build a linking habit.
3: Paste URL Over Selected Text
You may be aware of the Markdown hotkey for pasting a link, which is ⌘-K (or ⌃-K on Windows), but this ends up just inserting the Markdown formatting for a link.
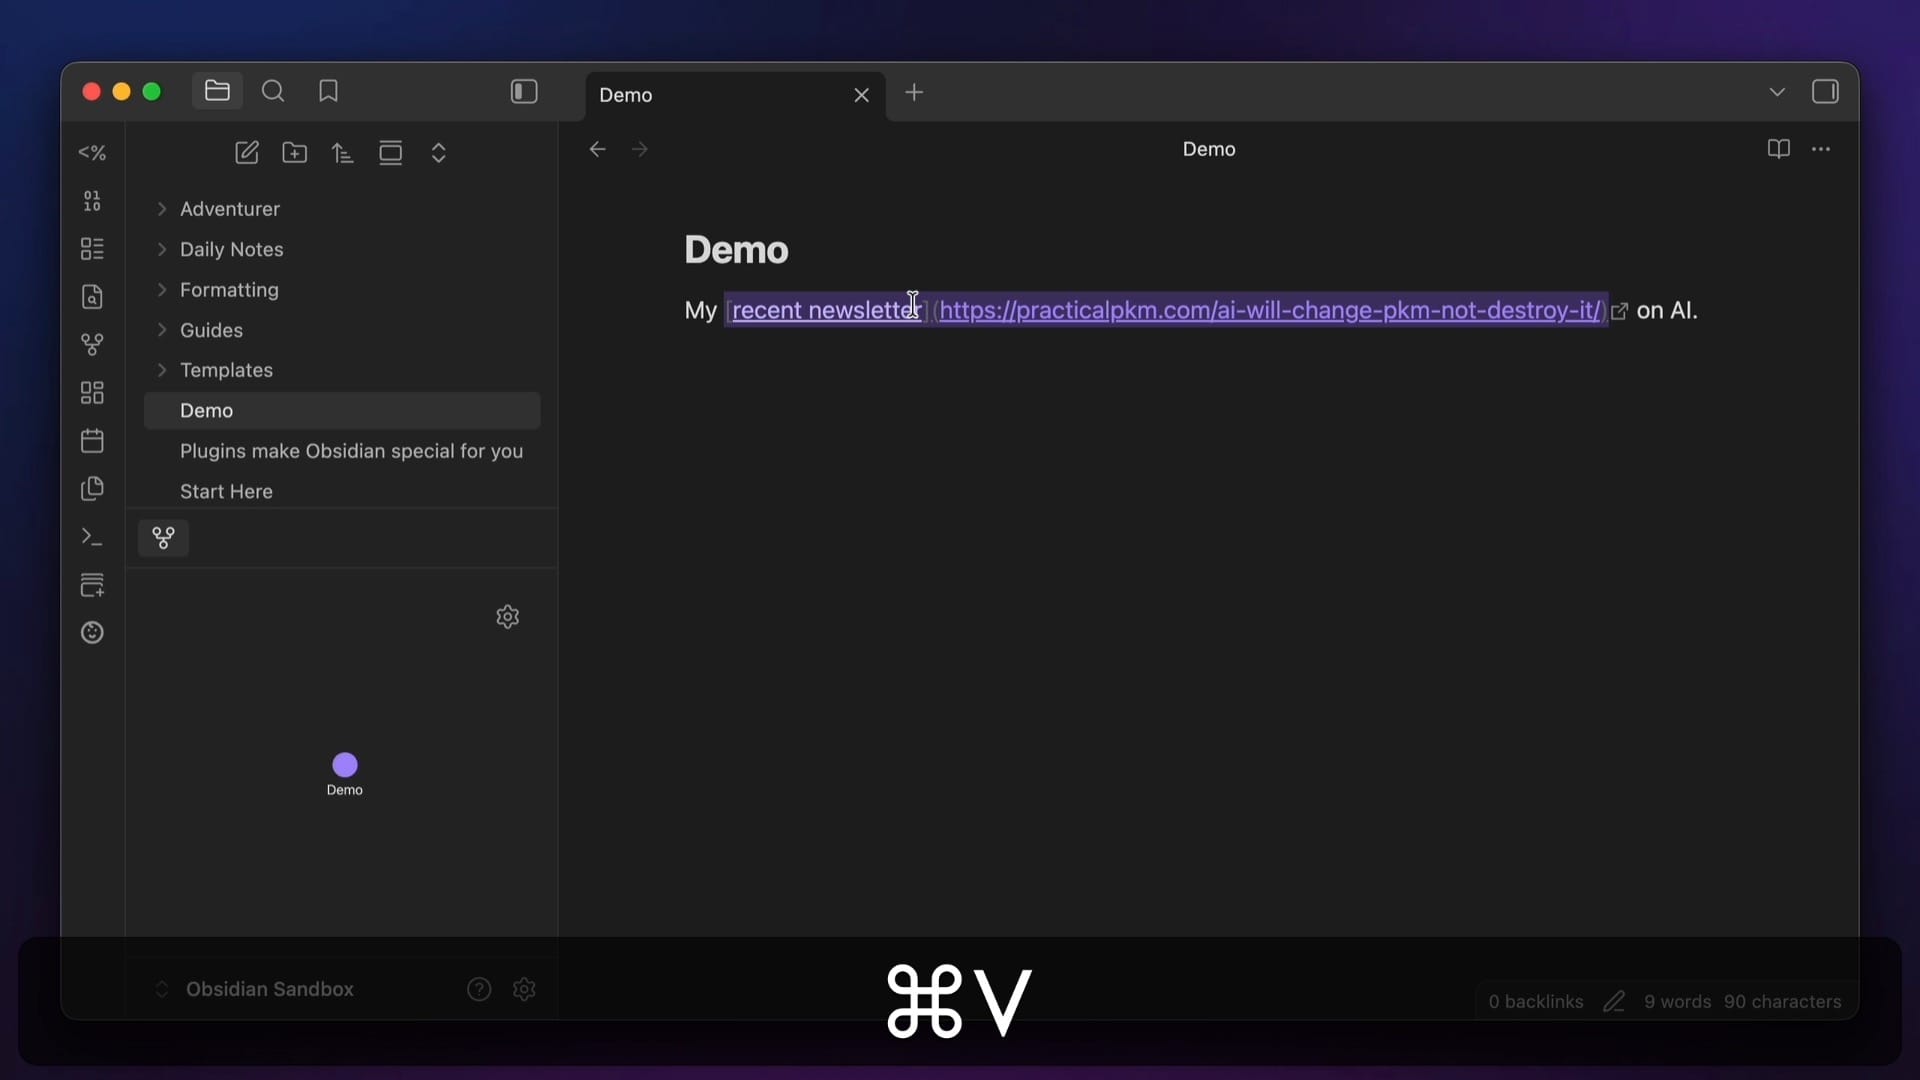
But if you have text selected in your note, you can actually use the standard paste command (⌘-V on Mac or ⌃-V on Windows), it will actually insert the URL into the appropriate place in the Markdown link automatically.
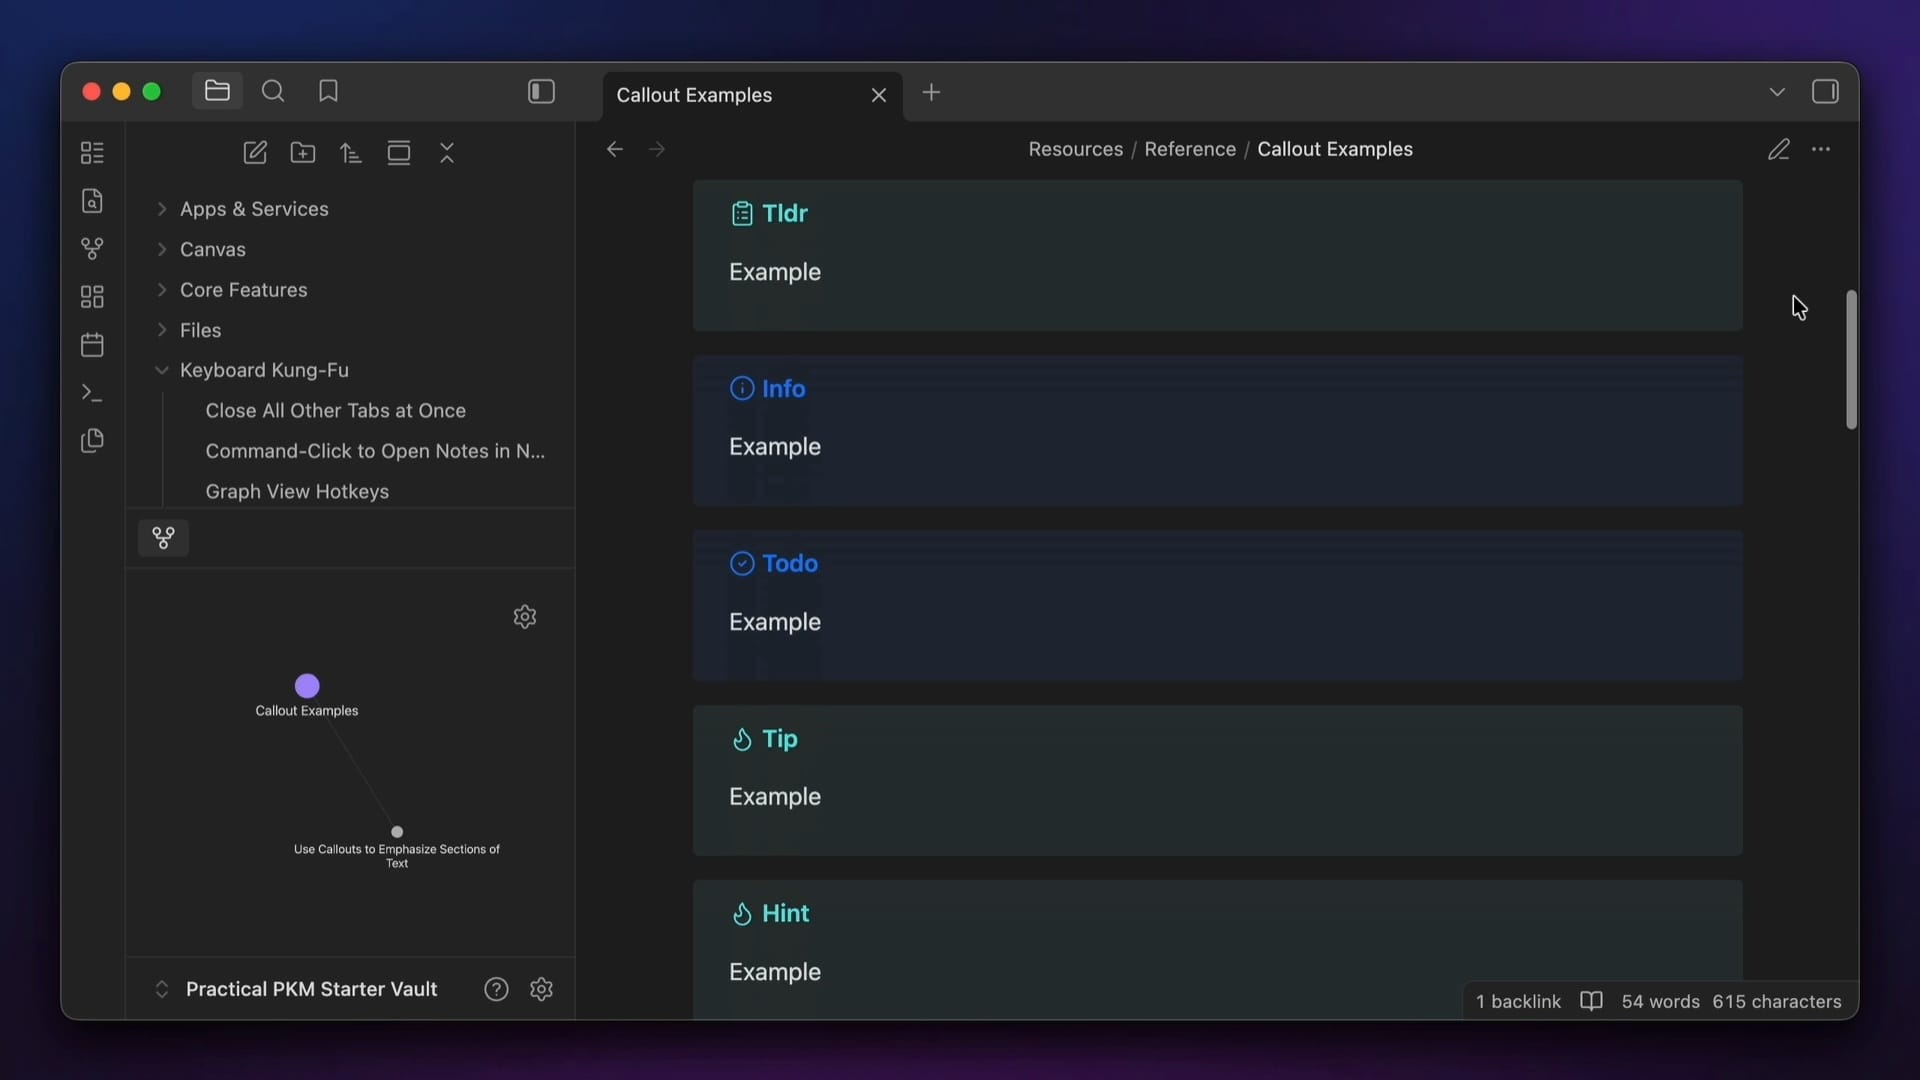
4: Use Callouts
Callouts are an easy way to add some visual flair to your notes and bring attention to important text. To add a callout, you can either run the Insert callout command from the Command Palette or simply type the following text in your note:
> [!NOTE] Callout title
> Callout text
You can change the type of callout by changing the text between the square brackets, for example, [!quote] or [!tip]. There are a bunch of callout types supported out of the box in Obsidian, each with its own icon and color. I actually have a reference of all these callout types inside of my free Obsidian Starter Vault:
You can also add your own custom callout types with the Callout Manager plugin, and you can make collapsible callouts by adding either a + or - character right after the square brackets, like so:
> [!NOTE]+ Callout title
> This callout is expanded by default
The + will have the callout open and the - will have the callout collapsed by default. Either way, you can click the caret to open or close the callout while in Live Preview or Reading Mode.
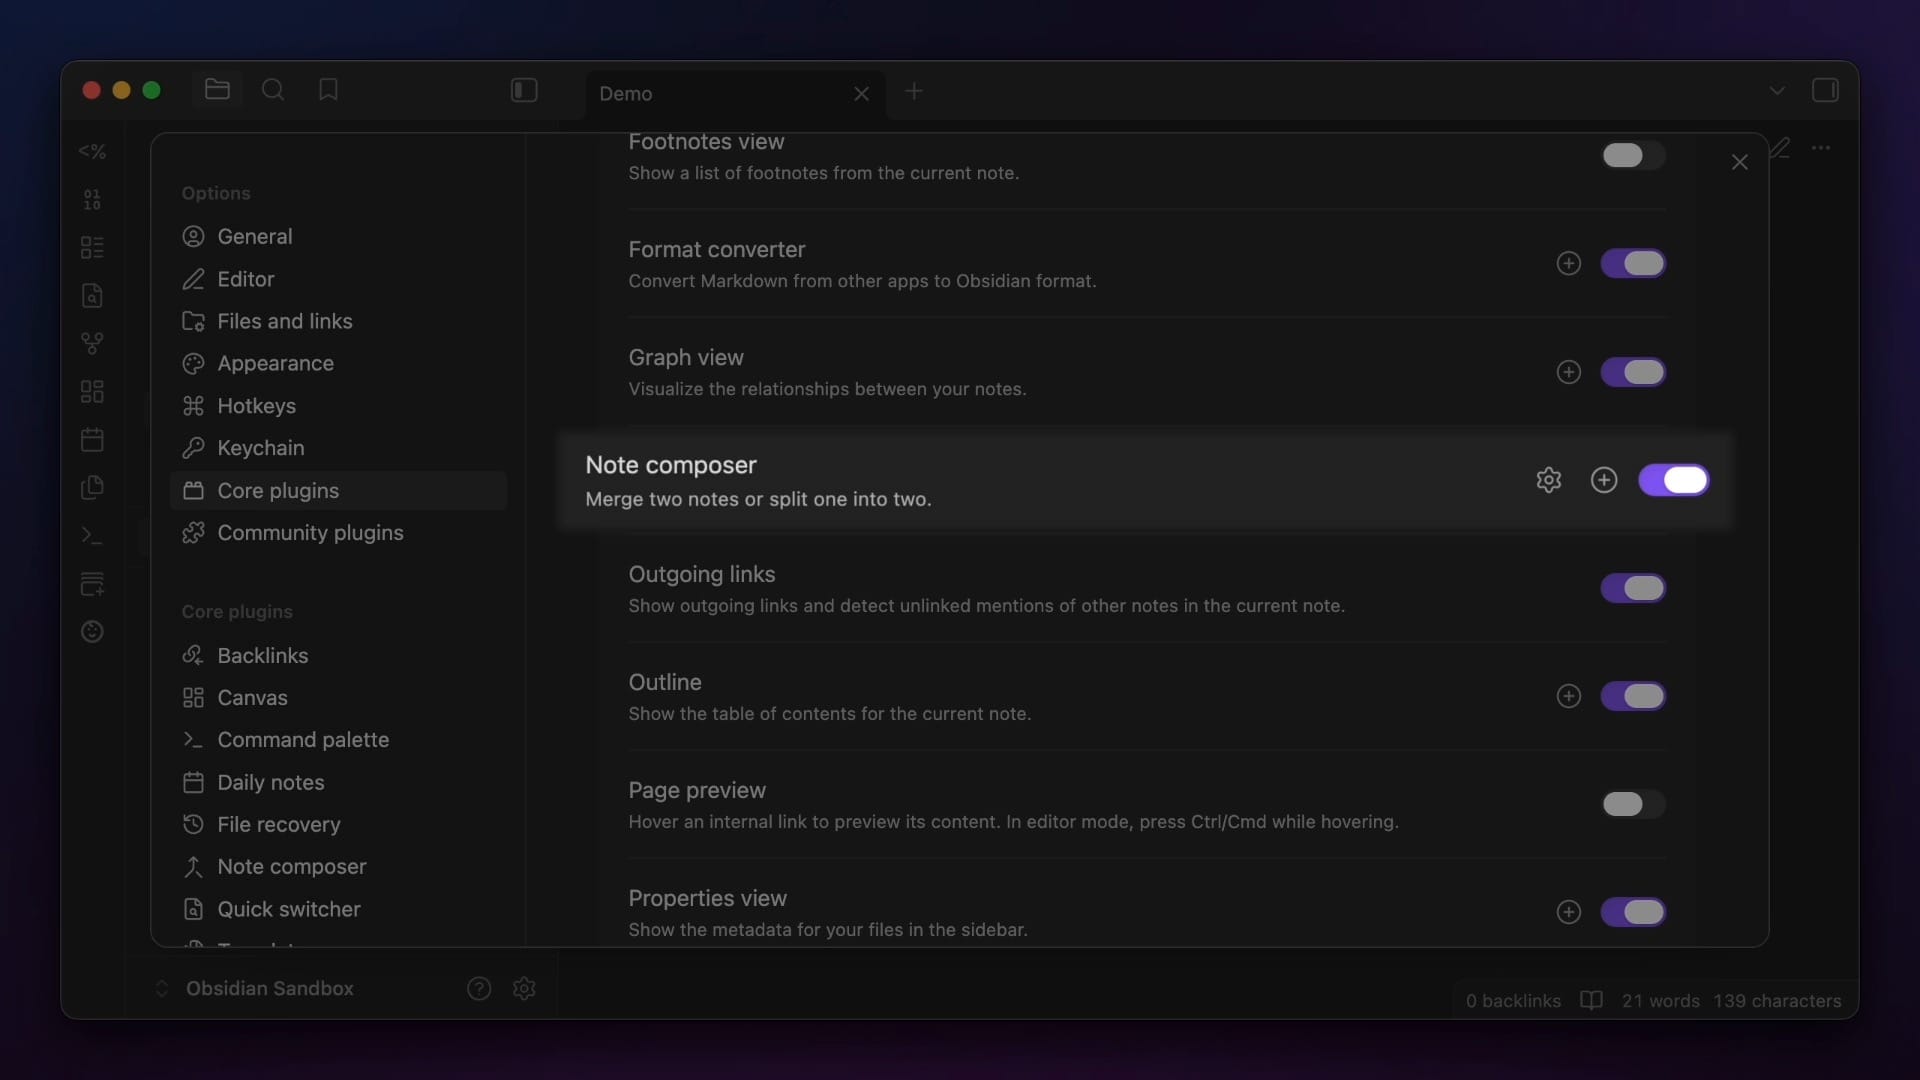
5: Create Atomic Notes With Note Composer
Note Composer is a core plugin that lets you do two things:
- bring together multiple notes into one longer note, and
- break apart longer notes into separate, smaller notes.
I never use this to merge notes together, but I do frequently use it to break apart longer notes into smaller atomic notes inside my vault.
To do this, first make sure that you have the Note Composer core plugin enabled in the Core plugin settings:
Next, select the text you want to make a new note out of. Then invoke the Command Palette with ⌘-P on Mac (or ⌃-P on Windows) and run the Extract Current Selection... command.

You can select the note you want to merge the text into, or start typing the name of a new note and then hit the Enter key to create it. The original text gets cut from the current note, and a link to the new note gets inserted in its place.
You can choose whether you want to create a normal link or embed the new note in the current note in the Note Composer settings, but either way, there is now a new atomic note in your vault. The new link to that note from your current note now shows up in the Graph View and Local Graph as well, which you can use to navigate between those notes.
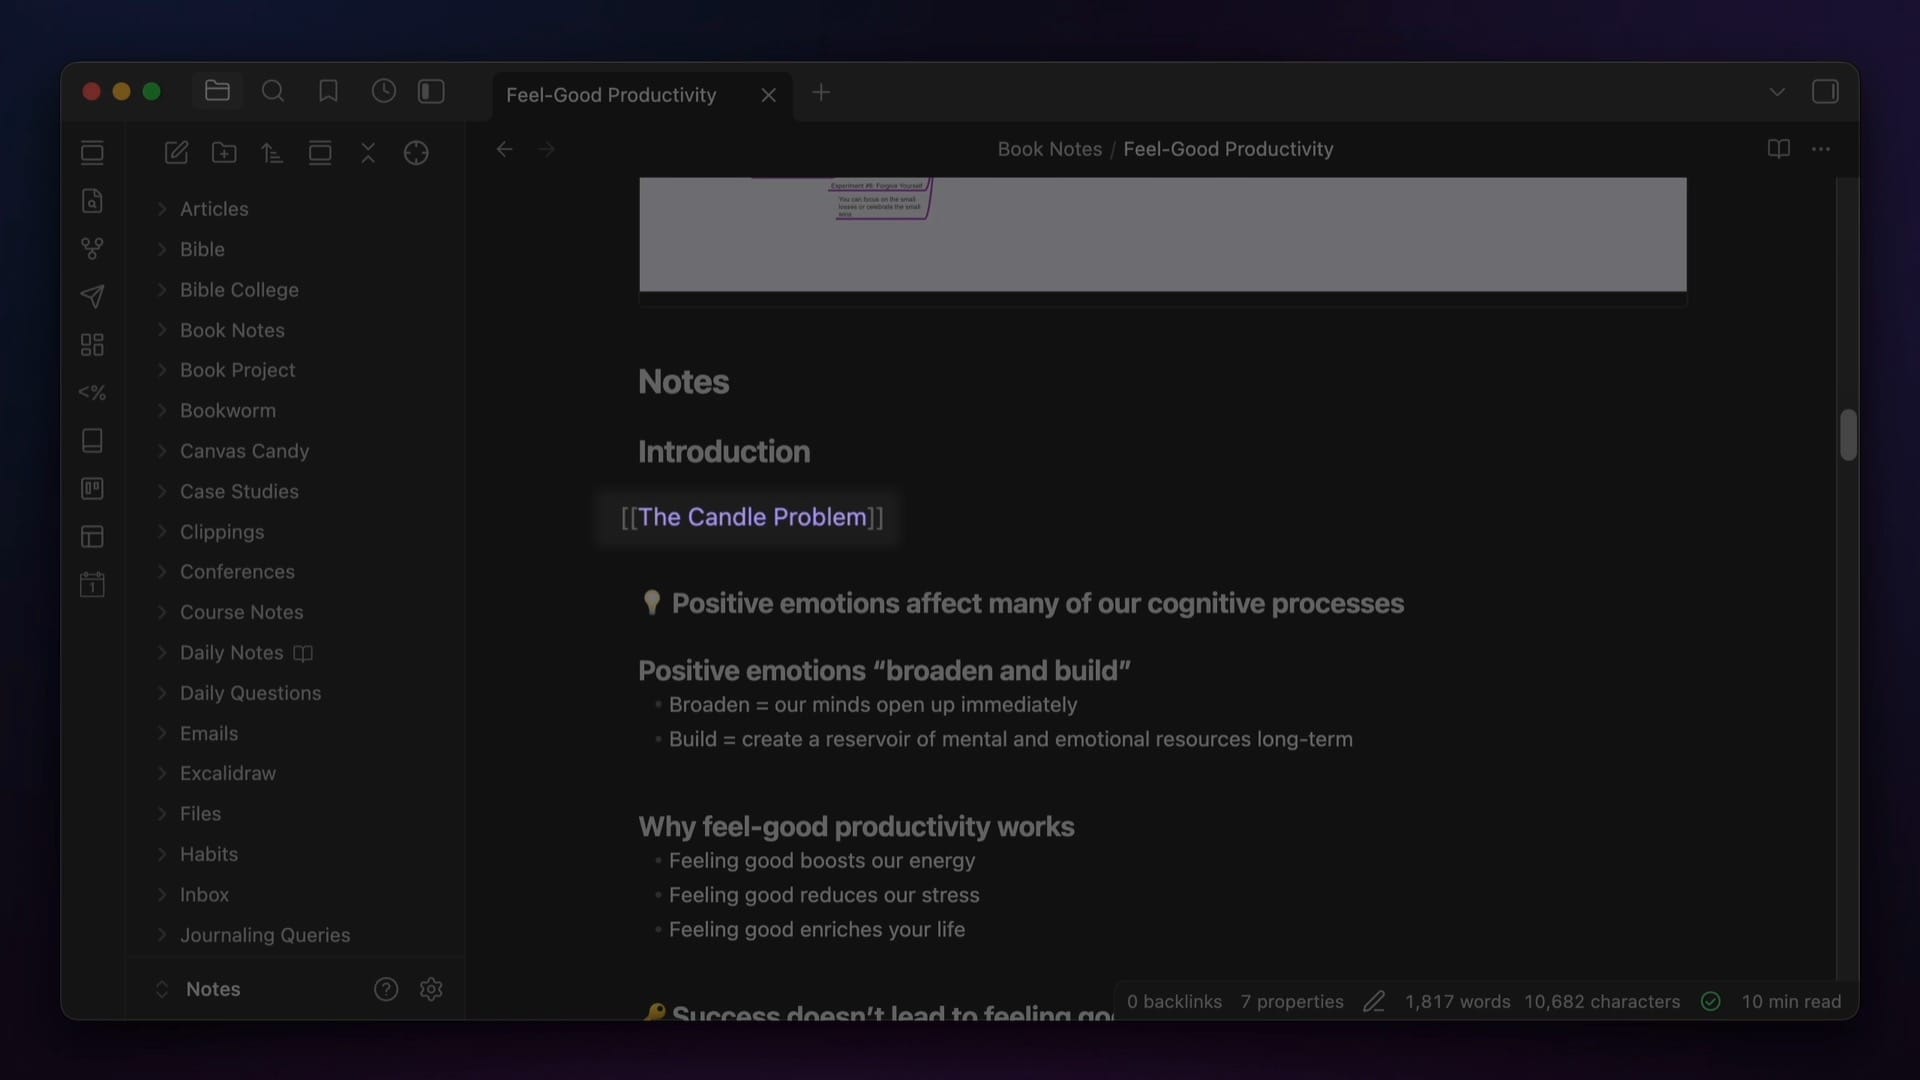
6: Link to Note Headings
This tip is one that I don't use a ton because, as I just mentioned, I prefer to break my notes apart into smaller atomic notes. But finding the right level of "atomicity" (not sure that's a word 😂) for your notes is subjective, so if you prefer longer notes, another great feature is the ability to link not just to note titles but also note headings.
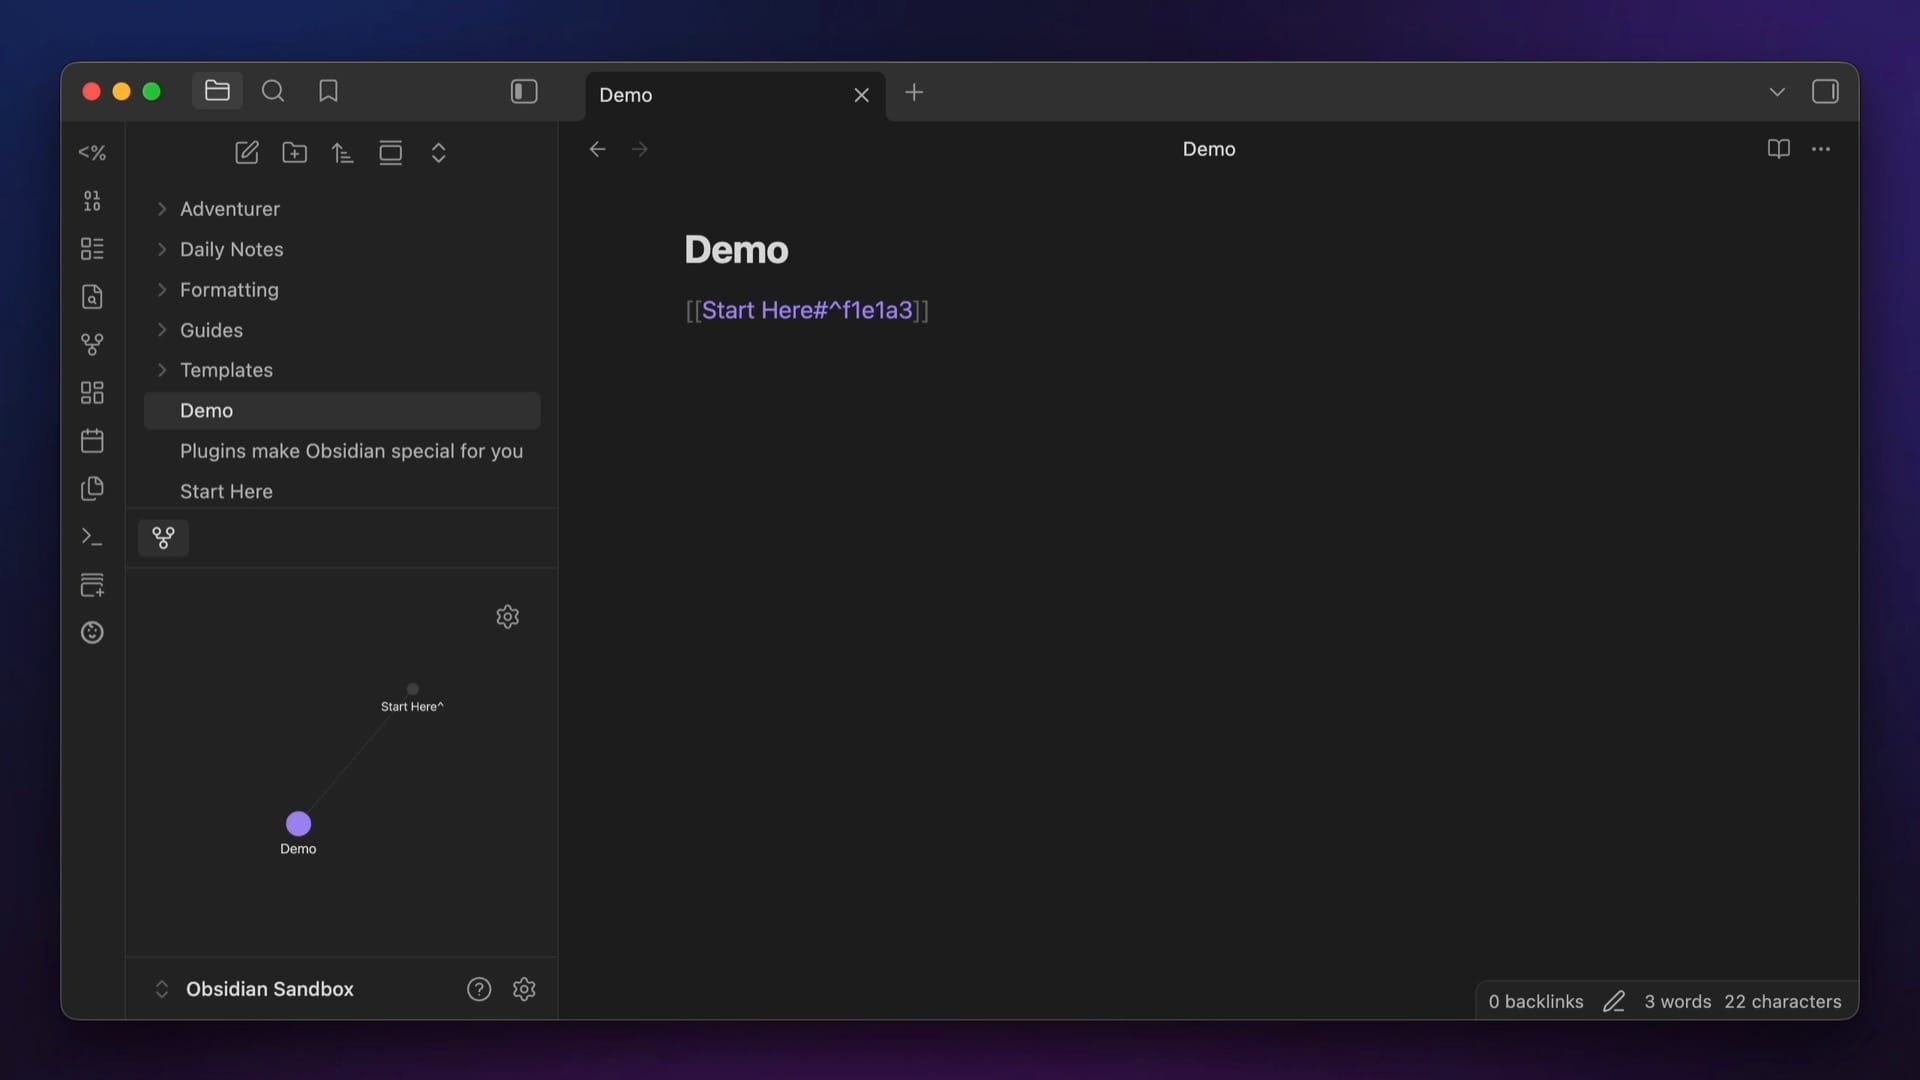
To do this, just type [[ to create an internal link, then start typing the name of the note you want to link to. Select the note from the dropdown list using auto-complete, and then type a # character to select the specific heading you want to link to in that note.
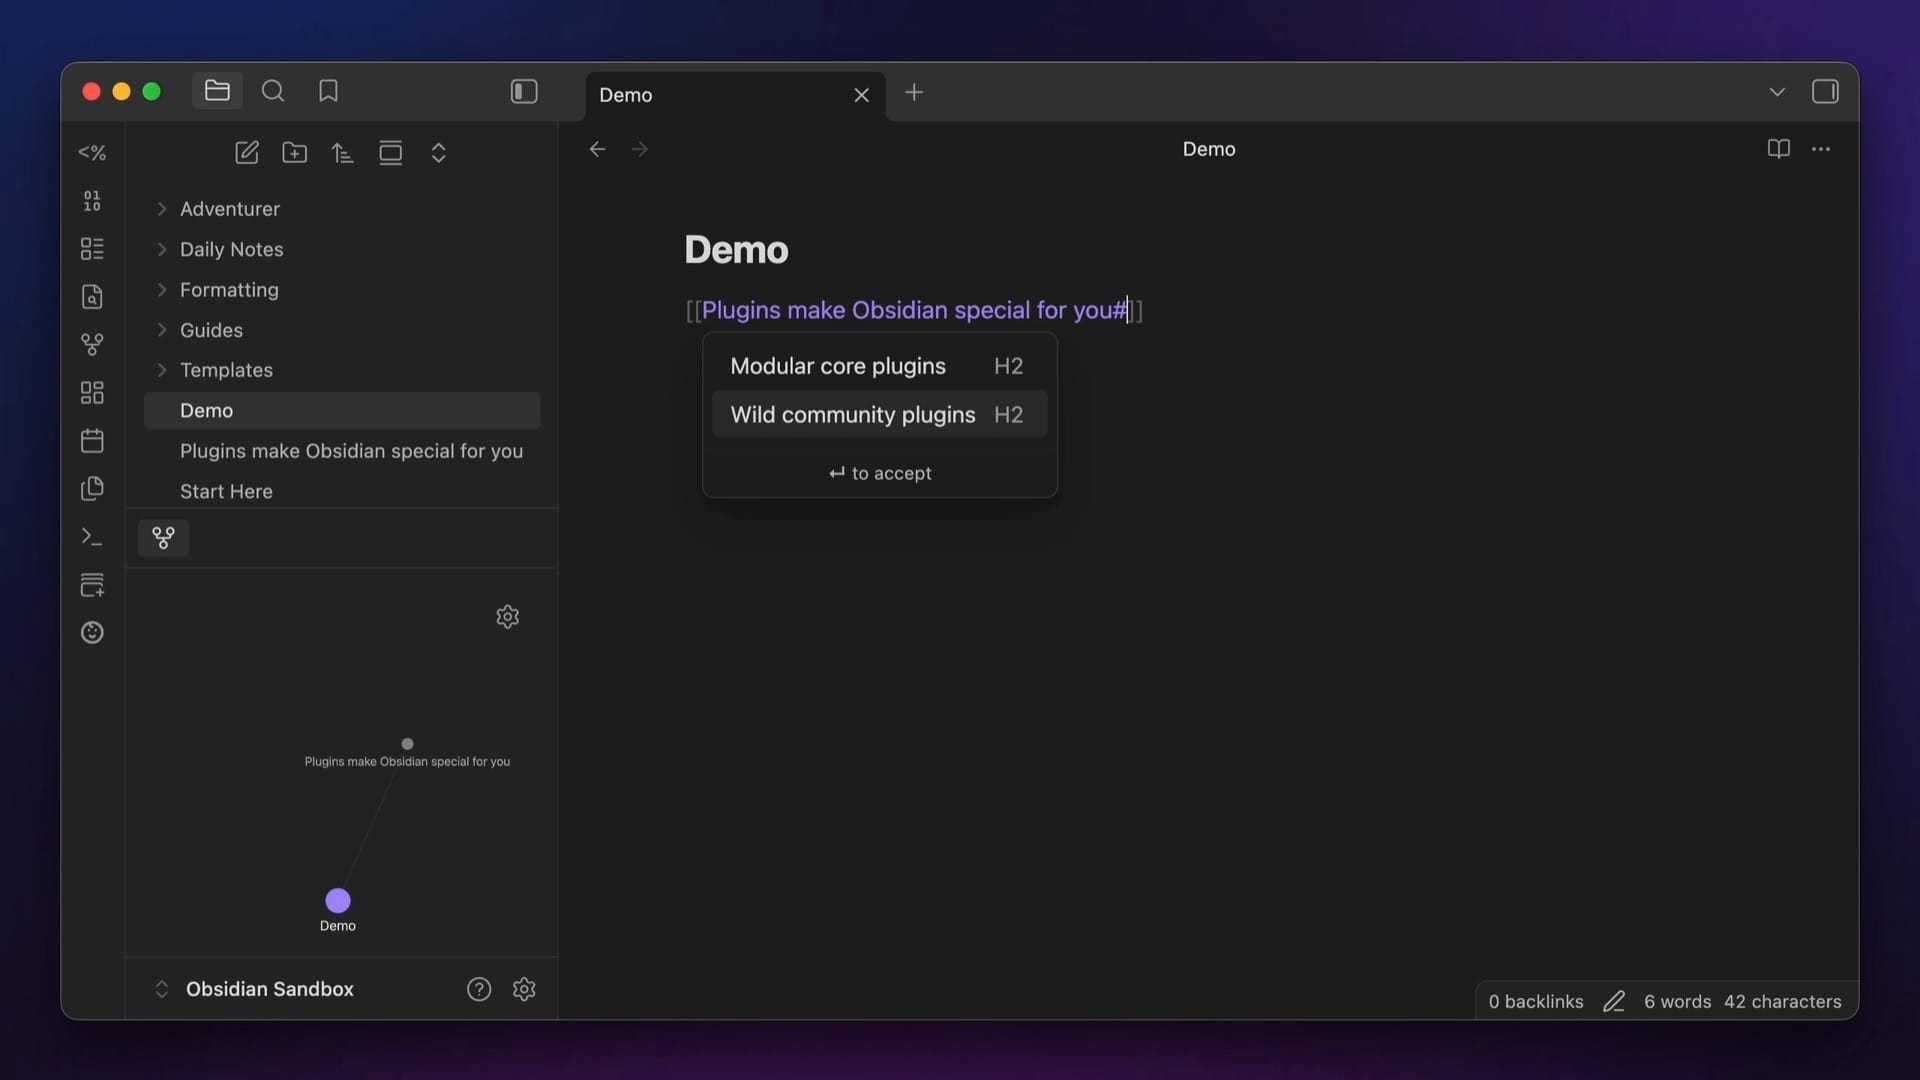
This creates a link that will take you straight to that heading inside the note when you click on it. You can even link to specific blocks in your notes using ^, but this creates weird number identifiers in your notes that don't really mean anything.
I think these block links are a little messy, but the heading links can be really useful. The only catch here is that all of the links in both the Graph View and the Local Graph exist on the note level, so you won't see links to headings or blocks show up in either of those Graph views.
7: Use the Outline View to Reorder Headings
Speaking of headings, these also show up in the Outline view if you have the Outline core plugin enabled. The Outline view appears in the right sidebar by default on the desktop version of Obsidian and gives you a quick outline of the headers in your current note.
The headers are nested by header level, and you can click on a header to jump to that header in the open note. But one thing you may not know about this Outline view is that you can actually use it to reorder the contents of your note.
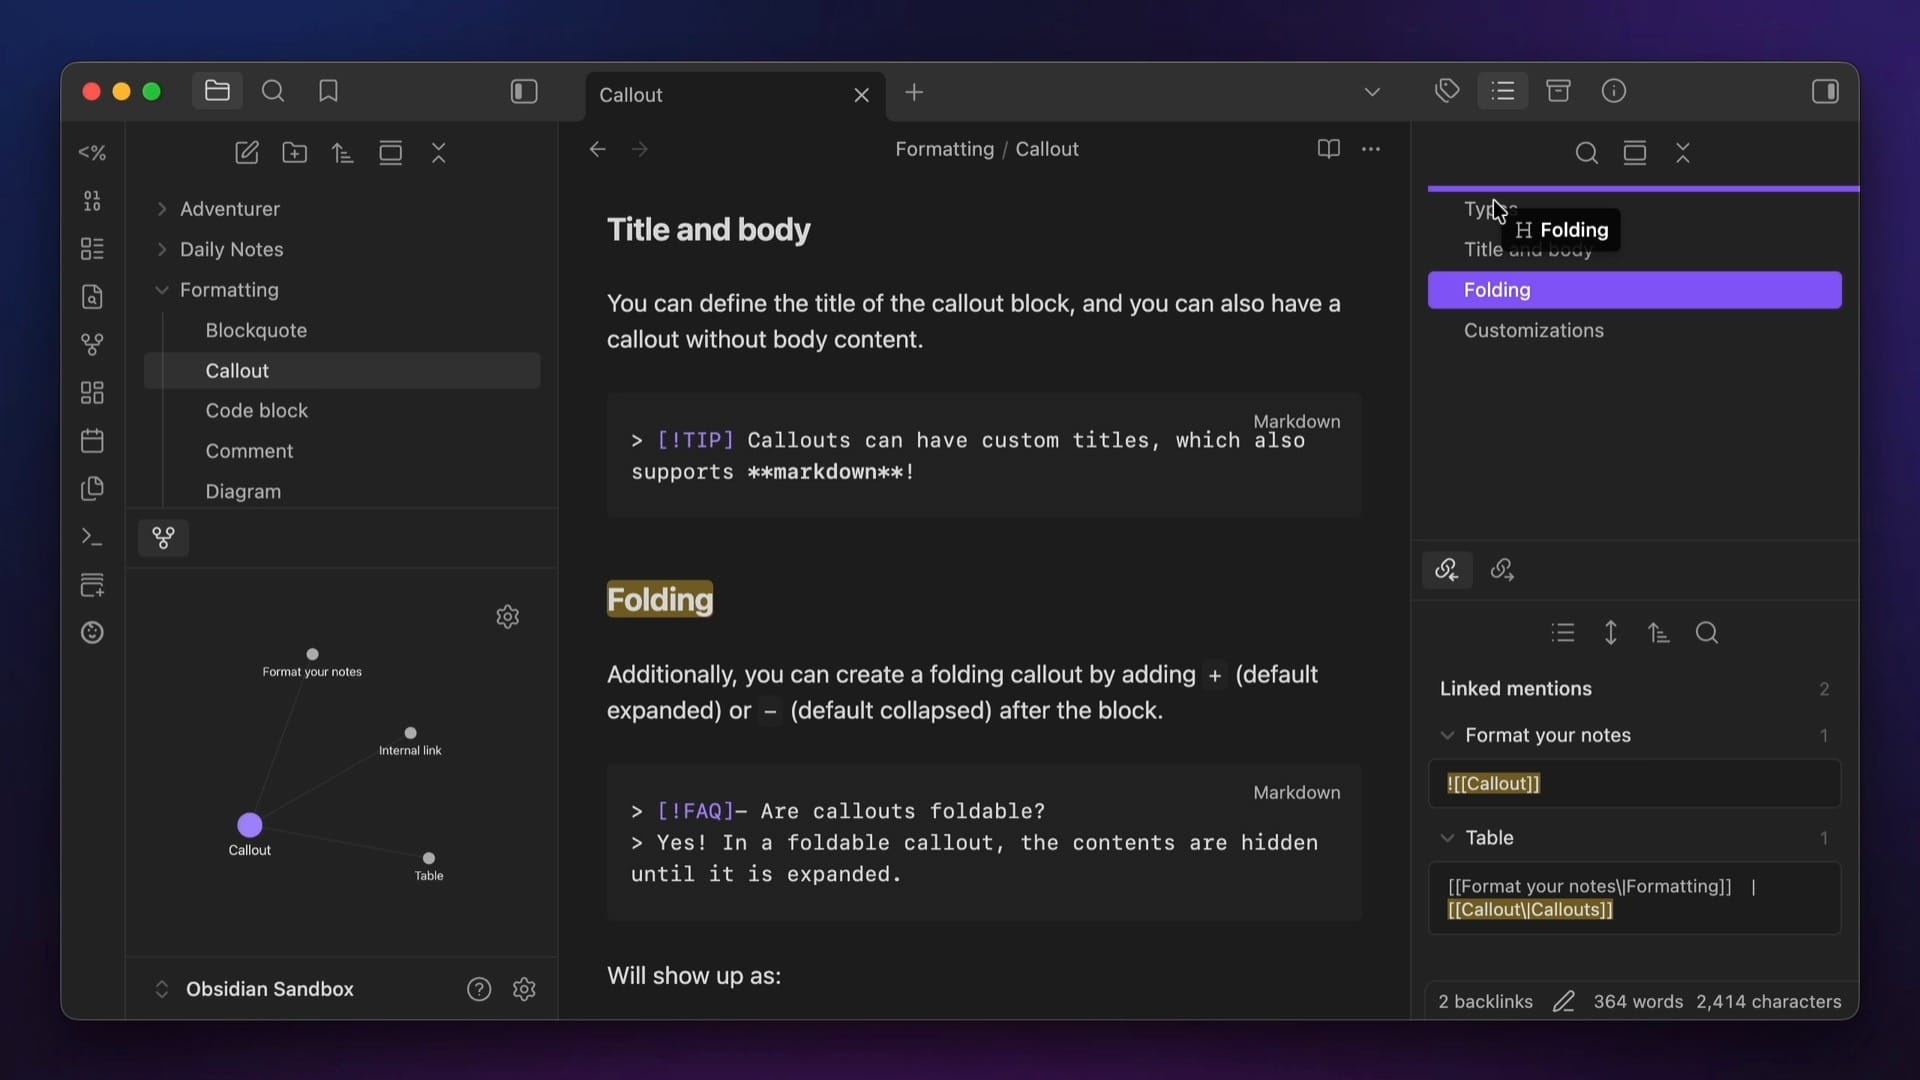
To do this, just click on the header you want to move in the Outline view and drag it into your desired location in the outline. When you let go of the mouse button, that entire heading and all the text below it will instantly be moved inside of your active note.
8: Set Up Custom Hotkeys
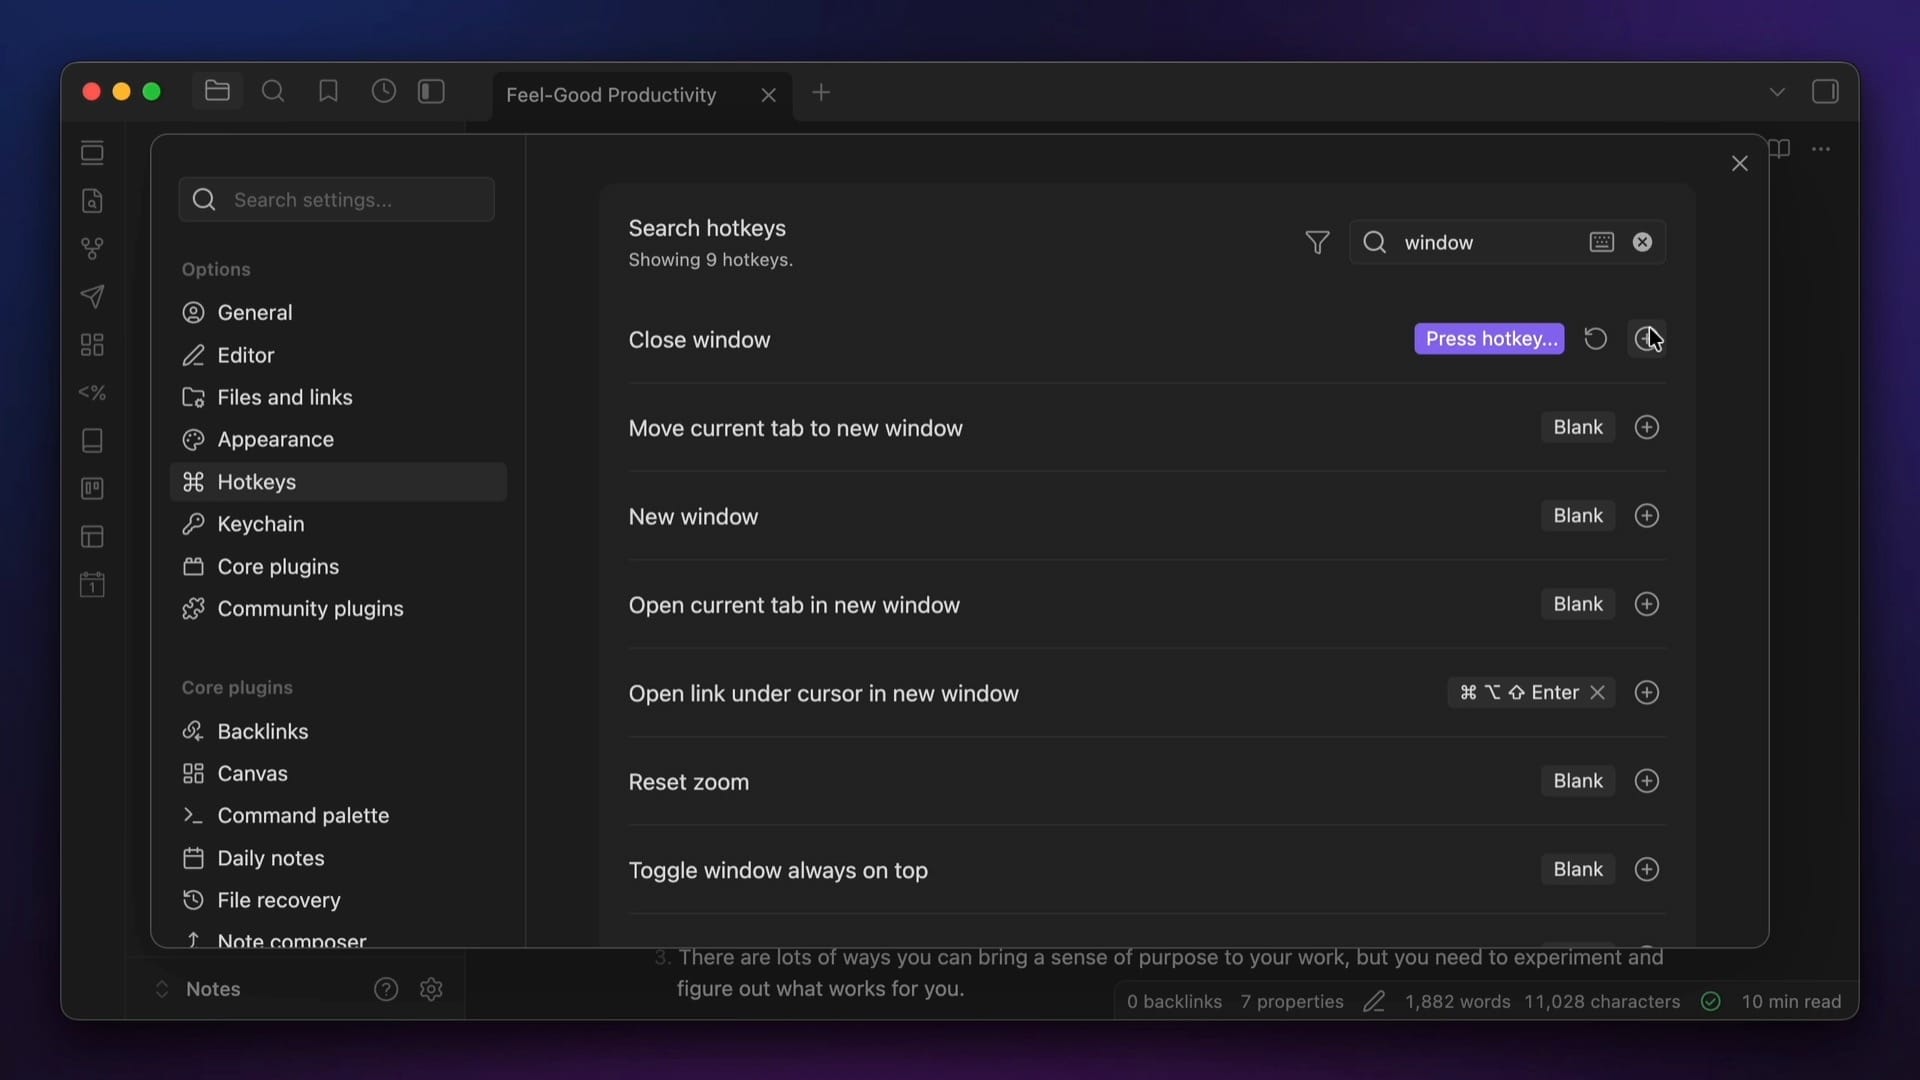
To set a custom hotkey, go to Settings → Hotkeys, then search for the command you want and click the + button to add the hotkey you want to use to trigger it. Type the hotkey, and it will be applied to that command.
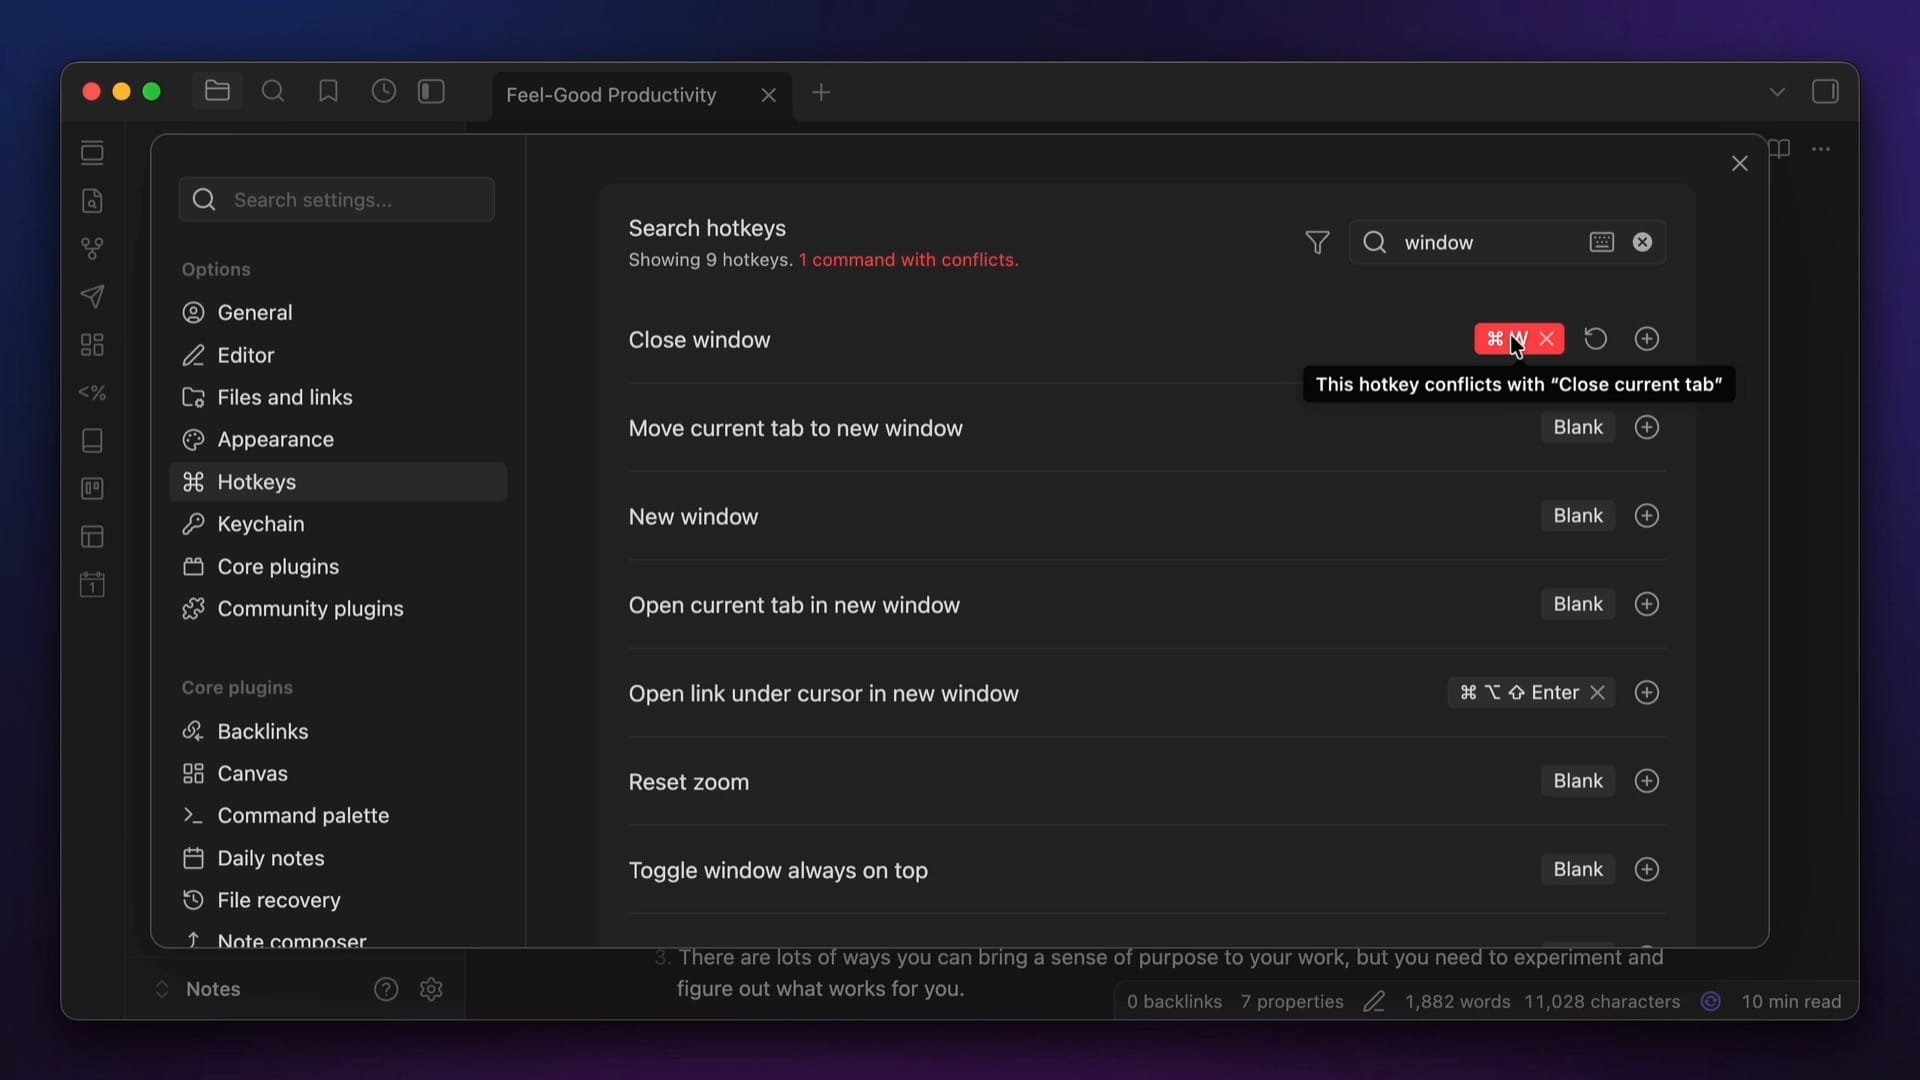
If there isn't a conflict with something else in Obsidian, it will be black. But if it does conflict, it will be red, and you can click on the red box to show which commands the hotkey conflicts with.
One of the ways I avoid conflicts is by remapping my Caps Lock key into a hyper key that simulates pressing the ⇧, ⌃, ⌥, and ⌘ keys all at once. Hitting all those keys physically requires some serious finger gymnastics on the keyboard, so it's pretty much guaranteed that no other hotkeys on my system will use all those modifiers at once. But using an app like Superkey (or the free lite version Hyperkey), I can reprogram my Caps Lock key to make hotkeys that use all these modifiers much easier to trigger.
For example, I have a bunch of QuickAdd commands that are mapped this way. I trigger my New Task macro ⇧-⌃-⌥-⌘-T to capture a new task to my Master Task List file, ⇧-⌃-⌥-⌘-J to capture a new journal entry to today's Daily Note, and ⇧-⌃-⌥-⌘-G to capture a gratitude entry. But thanks to Superkey, I can just hit ⇪-T, ⇪-J, or ⇪-G respectively.
9: Link to Your Obsidian Notes with URLs
You may not realize it, but every note in your Obsidian vault has a deeplink URL that you can use to navigate to that specific note from somewhere else on your system.
To get the URL for the current note, open the Command Palette and run the Copy Obsidian URL for Current File command.
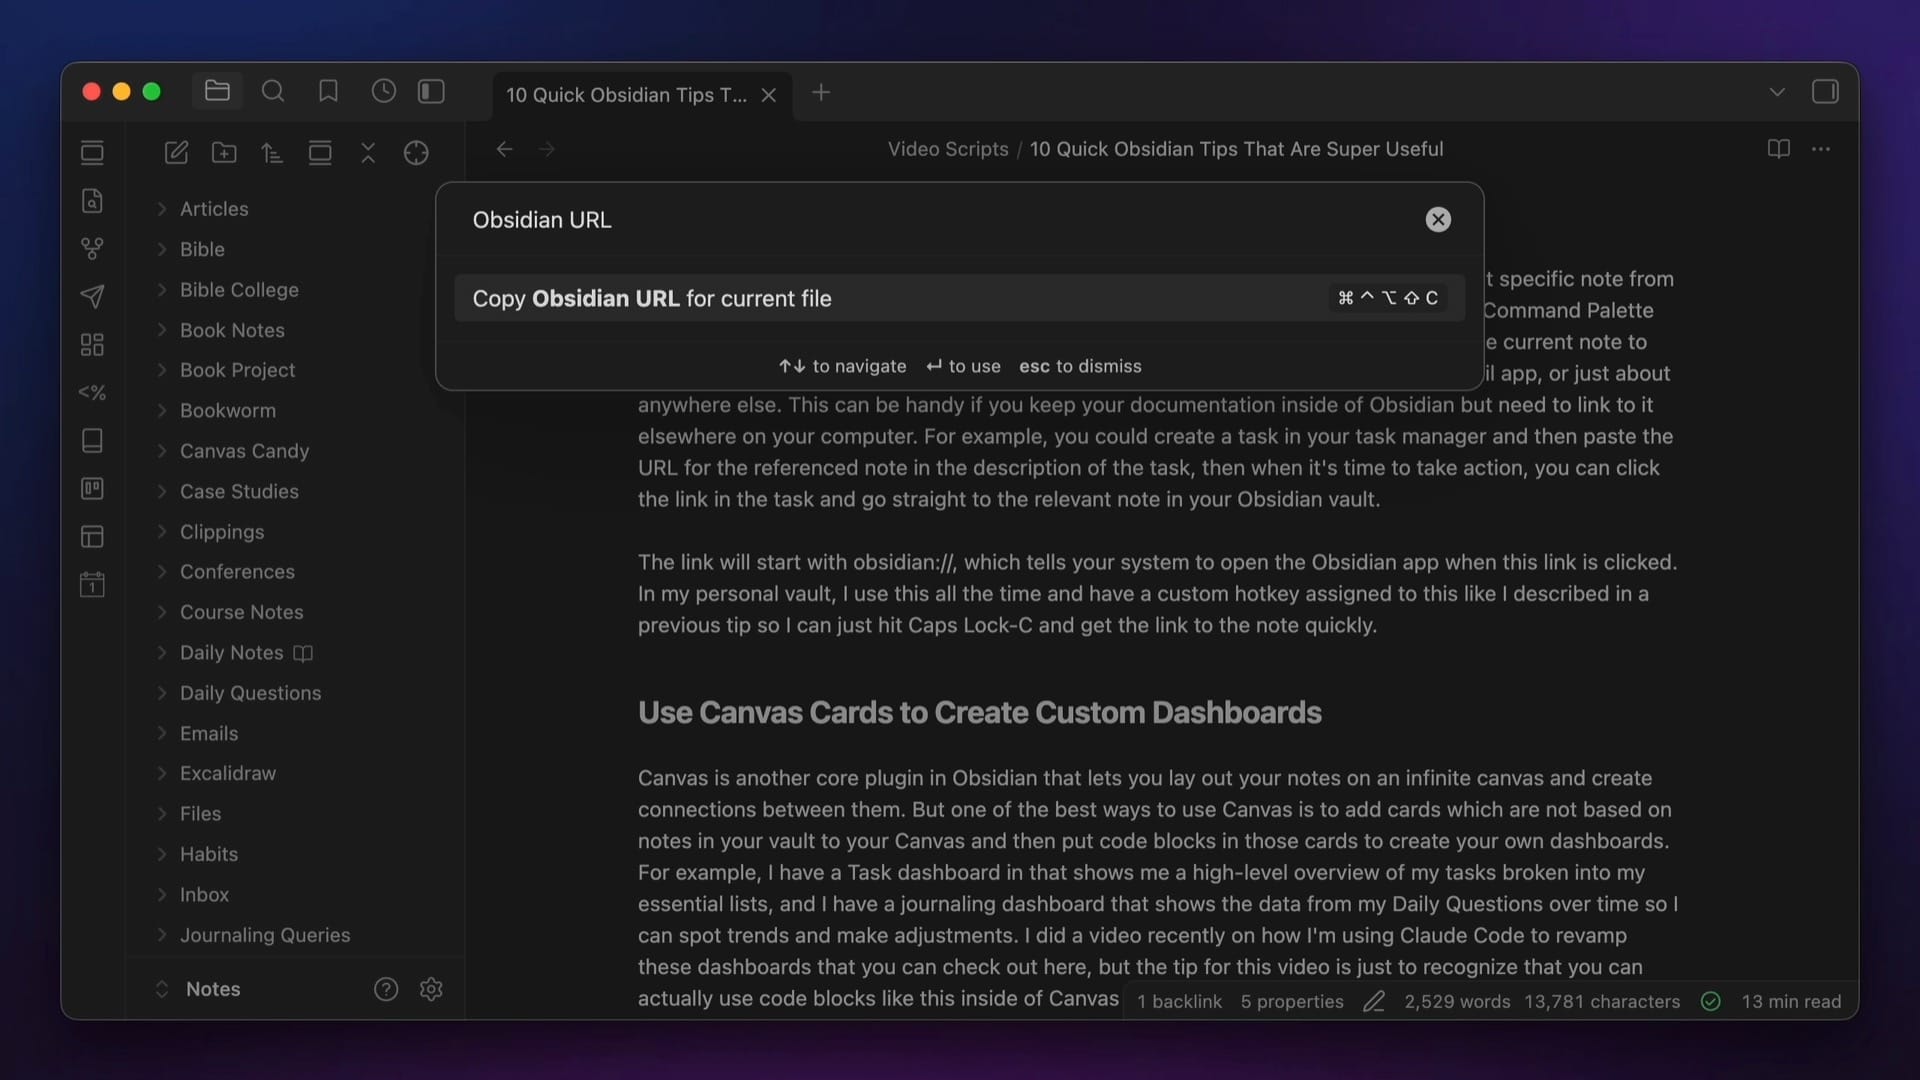
This will copy a link for the current note to the clipboard, and you can then paste it anywhere you want, like a calendar app, task manager, email app, or just about anywhere else on your system.
The link will start with obsidian://, which tells your system to open the Obsidian app when this link is clicked. For example, you could create a task in your task manager and then paste the URL for the referenced note in the description of the task:
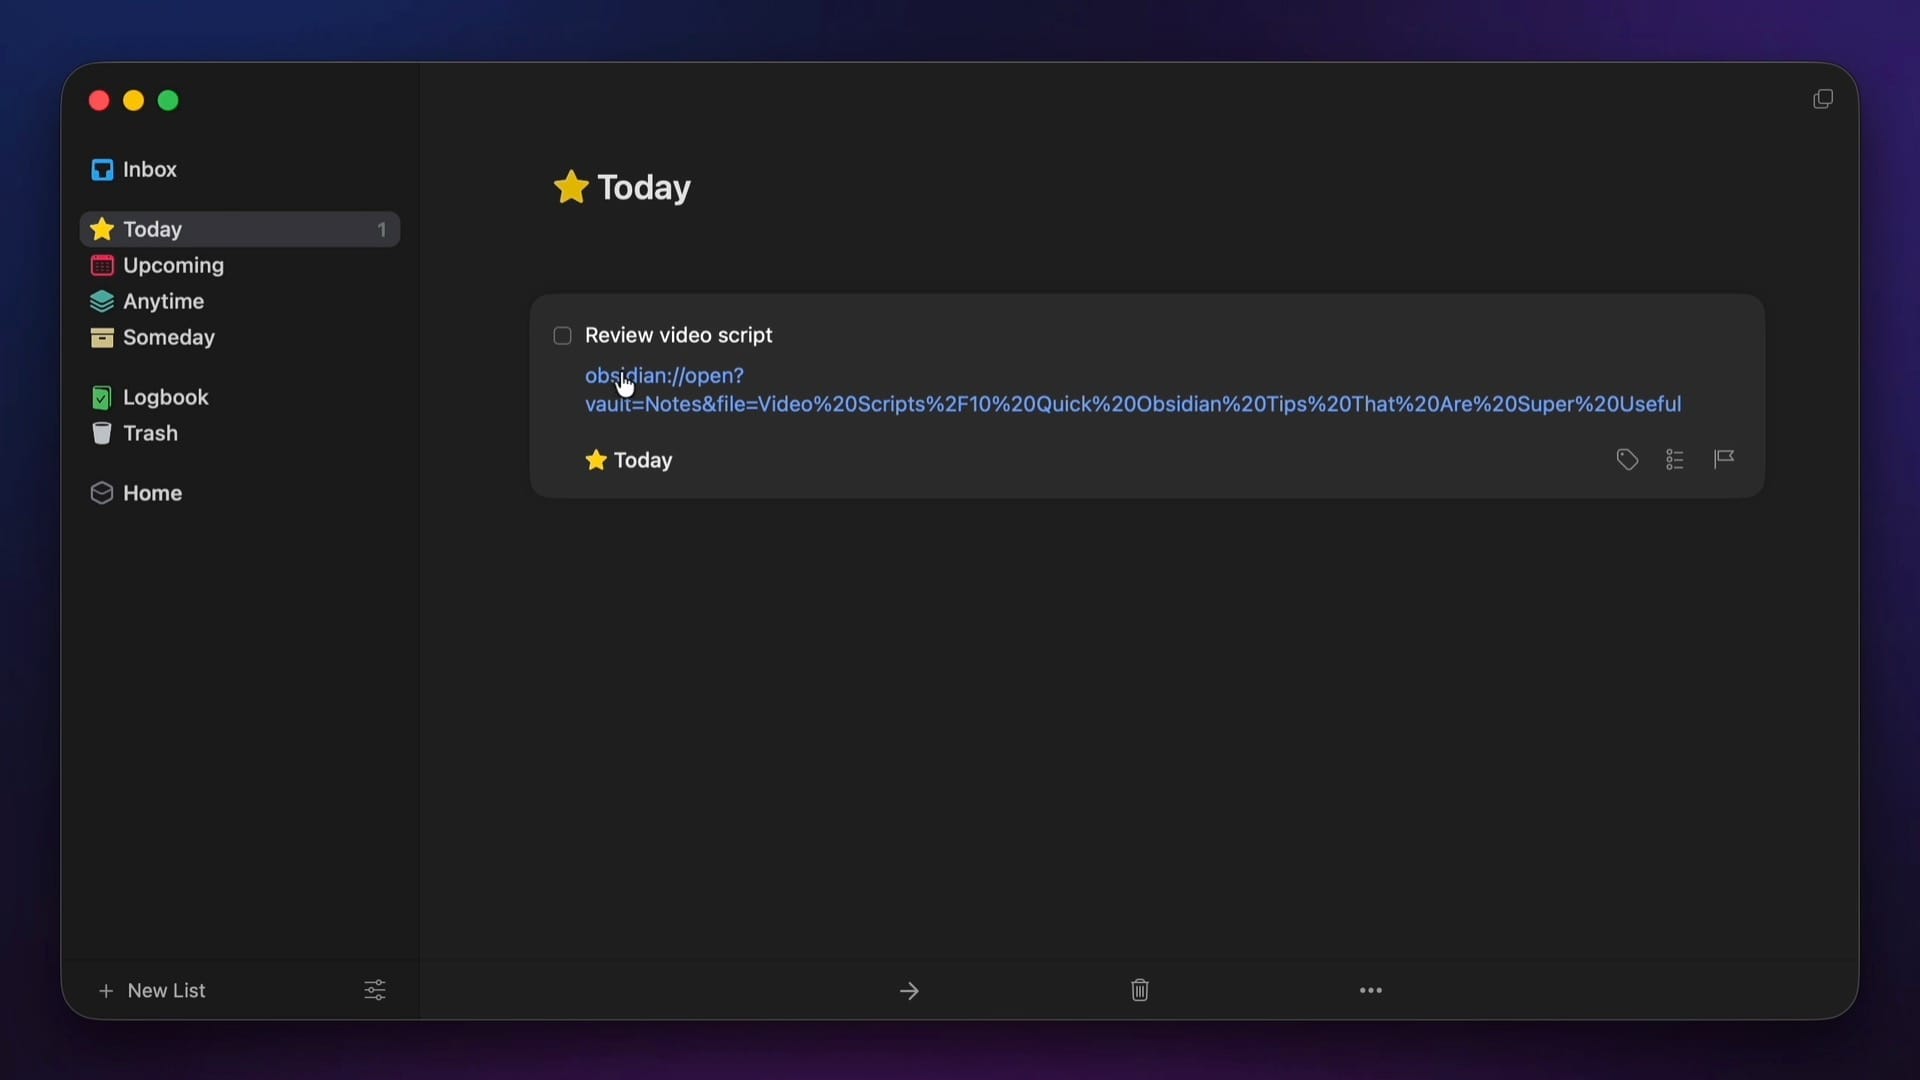
Then, when it's time to take action, you can click the link in the task and go straight to the relevant note in your Obsidian vault.
In my personal vault, I use this all the time and even have a custom hotkey assigned to this (like I described in a previous tip) so I can just hit ⇪-C and get the link to the note quickly.
10: Use Canvas Cards to Create Dashboards
Canvas is a Core plugin in Obsidian that lets you lay out your notes on an infinite canvas and create connections between them.
But one of the best ways to use Canvas is to add cards that are not based on notes in your vault, but instead use code blocks inside those cards to create your own custom dashboards. For example, I have a journaling dashboard that shows the data from my Daily Questions over time so I can spot trends and make adjustments.
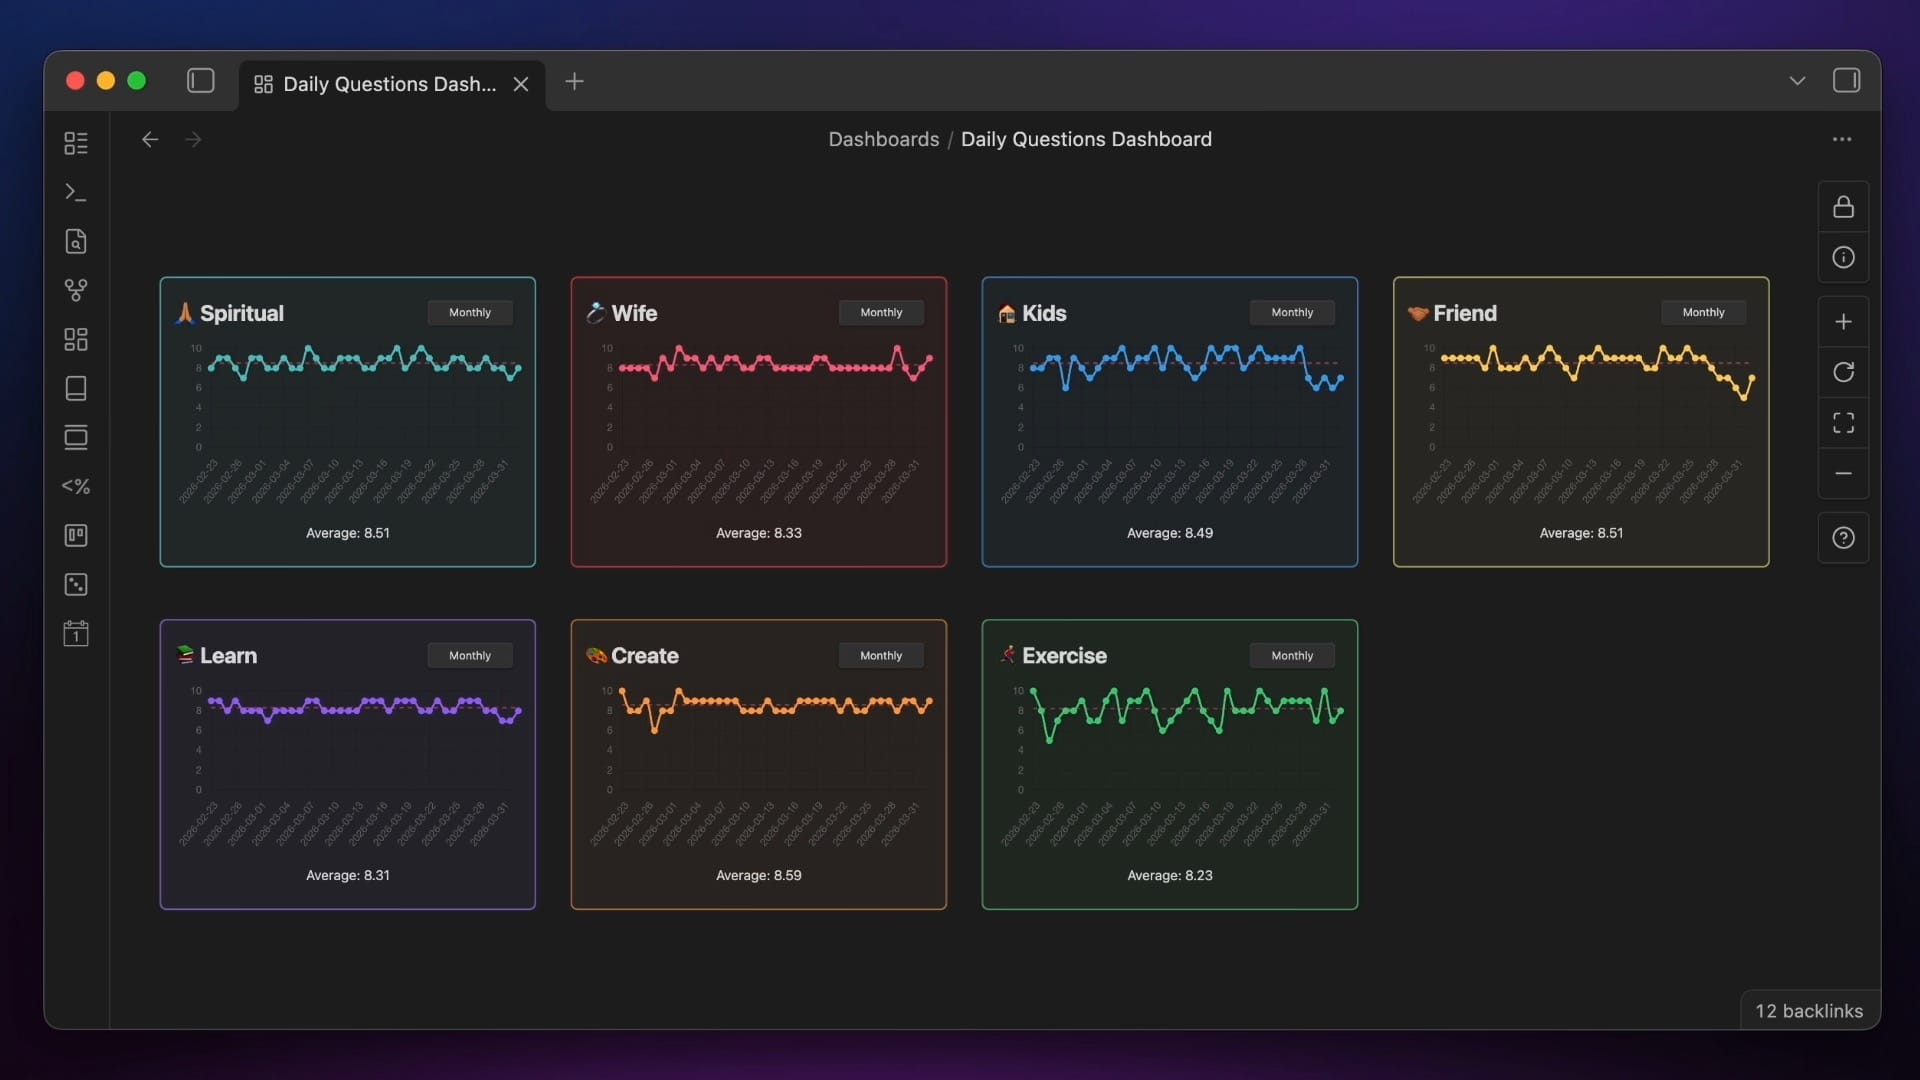
I posted recently how I'm using Claude Code to revamp these dashboards, but the tip for this post is just to recognize that you can actually use code blocks like this inside of Canvas cards, even if they aren't tied to a specific note inside your vault.
Conclusion
So there you have it, 10 quick, useful tips to help eliminate friction in your Obsidian workflows. And if you really want to level up your Obsidian game, check out LifeHQ. It has a bunch of custom dashboards, and all my productivity and creativity workflows are pre-built for you (all the settings are pre-configured, and all the plugins are pre-installed). Each one is thoroughly documented, so you can copy it easily into your own vault and tweak it to your liking. There are over 60,000 words of documentation, and I walk through how everything is set up so you can customize how you'd like.
🚀 Want to give your vault an instant upgrade?
Shortcut the Obsidian learning curve and download LifeHQ now. Includes battle-tested Obsidian workflows to boost your productivity & creativity.


